
Double-Banded Face Masks

The Double Band
A double-band is the most secure way to keep a face mask on. It is particularly good for children! It keeps the mask on securely and once in place does not require adjustments — which is safer for everyone!
There are two ways to create a double-band: using an elastic headband or creating your own using elastic. The results are the same, but the method differs. I’ve included instructions for each method.
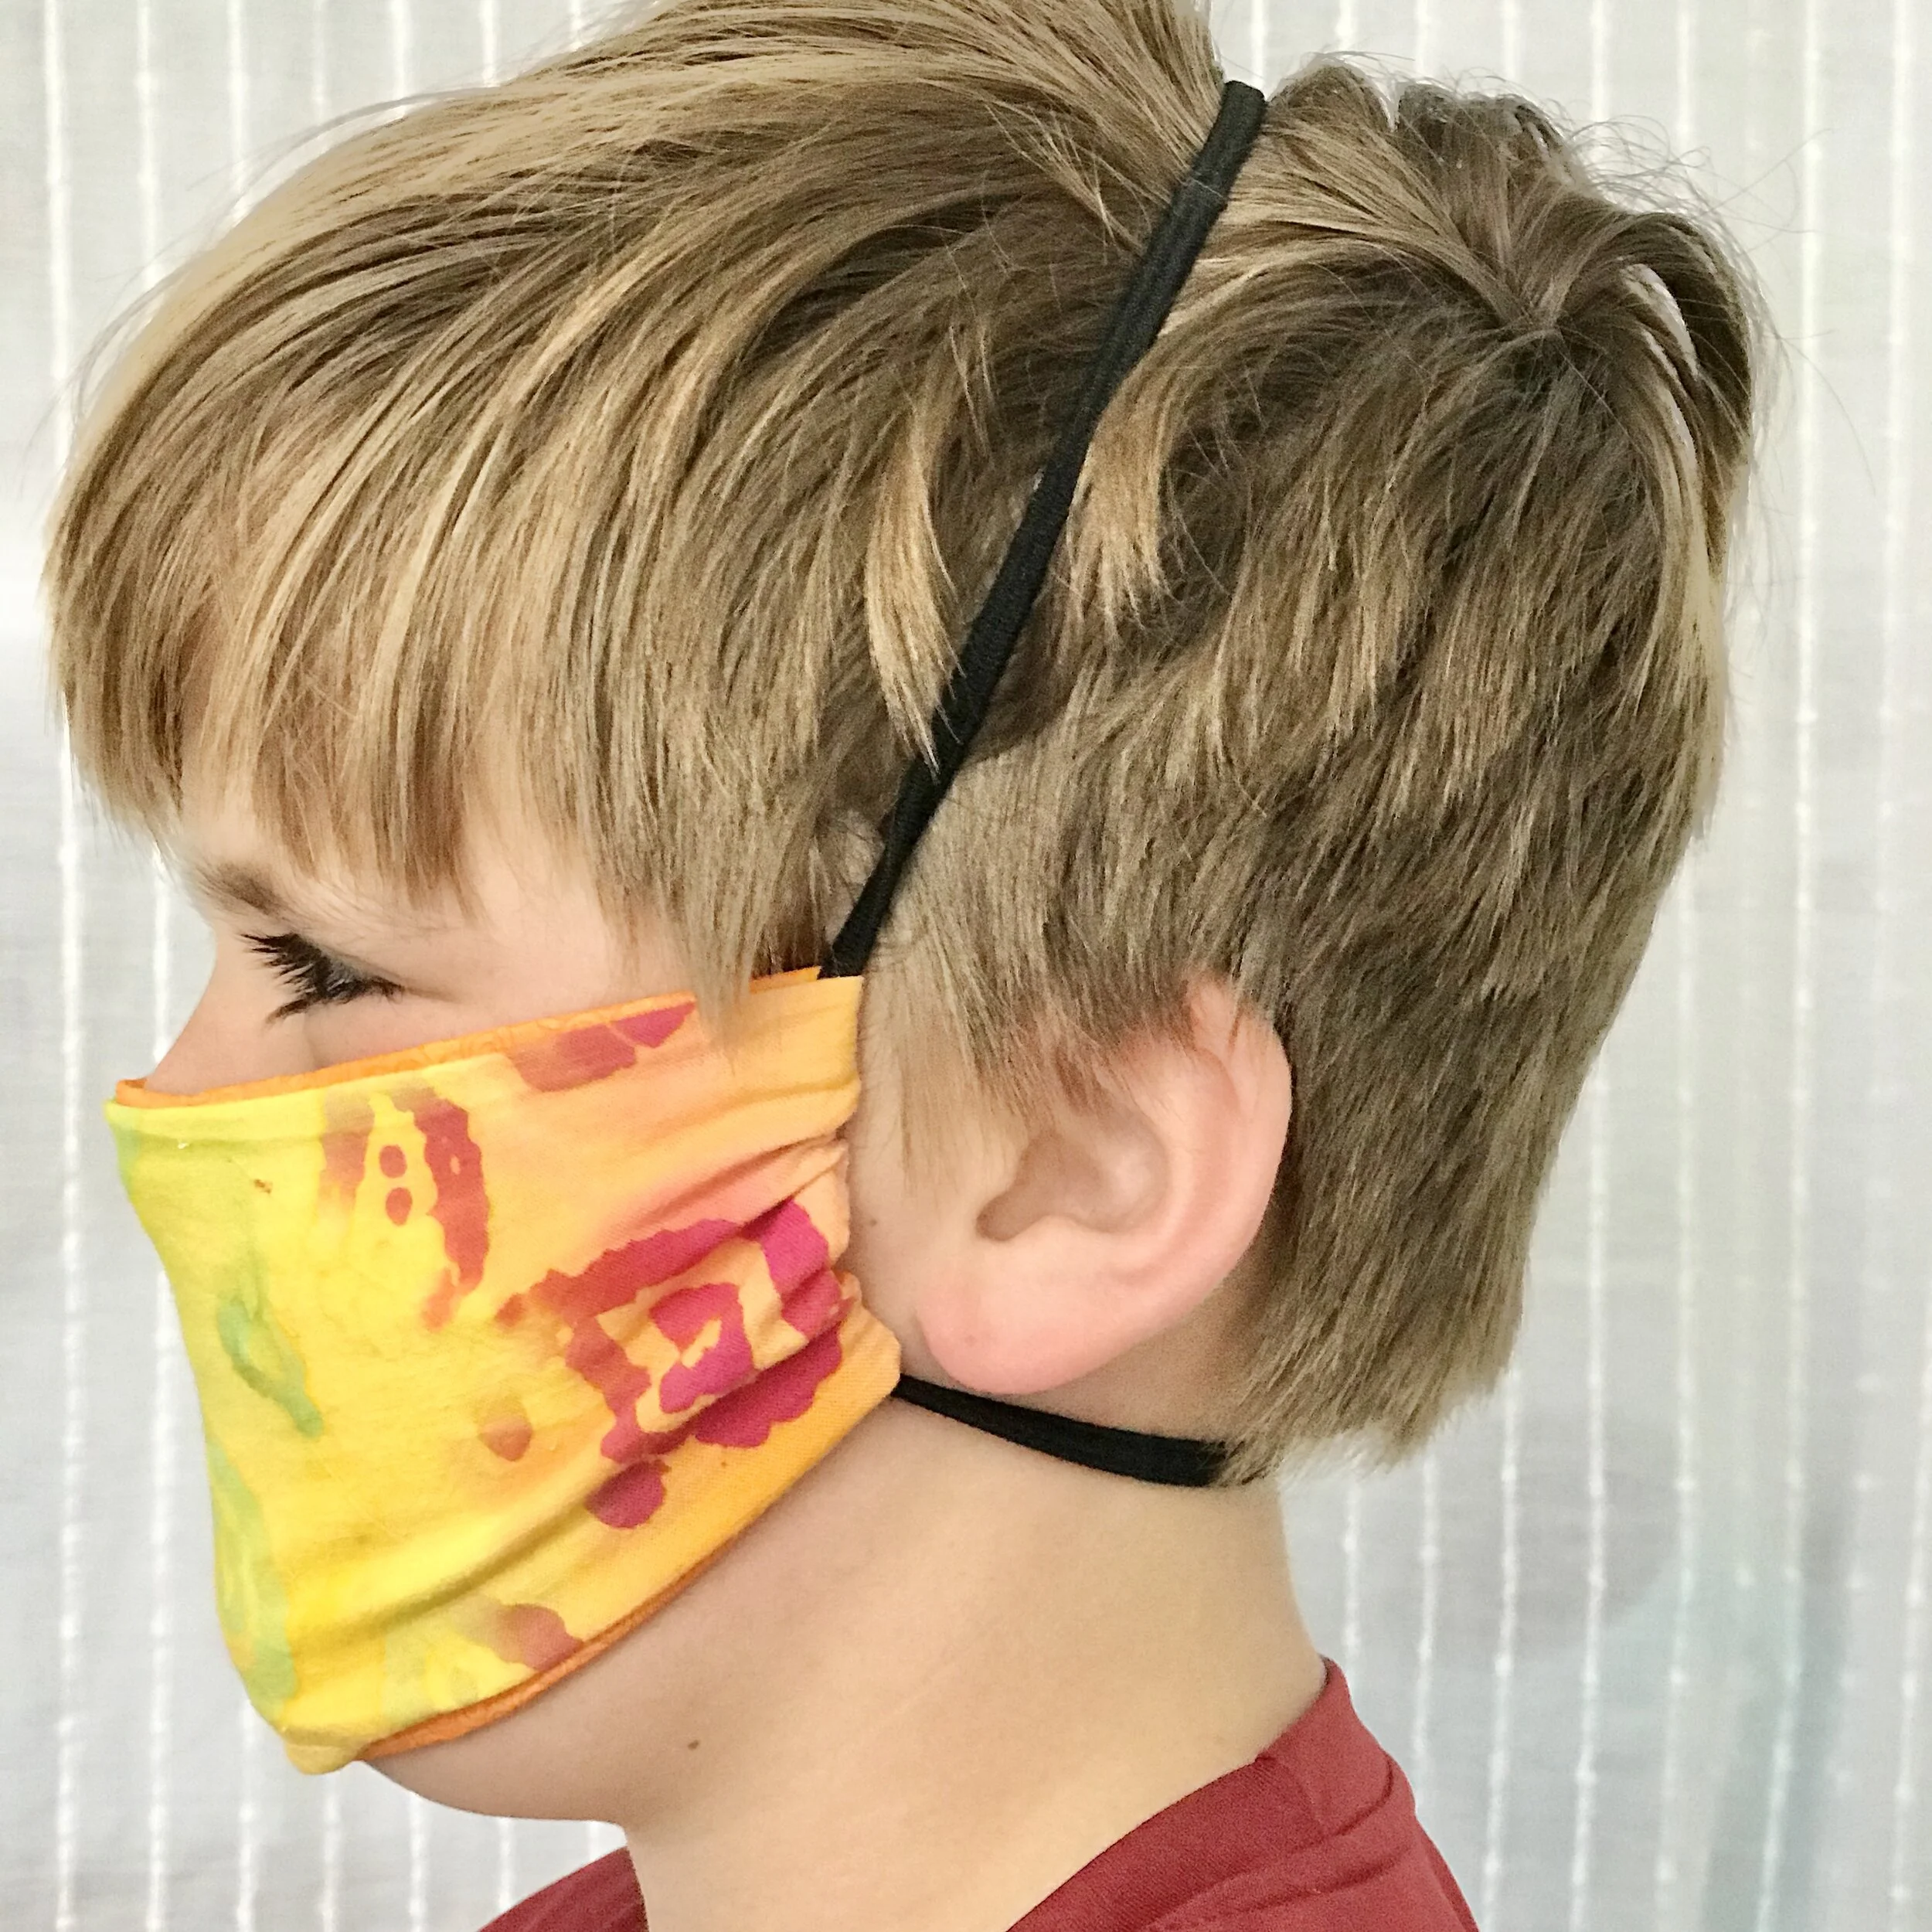
I used elastic in a variety of thicknesses to achieve this. It is the most secure for children, and is easily adjustable. One strap goes over the top of the head and the other behind the neck. I would use the widest elastic you can find (up to 1”) for smaller children.
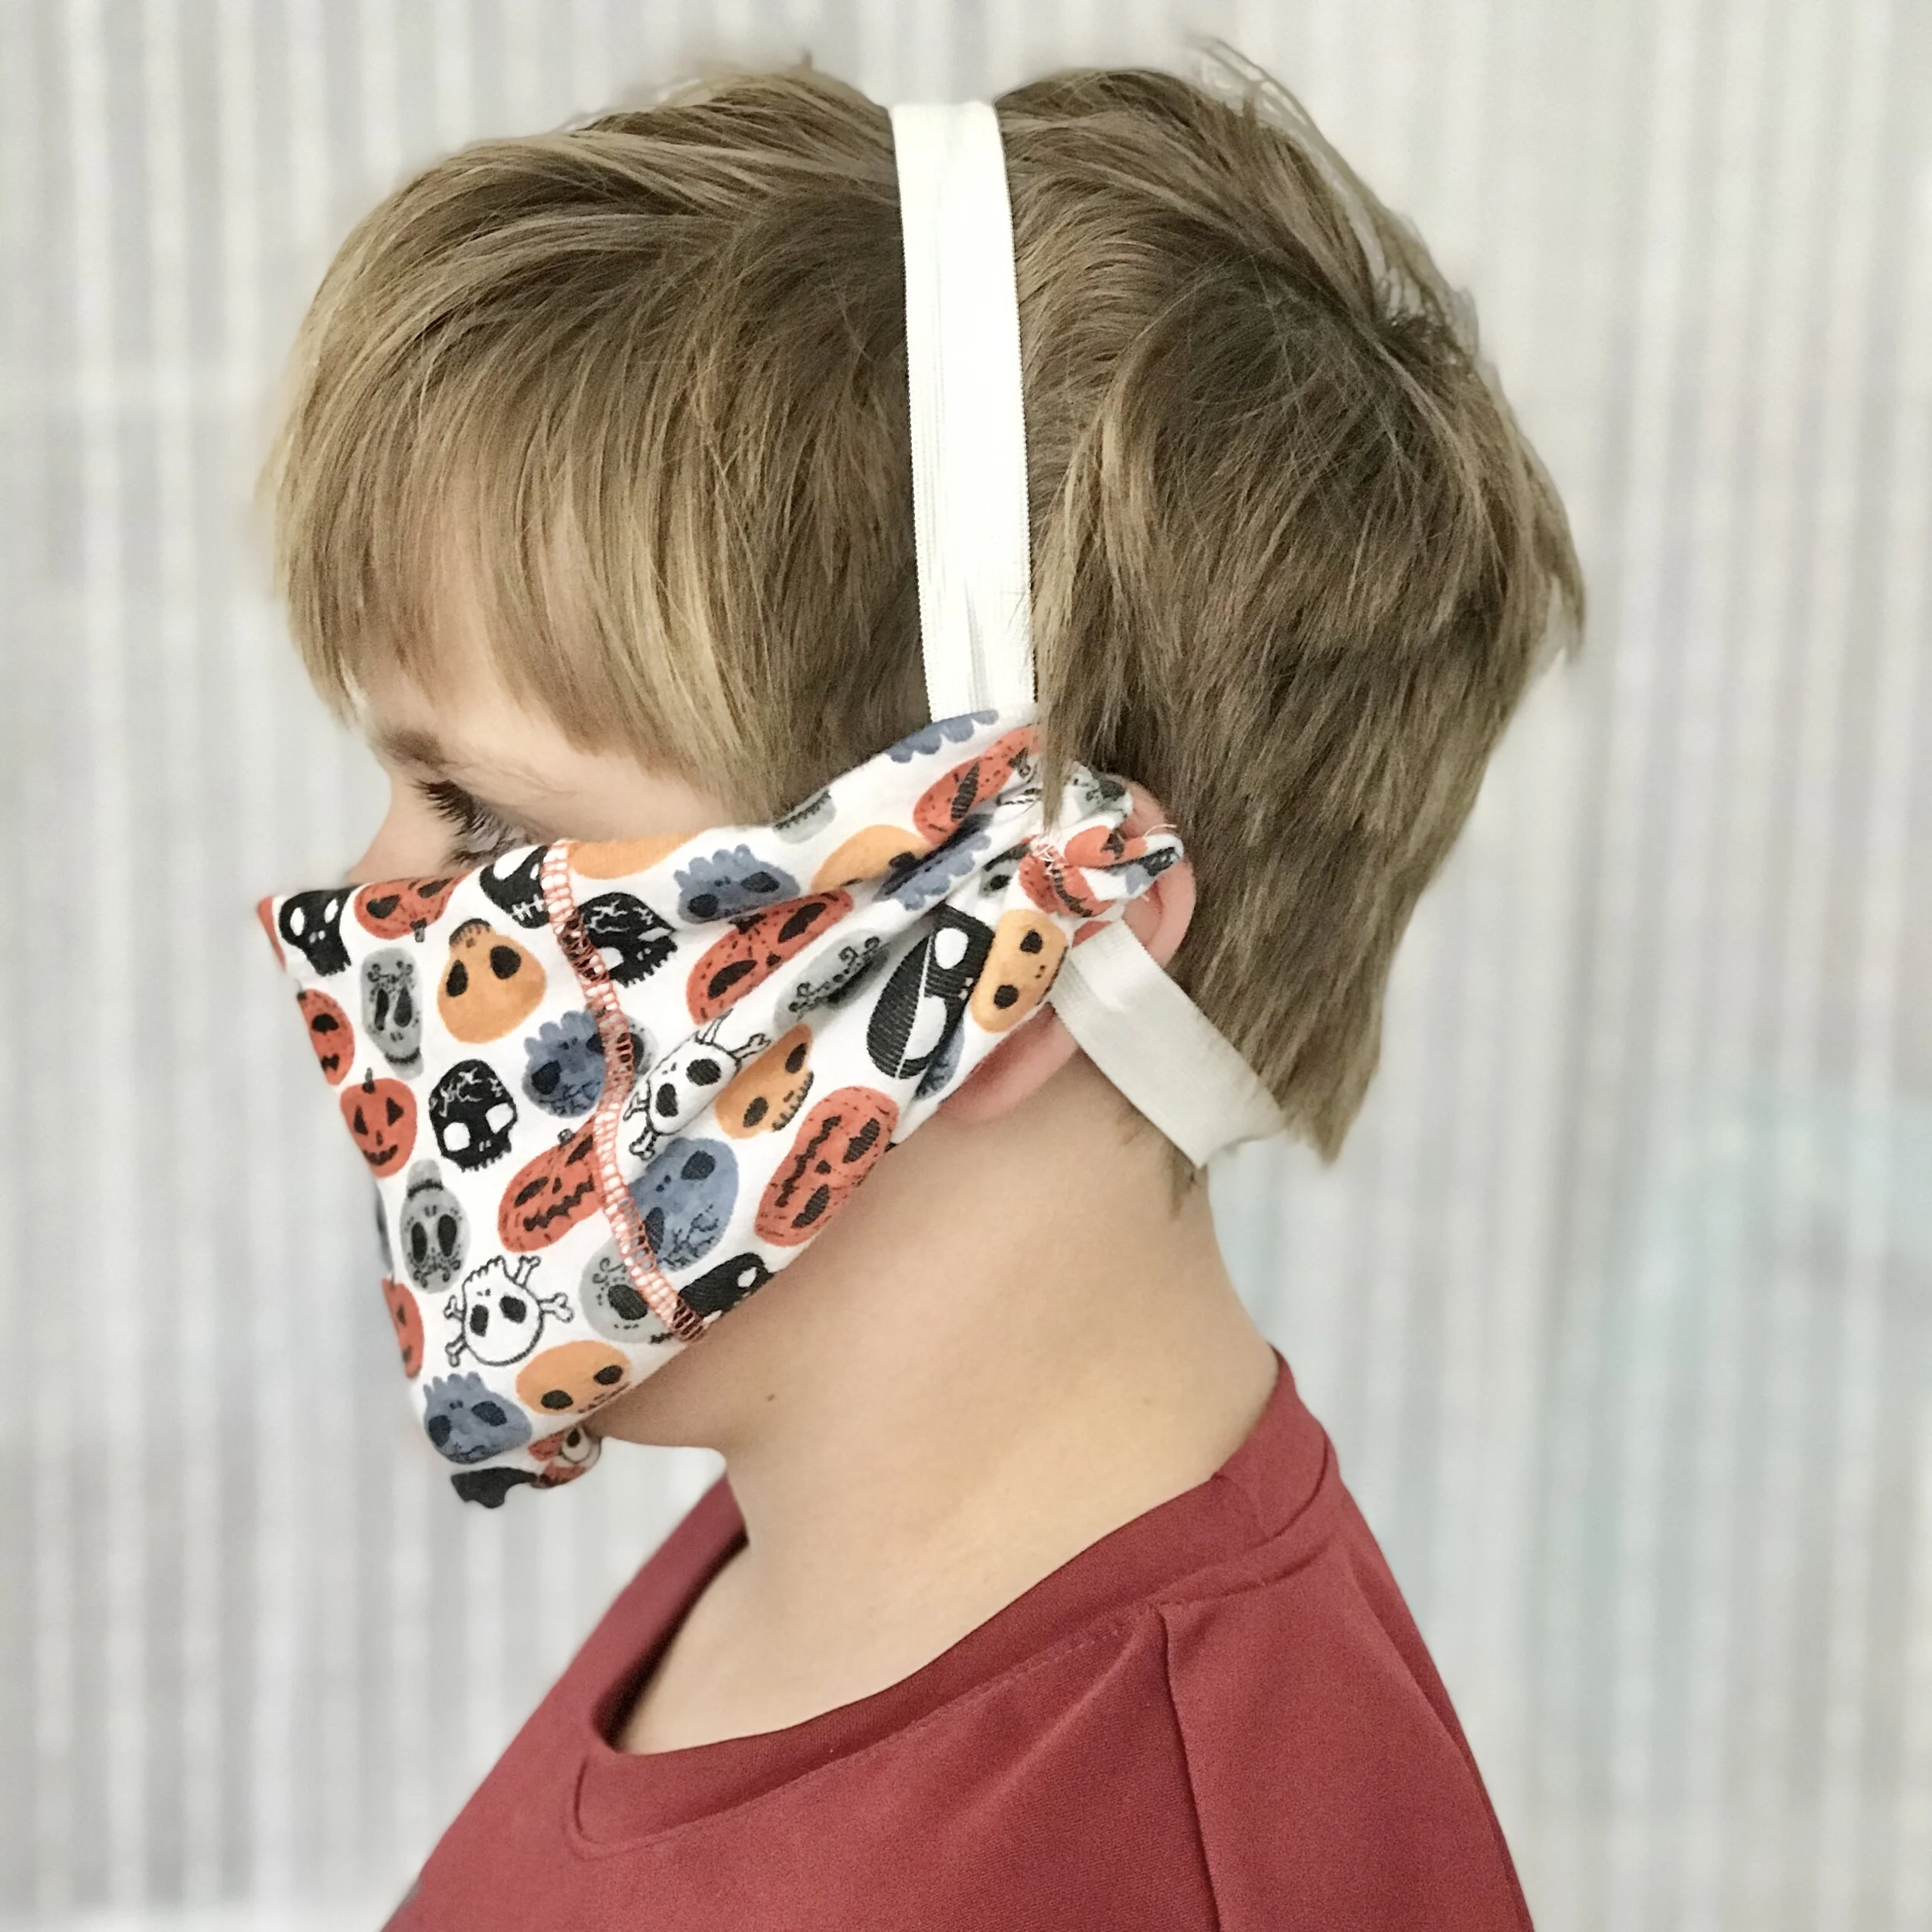
NOTE: Some of these masks are for adults or smaller children. These photos show proper use of the elastics ONLY. Not proper fit of masks.

1/4” elastic loop in the Double Band configuration
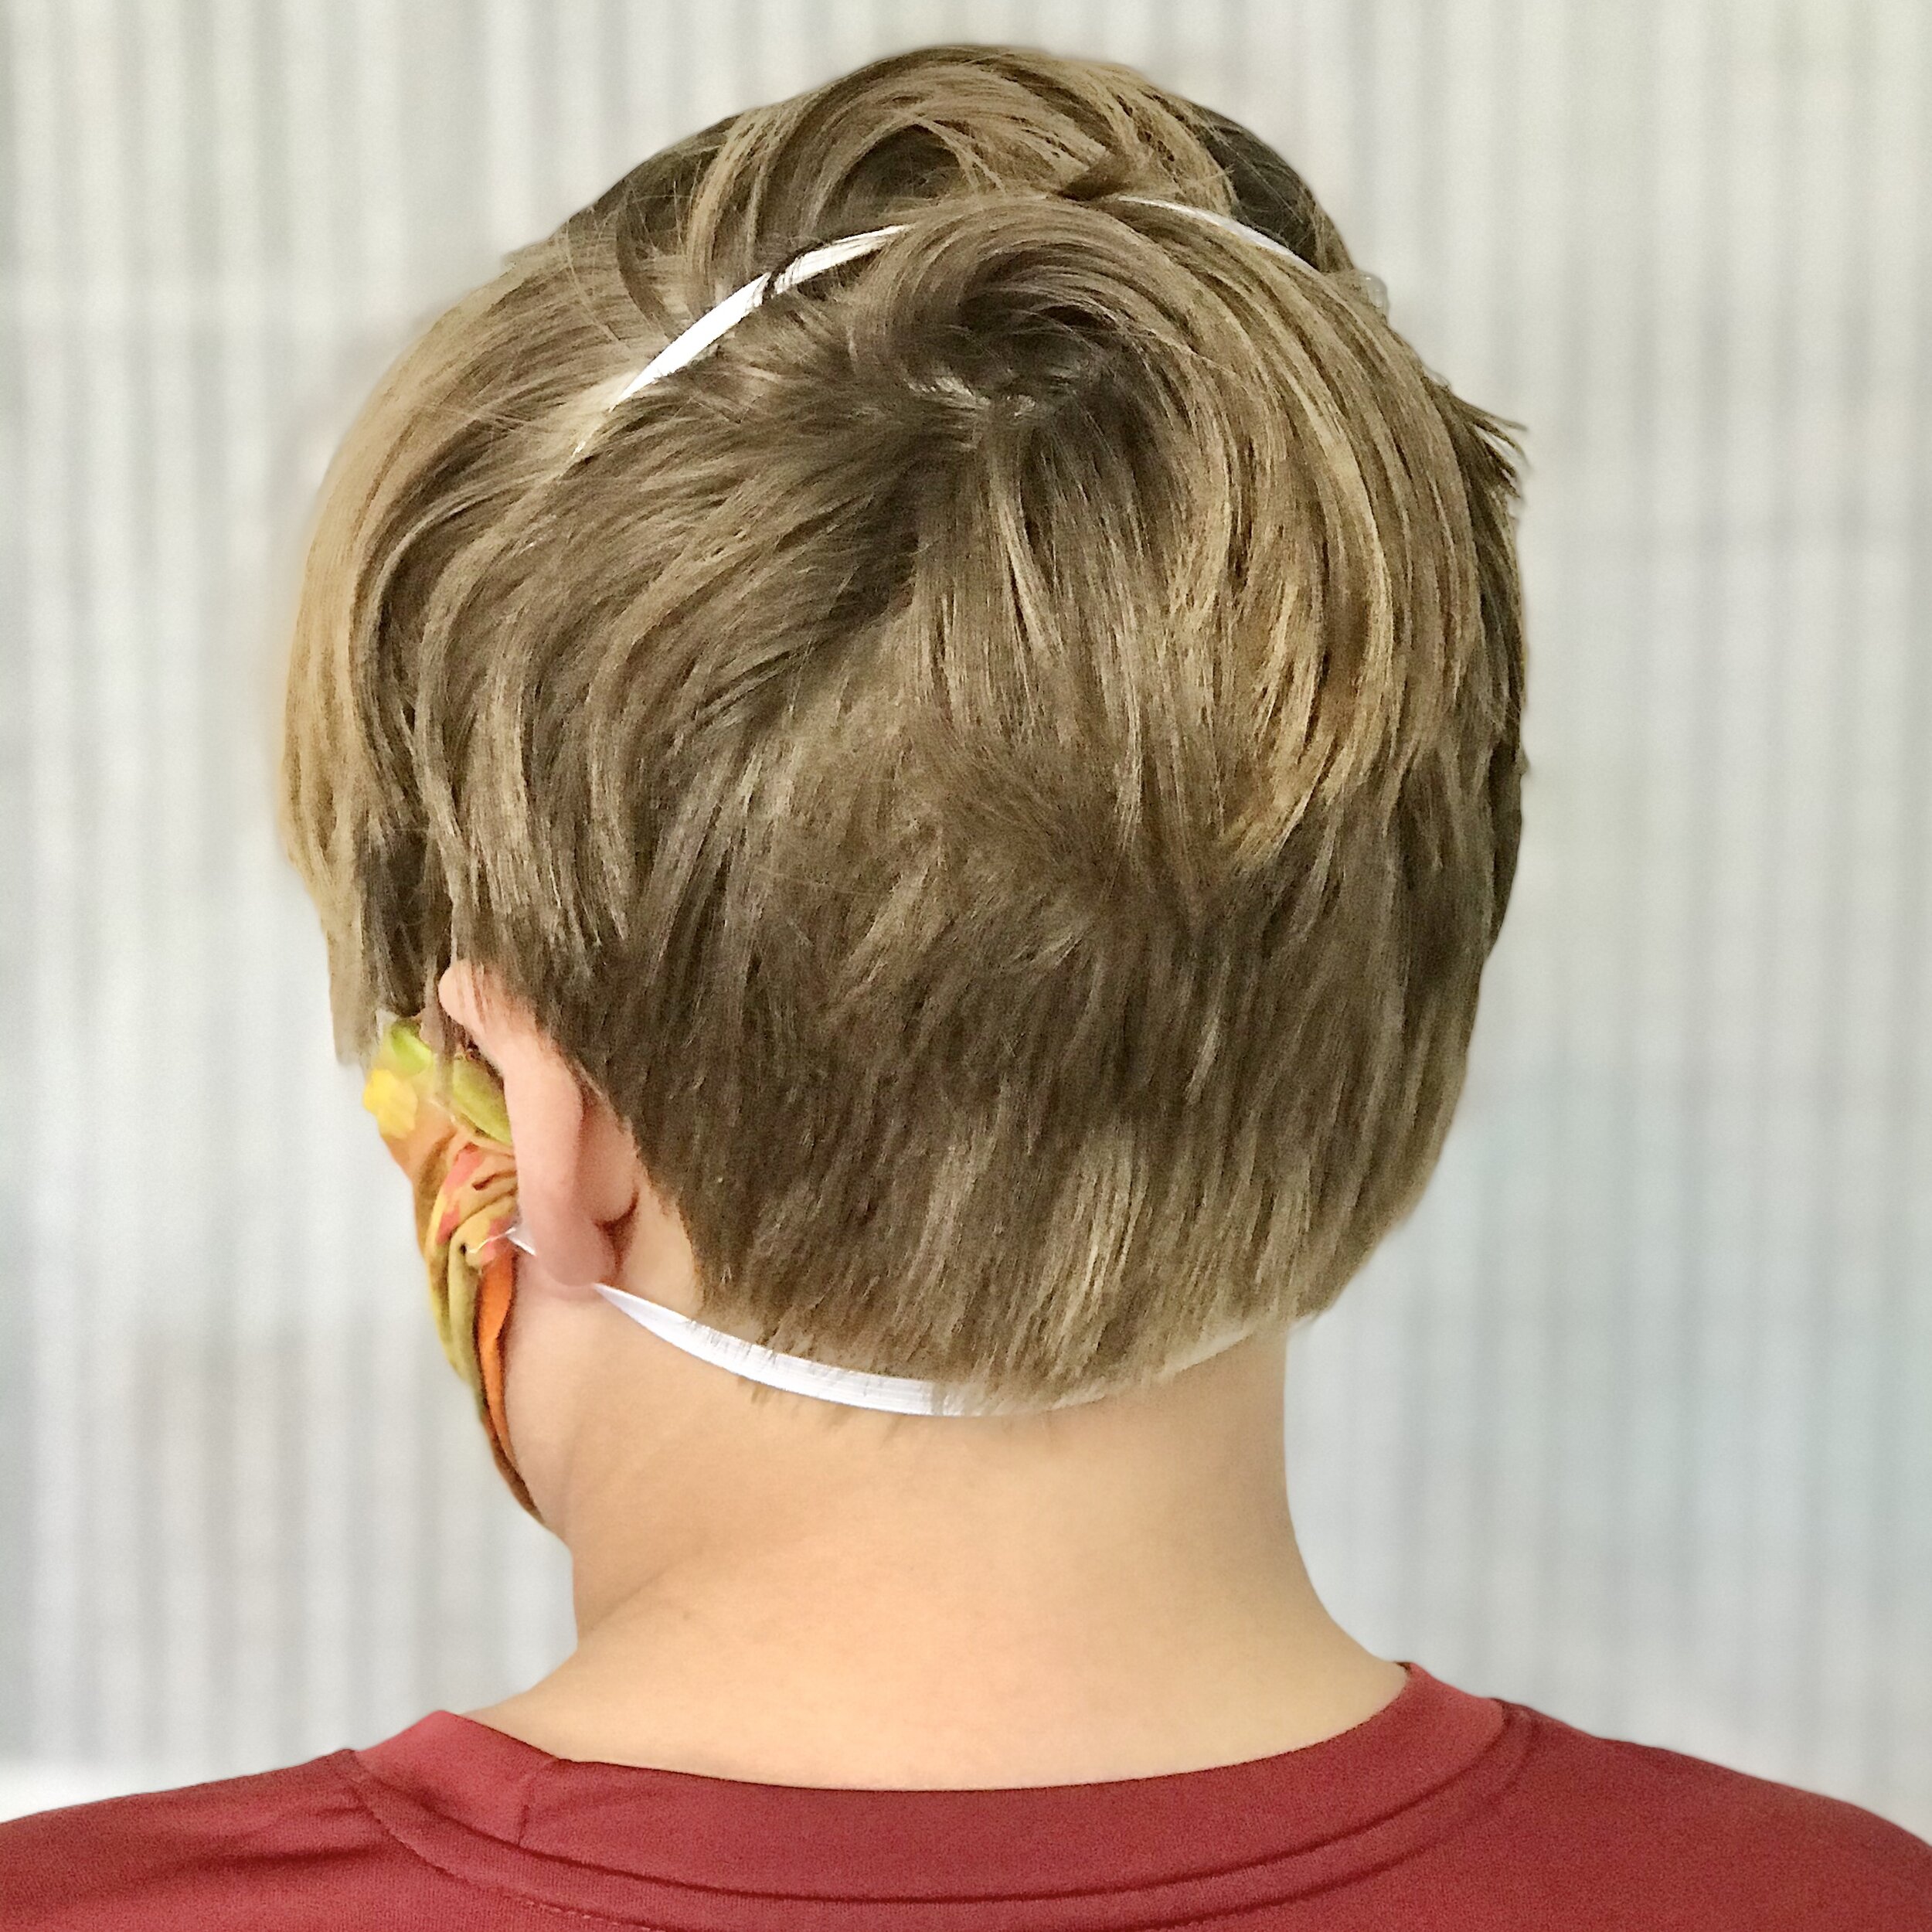
Placement of the Double Band straps.
A Double Band created with one Goody Ouchless Headwrap
1” elastic in the Double Band configuration.
The Basic Face Mask
The face masks I ended up being happiest with are based on the instructions from Vanderbilt University Medical Center. I chose this design for several reasons. It is simple to make. I could use items I already owned. It is adaptable for different face sizes and shapes. And my local hospitals will accept donations of this kind of mask as well. I made several small adjustments to the design, however, to accommodate the different materials I have on hand to use and to create a filter pocket.
Additionally, I felt the measurements they provide are a little on the small size, so I made our masks slightly bigger for better face coverage. Maybe we just have big faces! Once you have the basics down, however, you can adjust yours for your own family. Just be sure the mask fits securely over the nose and extends past your chin. You also don’t want gaping on the sides of the mask.
Here are the basics: you are making a rectangular mask with two layers of fabric and an interior pocket for a filter. It an be fastened to the head in a variety of ways.
For fabric recommendations, elastic ideas, and measurements, start at this link and then come back here for the full tutorial:


Making Your Face Mask
Step 1: Cut the Fabric
Cut a rectangle of each fabric — two total per mask.
Adult: 7.5” x 10.5”
Child: 6.5” x 8.5”
Adjust according to your family’s face size. If you are making masks to donate, make adult masks.
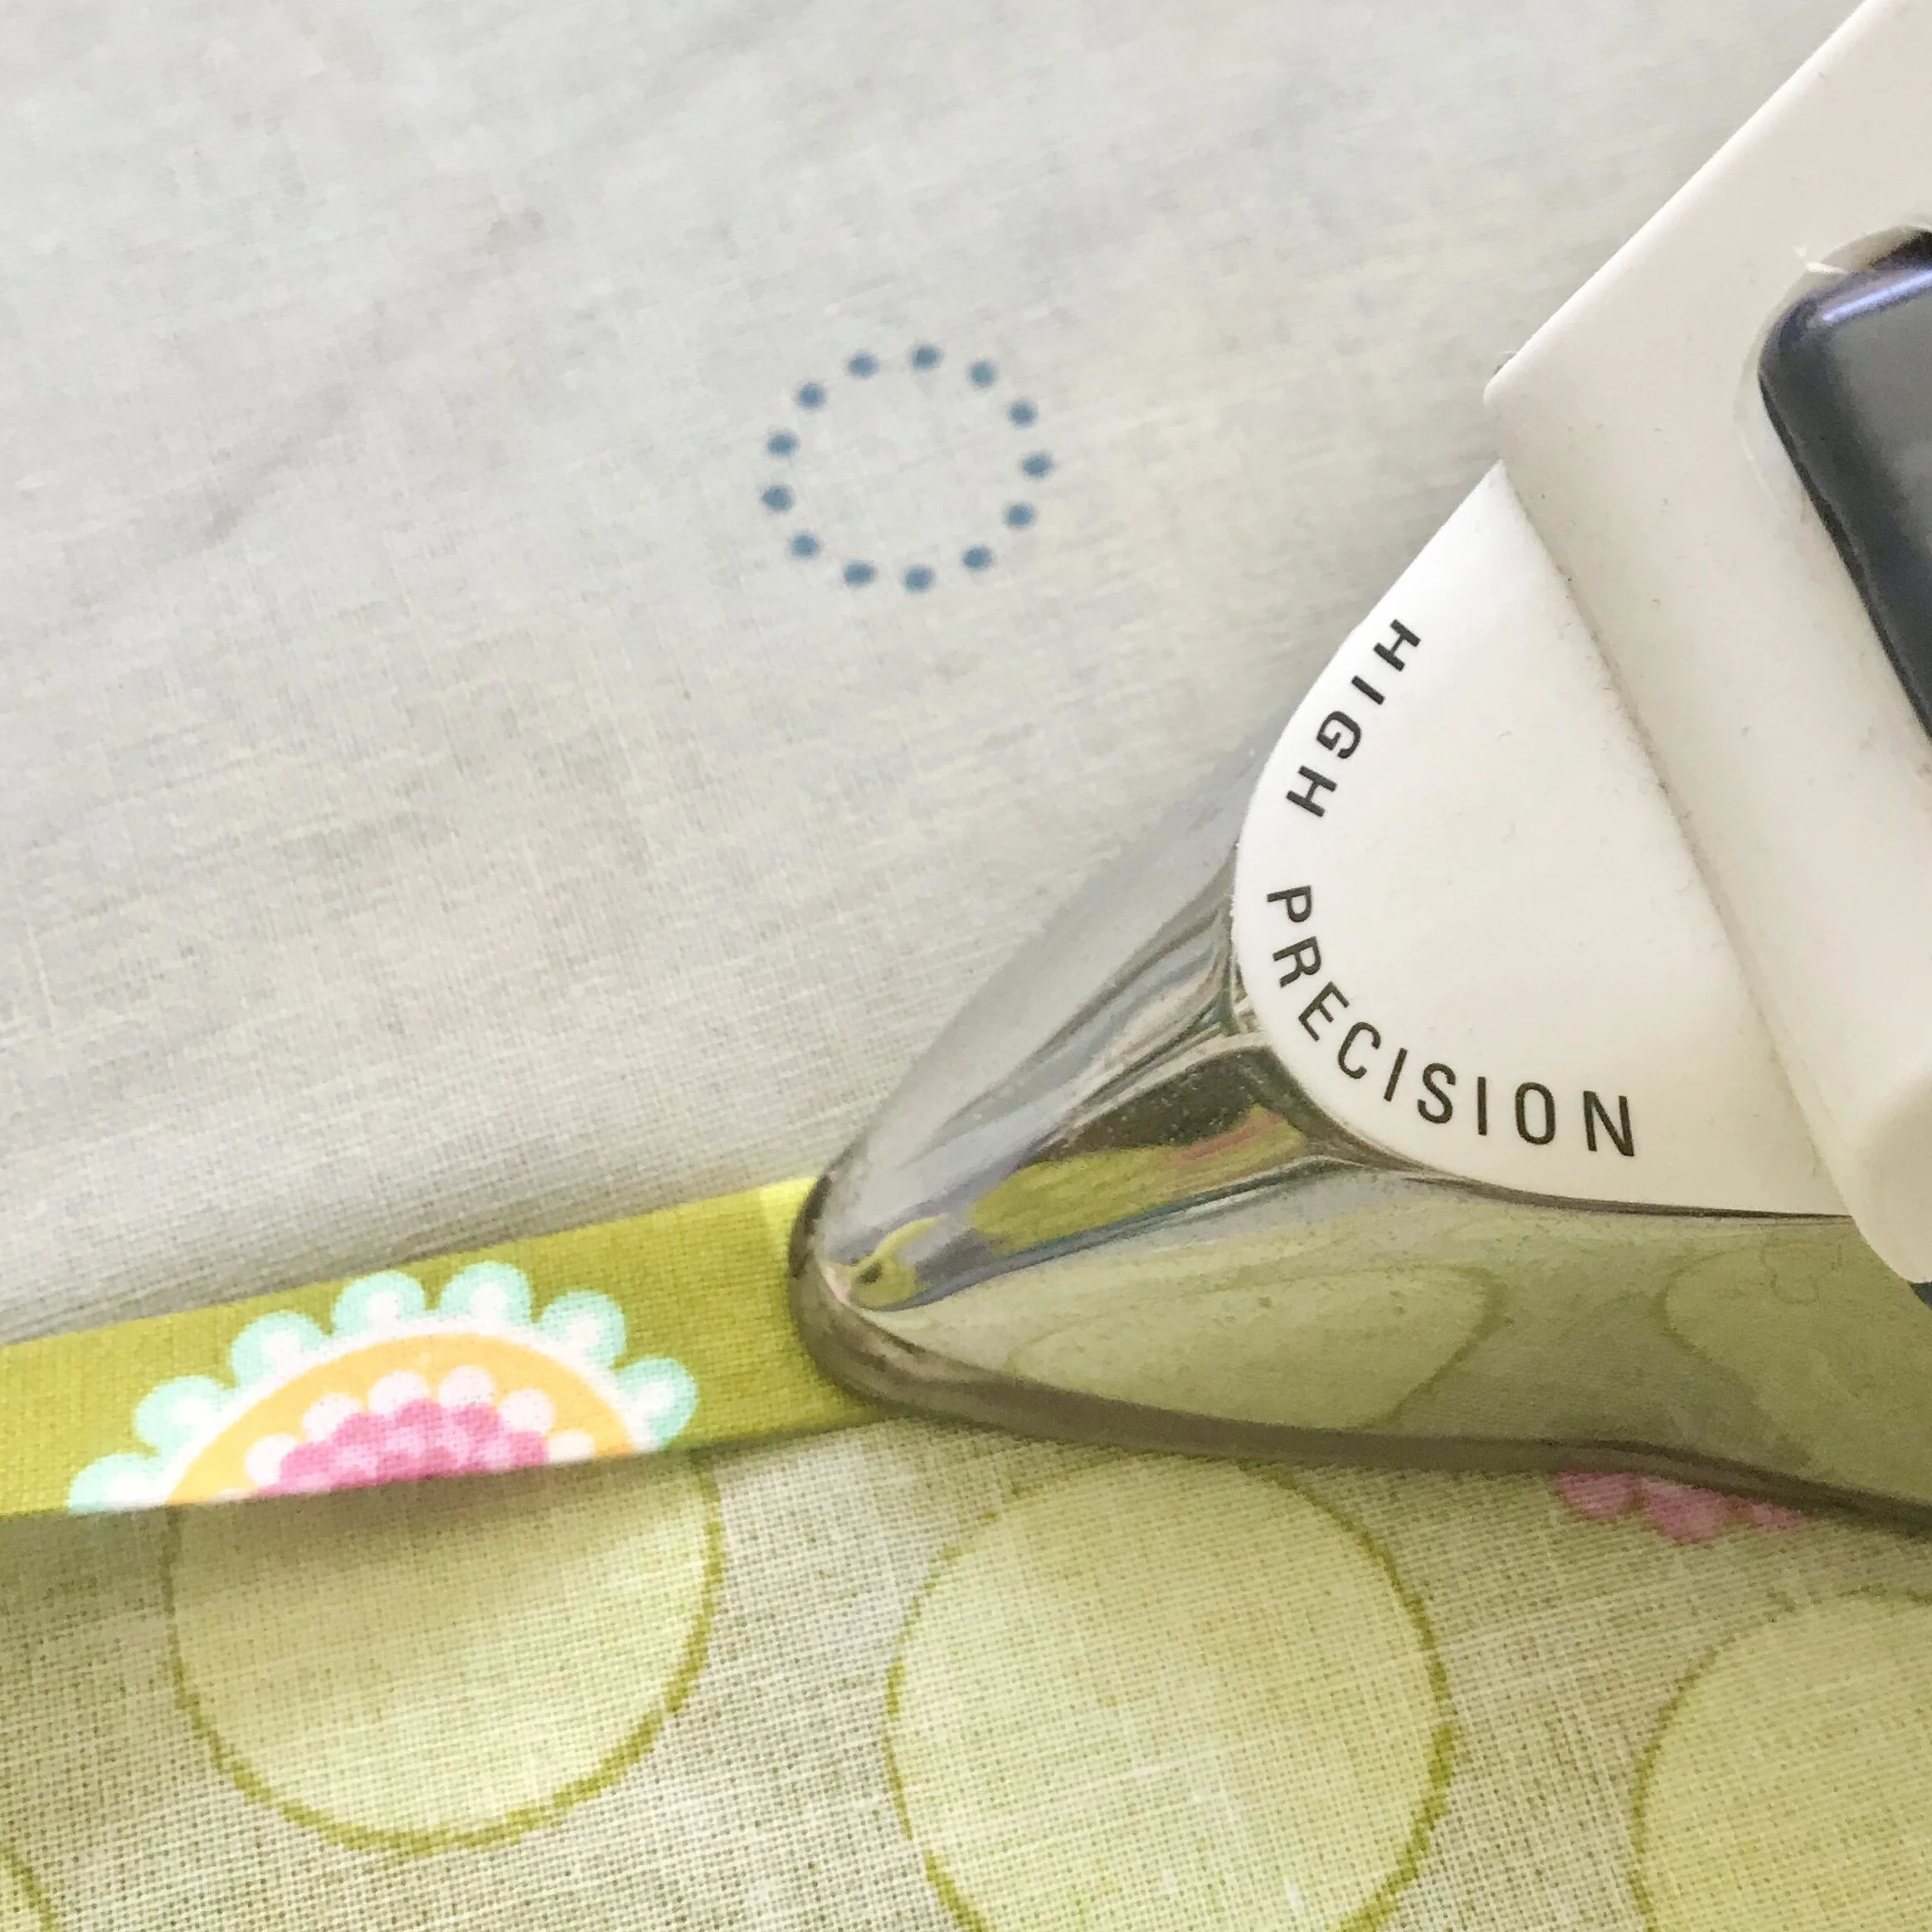
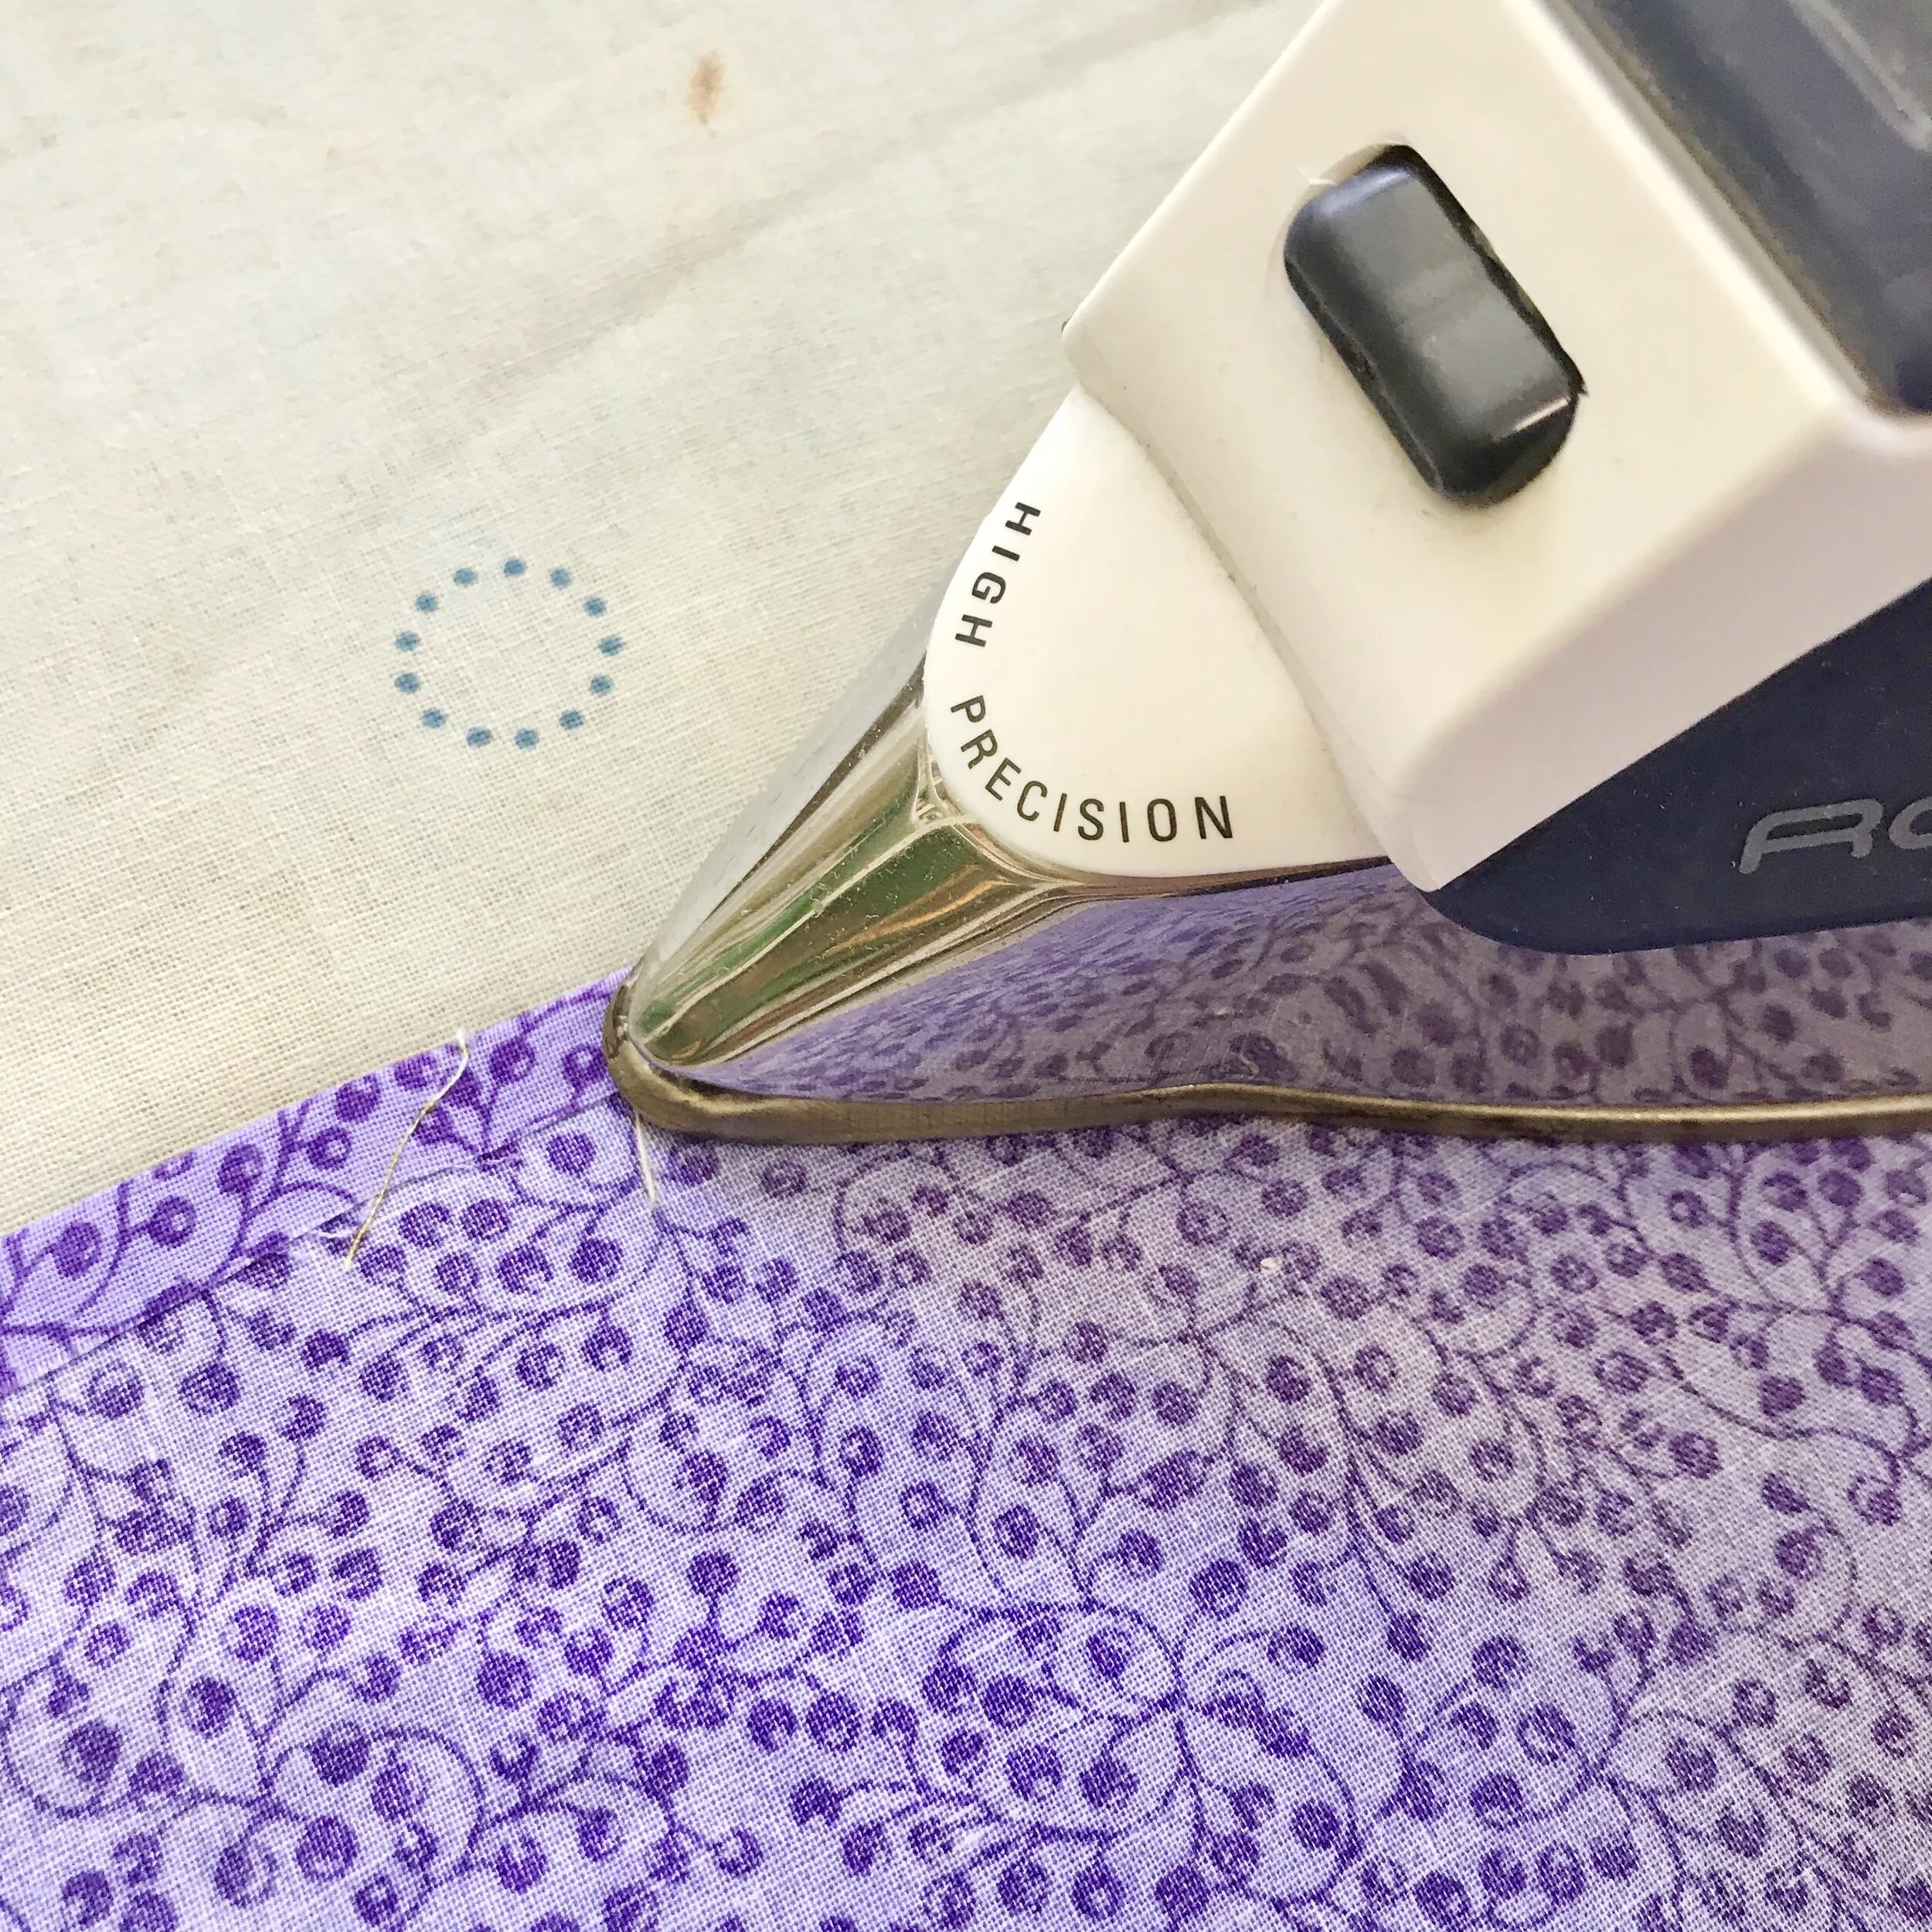
Step 2: Fold & Iron
Press the fabric. At the top of each piece, fold and press 1/4” over. Then fold and press again to create a double-fold hem. At the bottom fold and press 1/4” over.
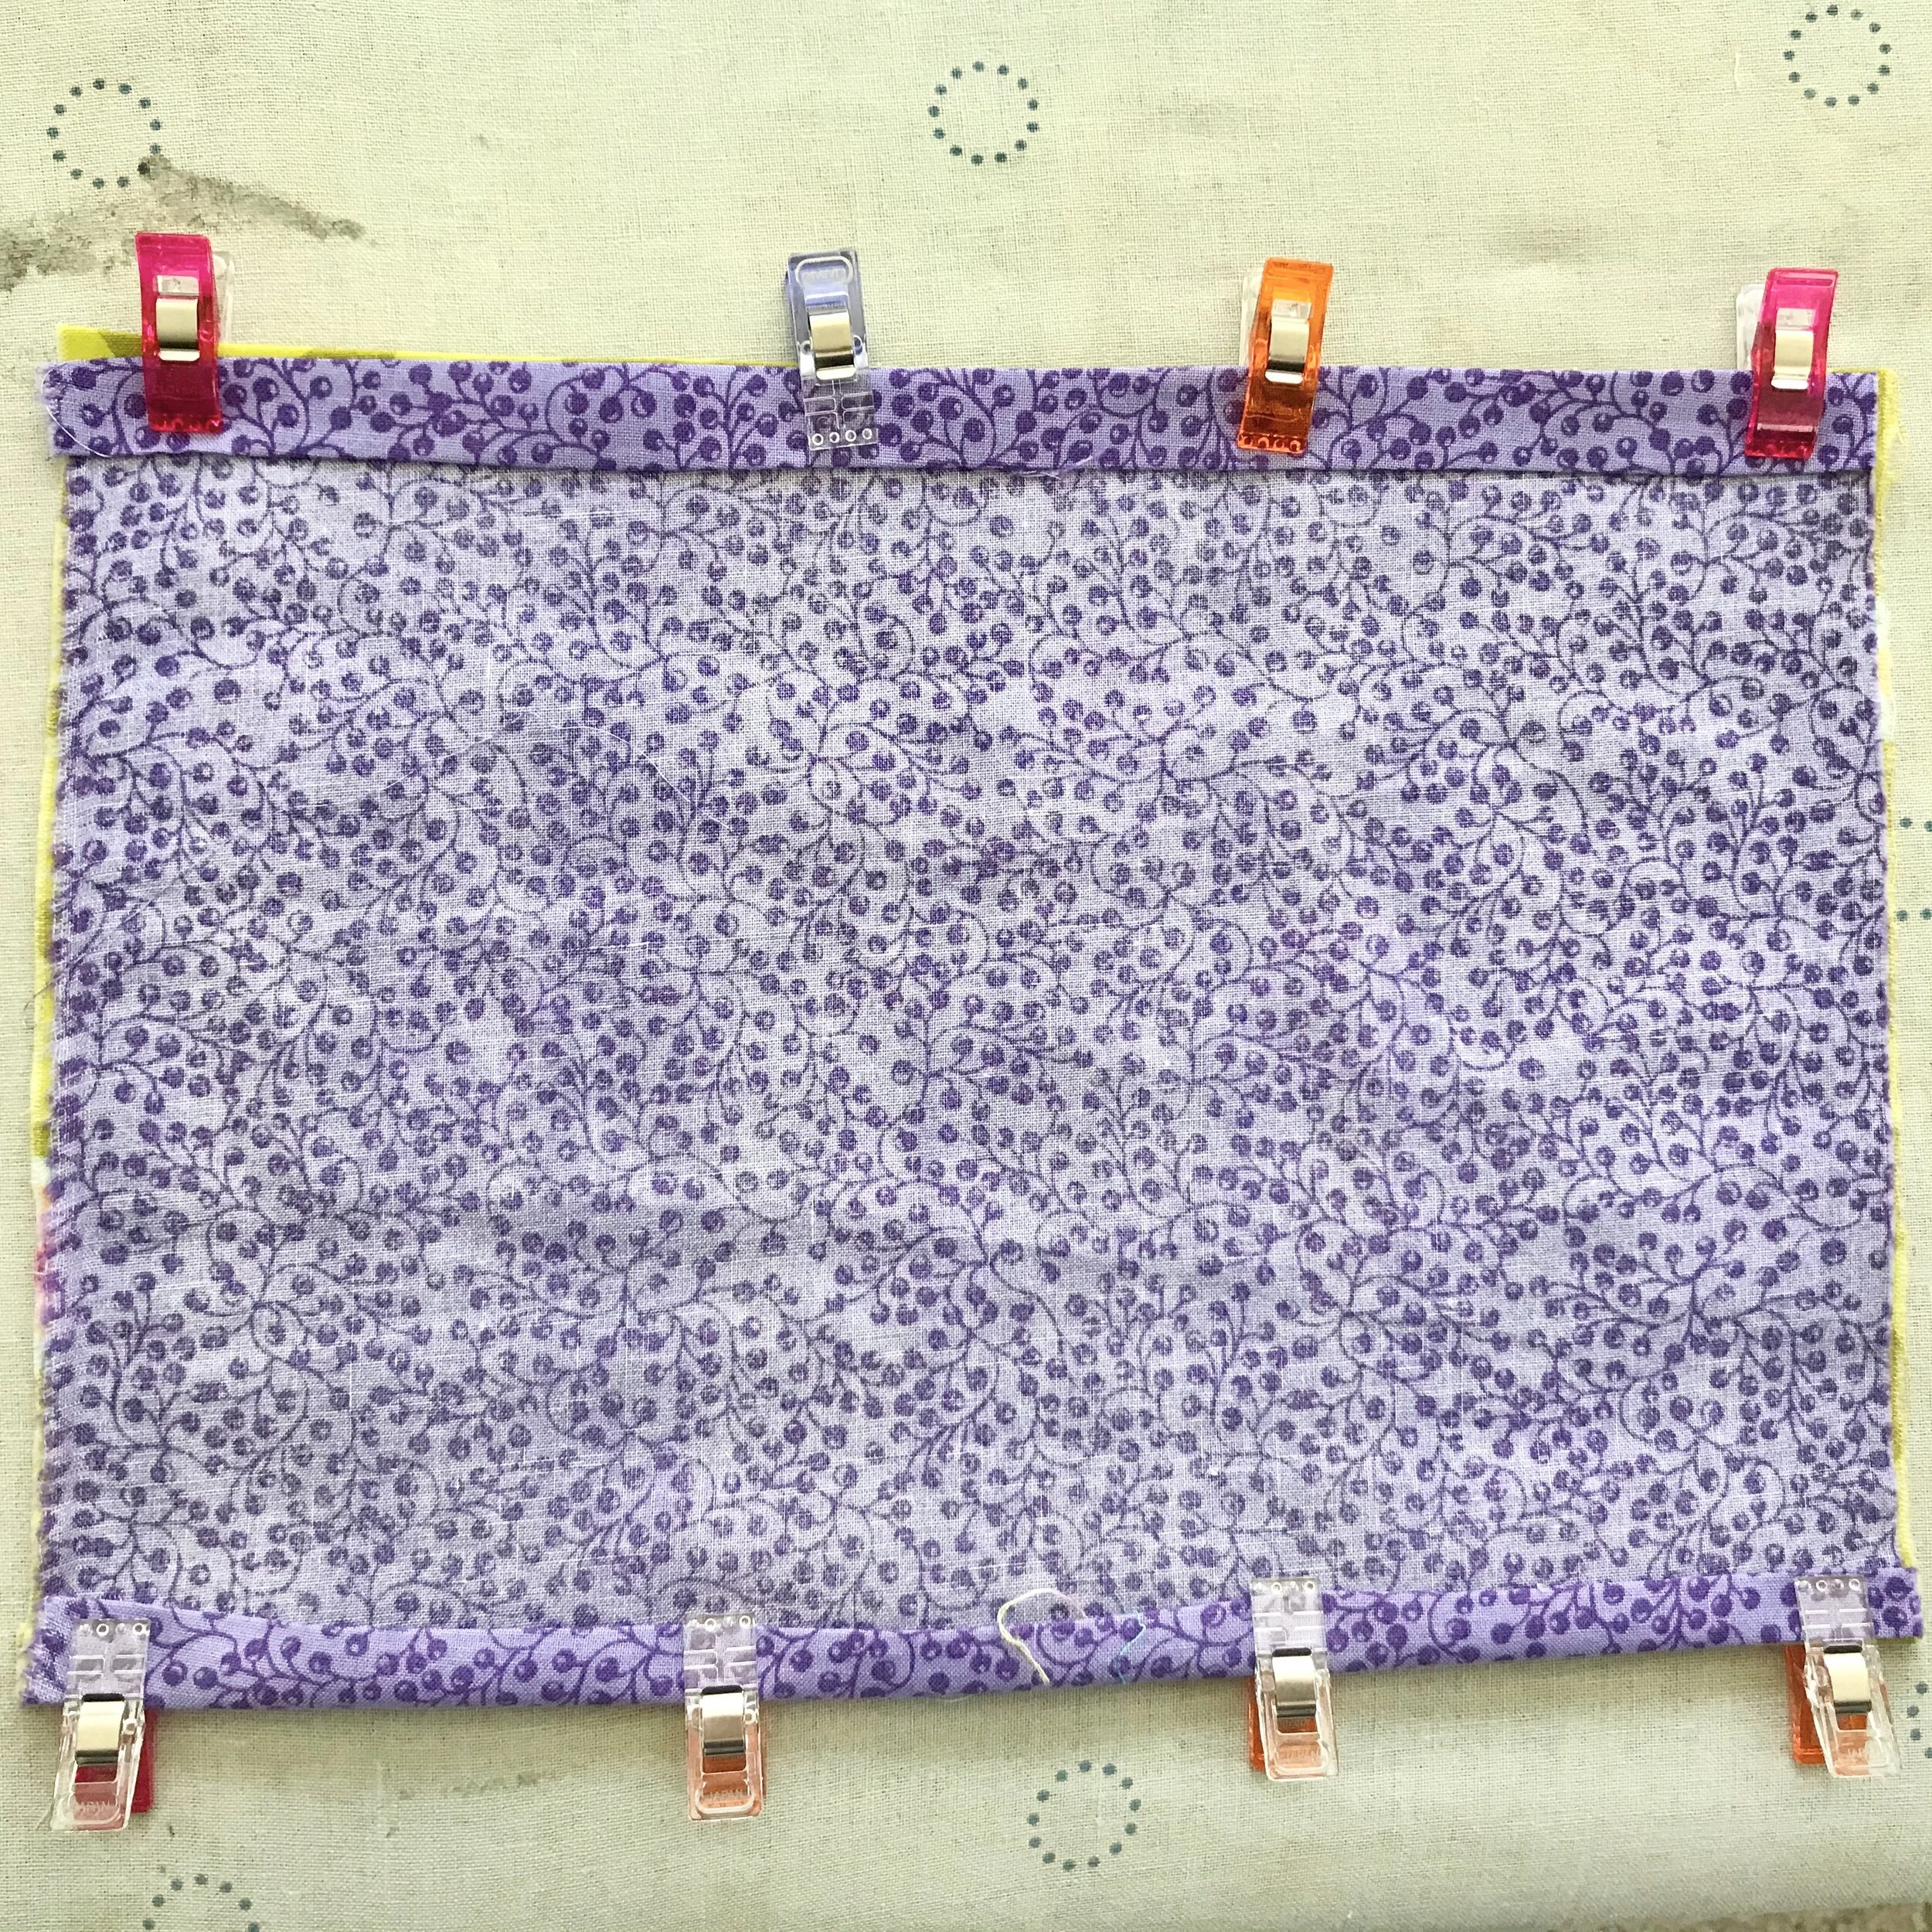
Step 3: Pin Right Sides Together
Place the right sides of the two fabric pieces together. Pin or clip them together. Place a clip at each corner — this will keep the seams from getting too close to the edges.
I use quilting clips — which I love — but straight pins work very well, too.
If you are using flannel instead of a filter, sandwich the flannel between the two pieces of cotton.
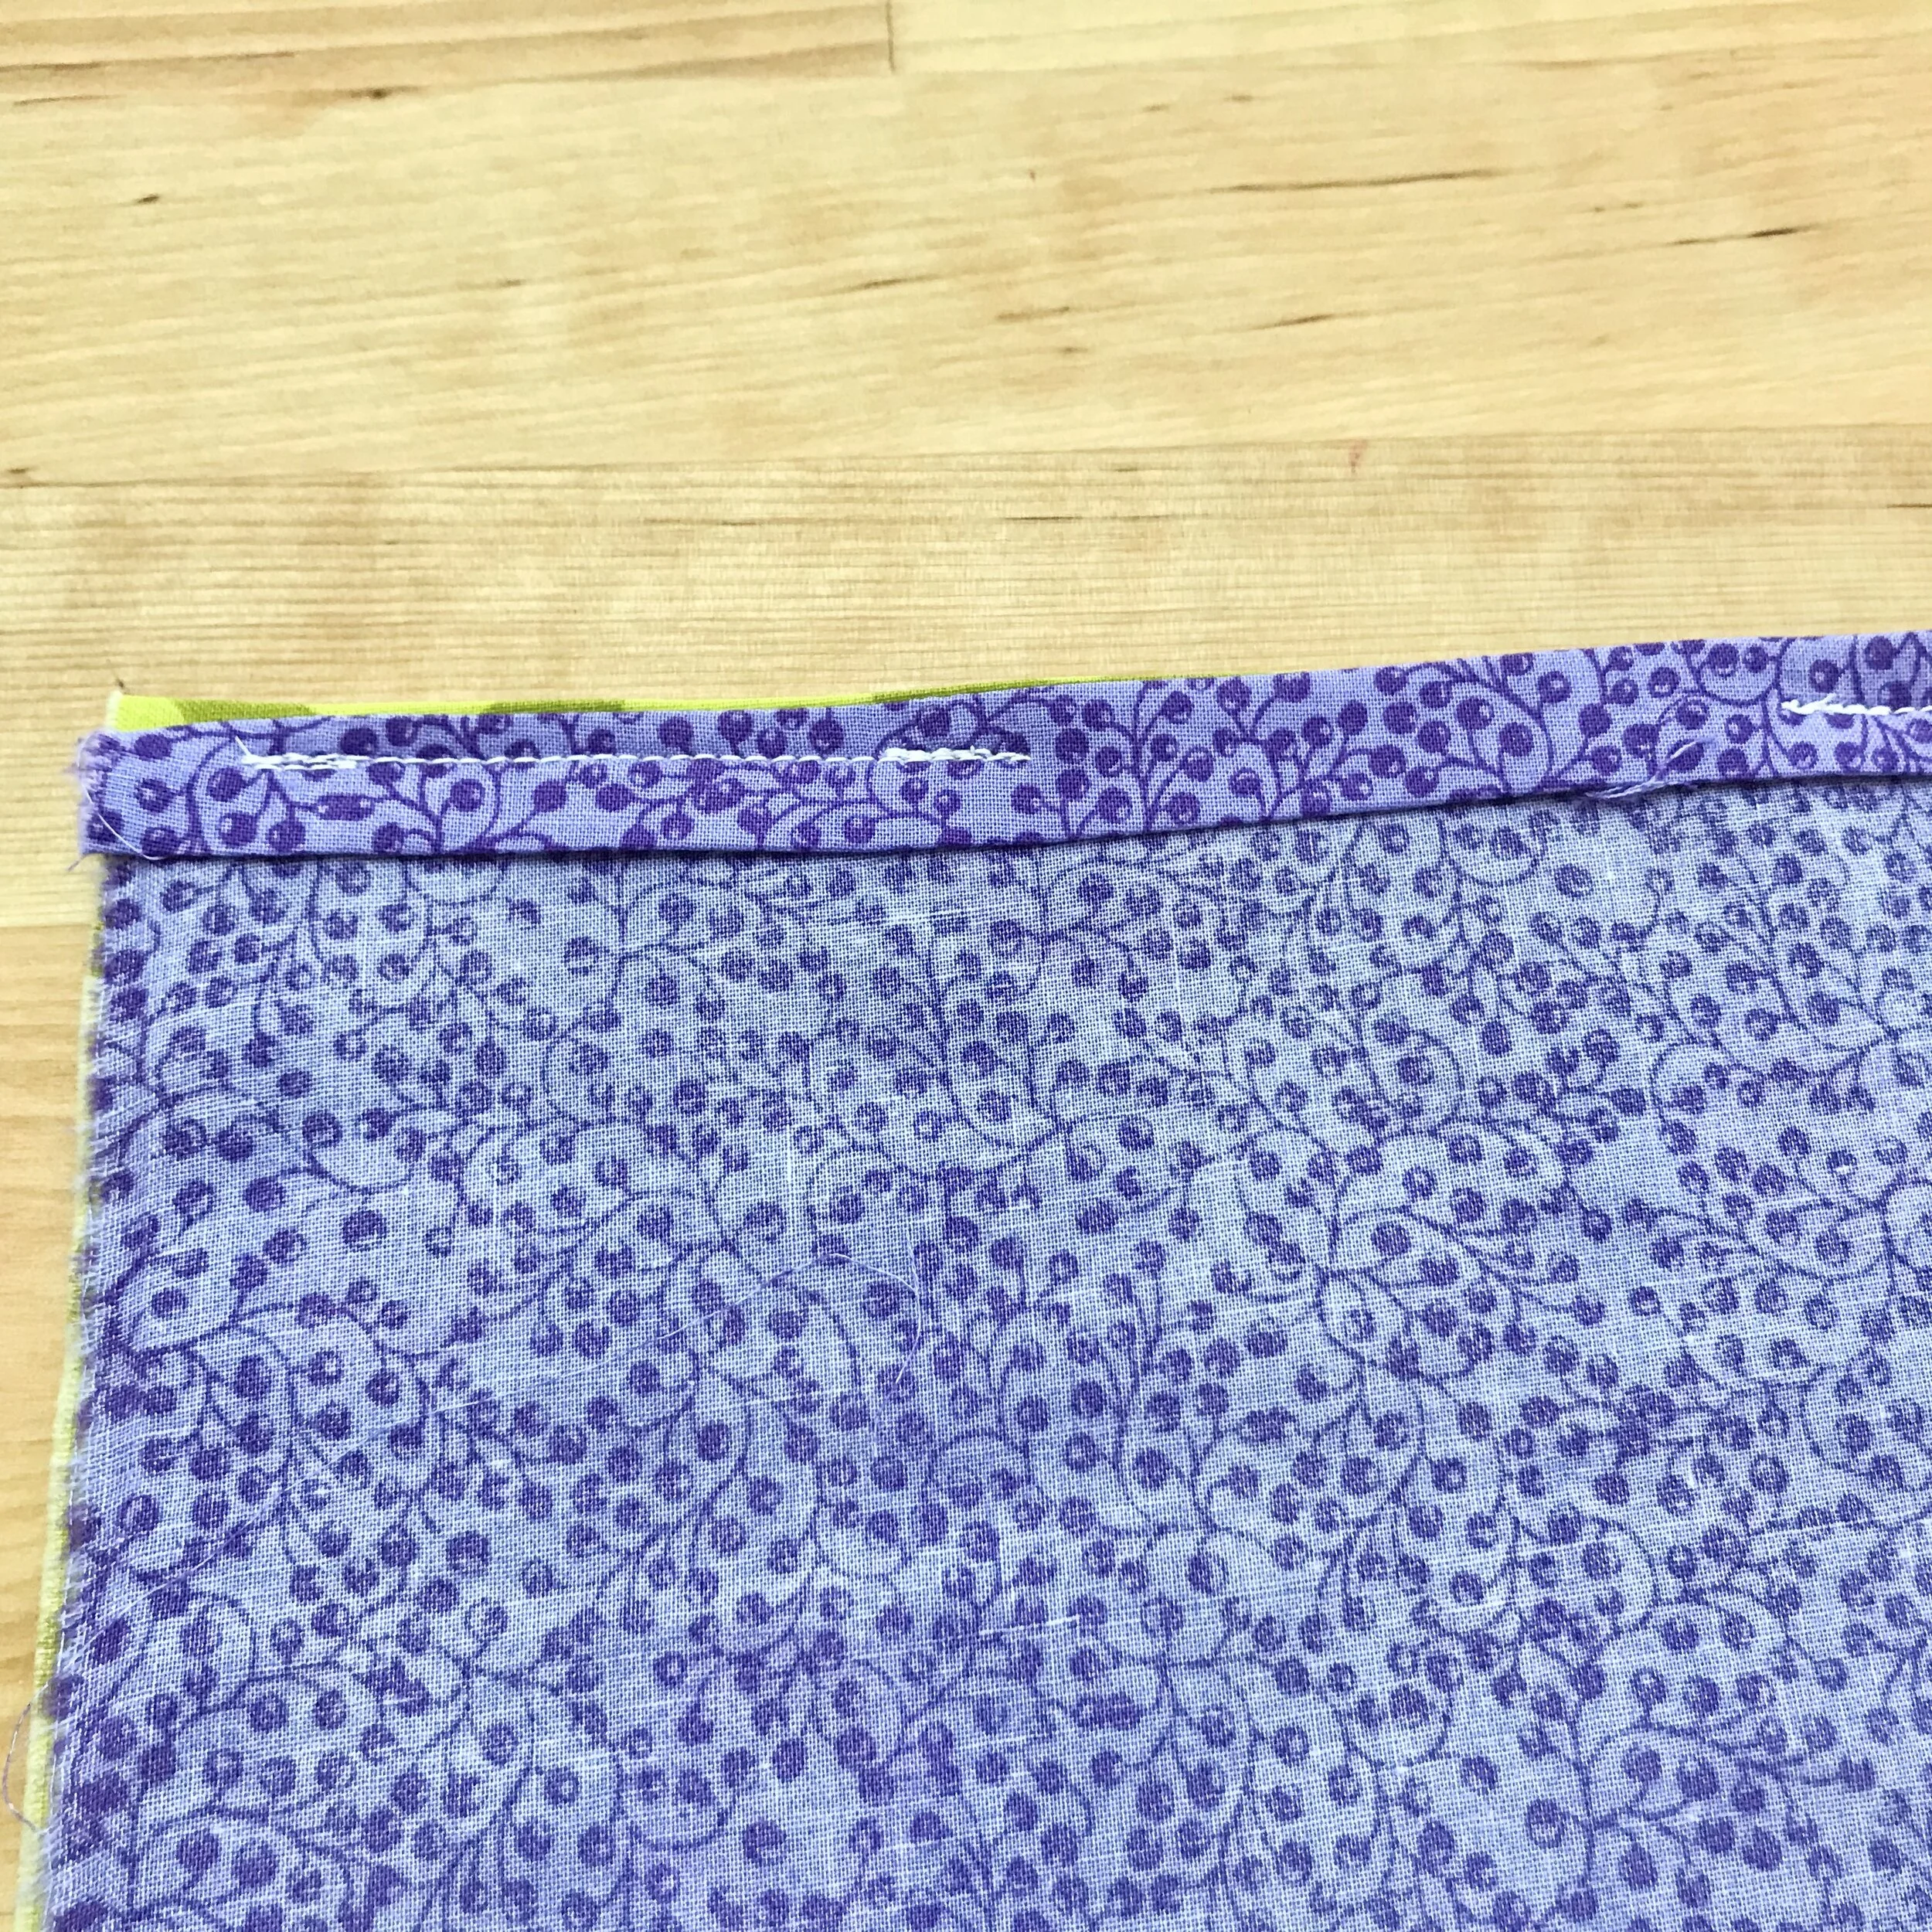
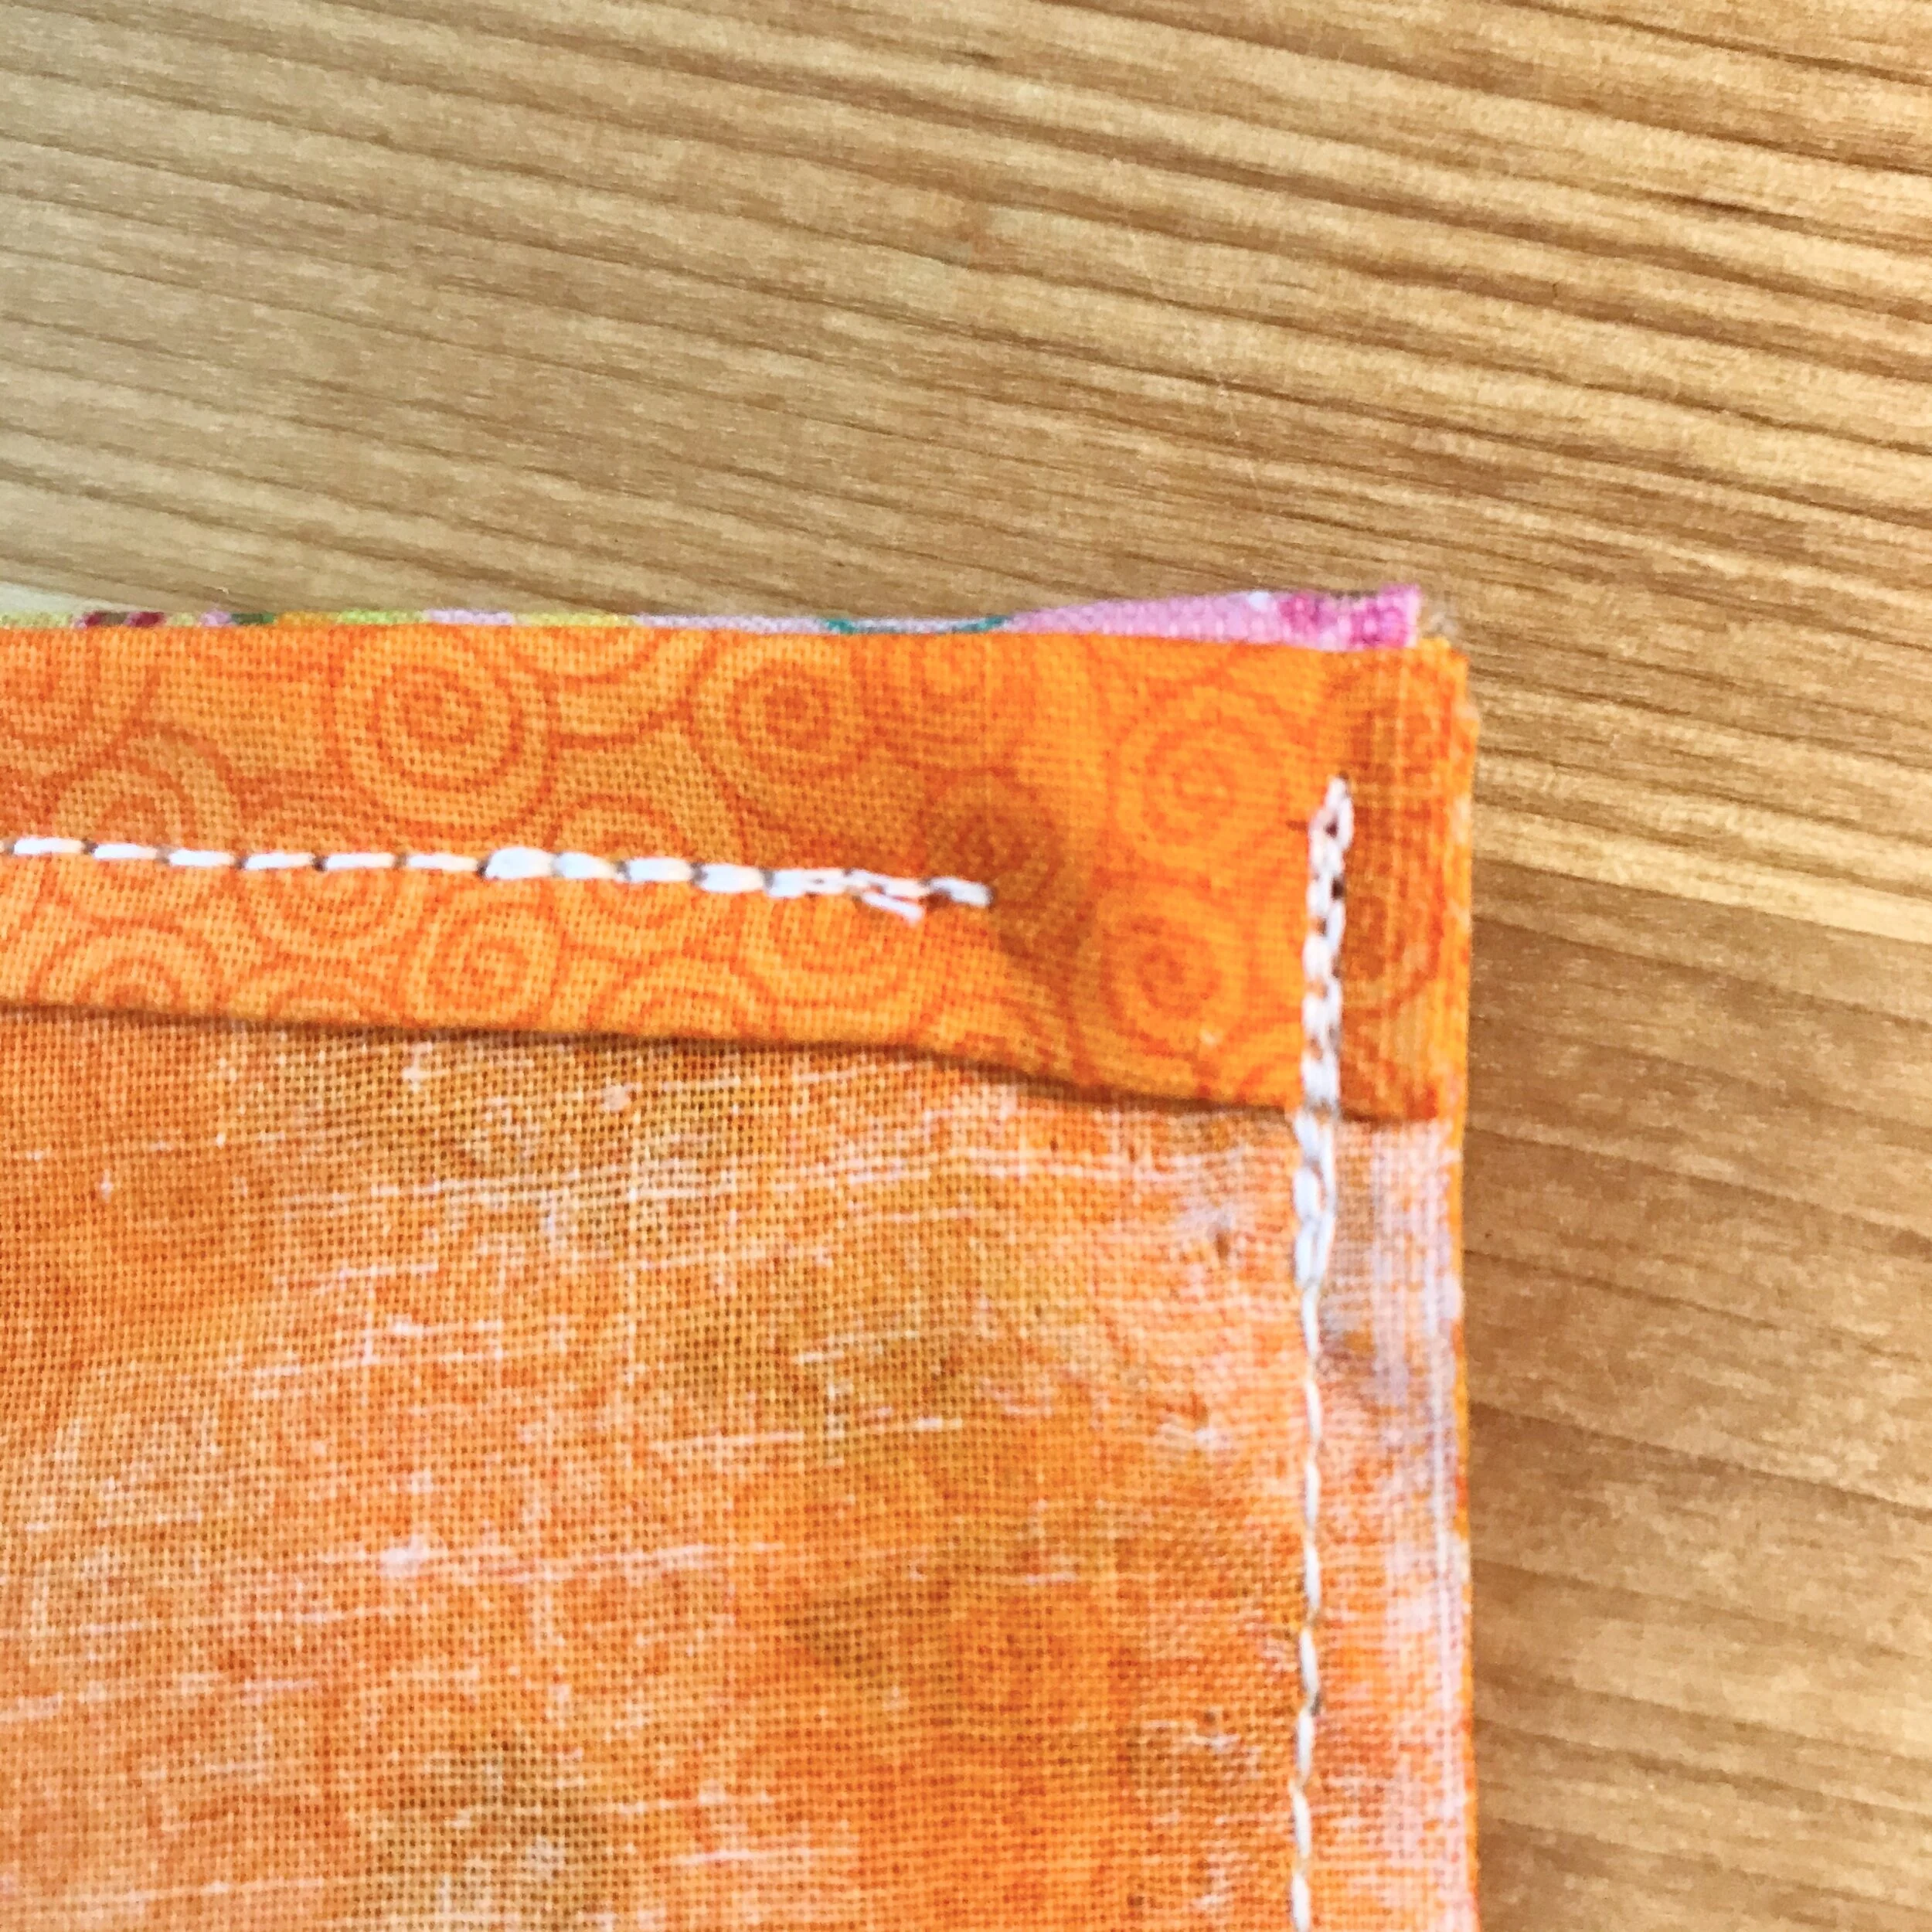
Step 4: Sew the Top Seams
The top seam is actually two small seams with a space between. This space will form the access for the filter pocket.
Starting 1/2” in from the corner, sew a 3.5” seam across the top. Repeat from the other corner leaving an approximately 2” gap between the two seams.
Measurements are for an adult-sized mask. Adjust accordingly for smaller masks.

Step 5: Sew the Bottom Seam
The bottom seam goes straight across but starts and stops 1/2” from the fabric edge.
Step 6: Choose your Fastener Method
From here there are several ways to finish your mask depending on how you want it to fit and what materials you’ll be using. See below.
Using an Elastic Headband
This is my favorite, personally. I used elastic headbands from Goody — an item I use anyway. They make a great double-band for adults and larger children, too. The headbands have good stretch and are long-wearing. They often last years for me. Because they are already in a loop, it just takes a little finagling to get them to work, but truly, it isn’t hard!

Step A: Sew top & bottom Seams
Follow the basic mask instructions to sew the top and bottom seams.
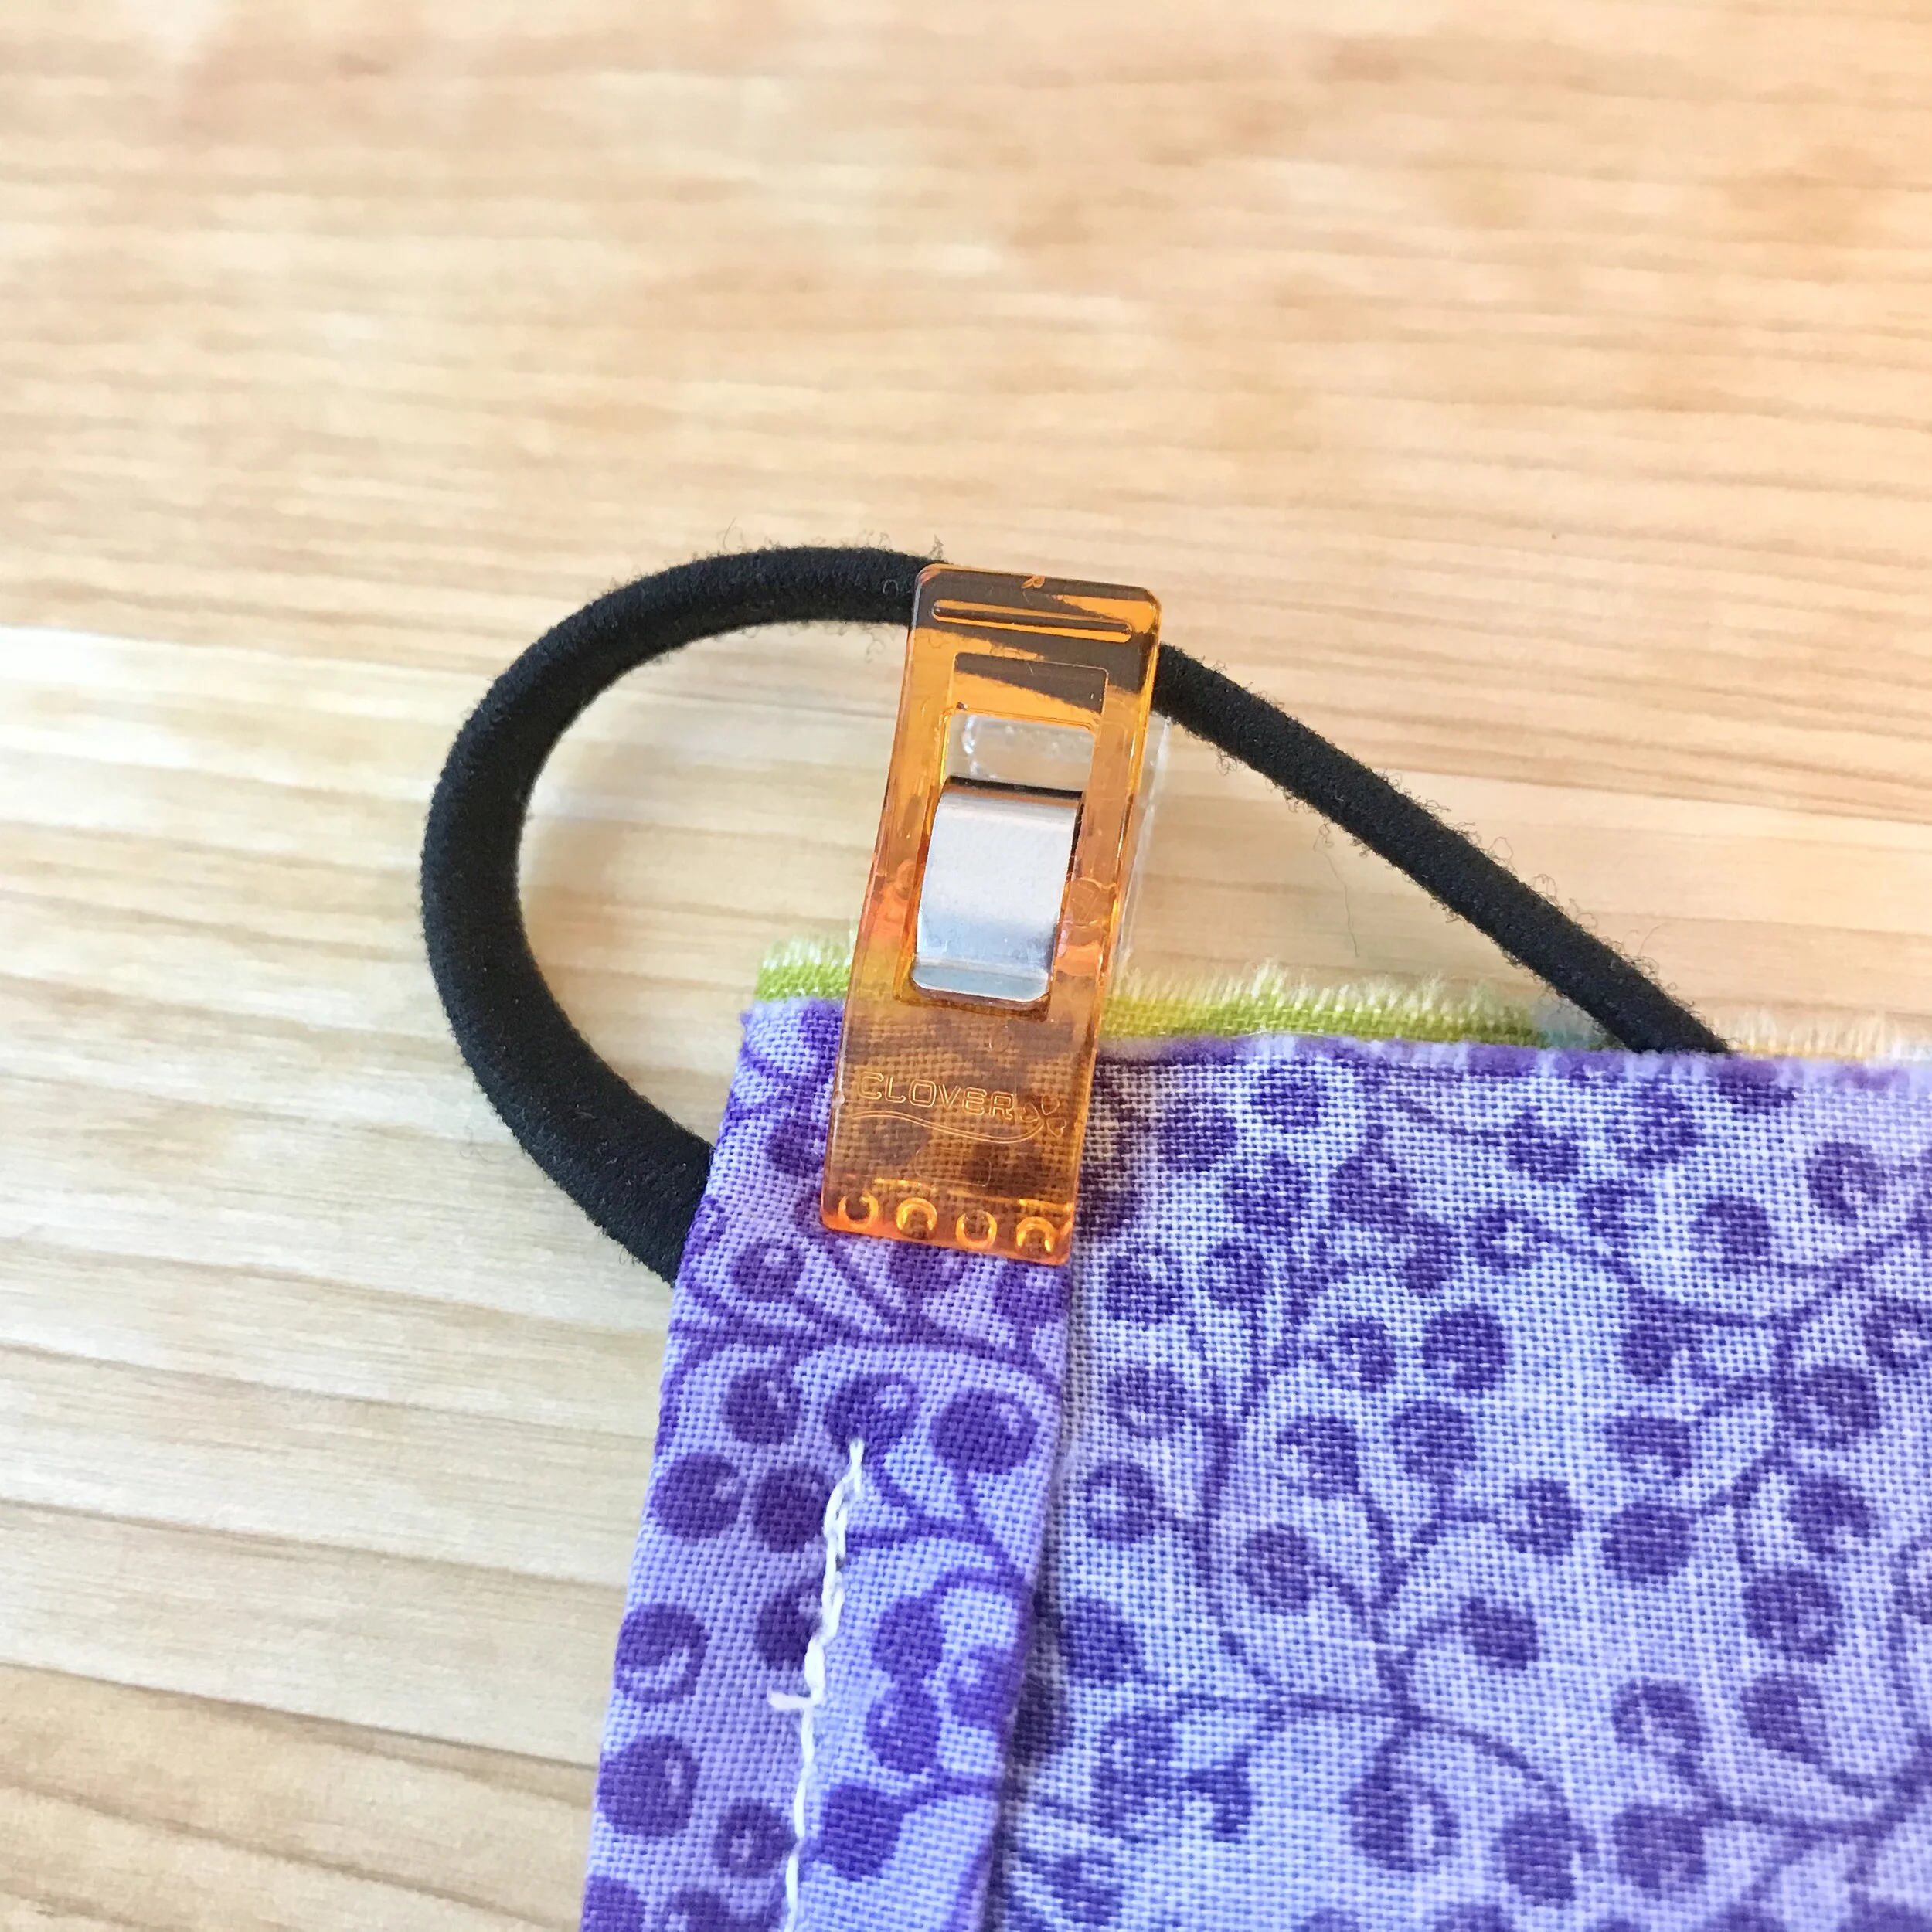
Step B: Place & Clip the Headband
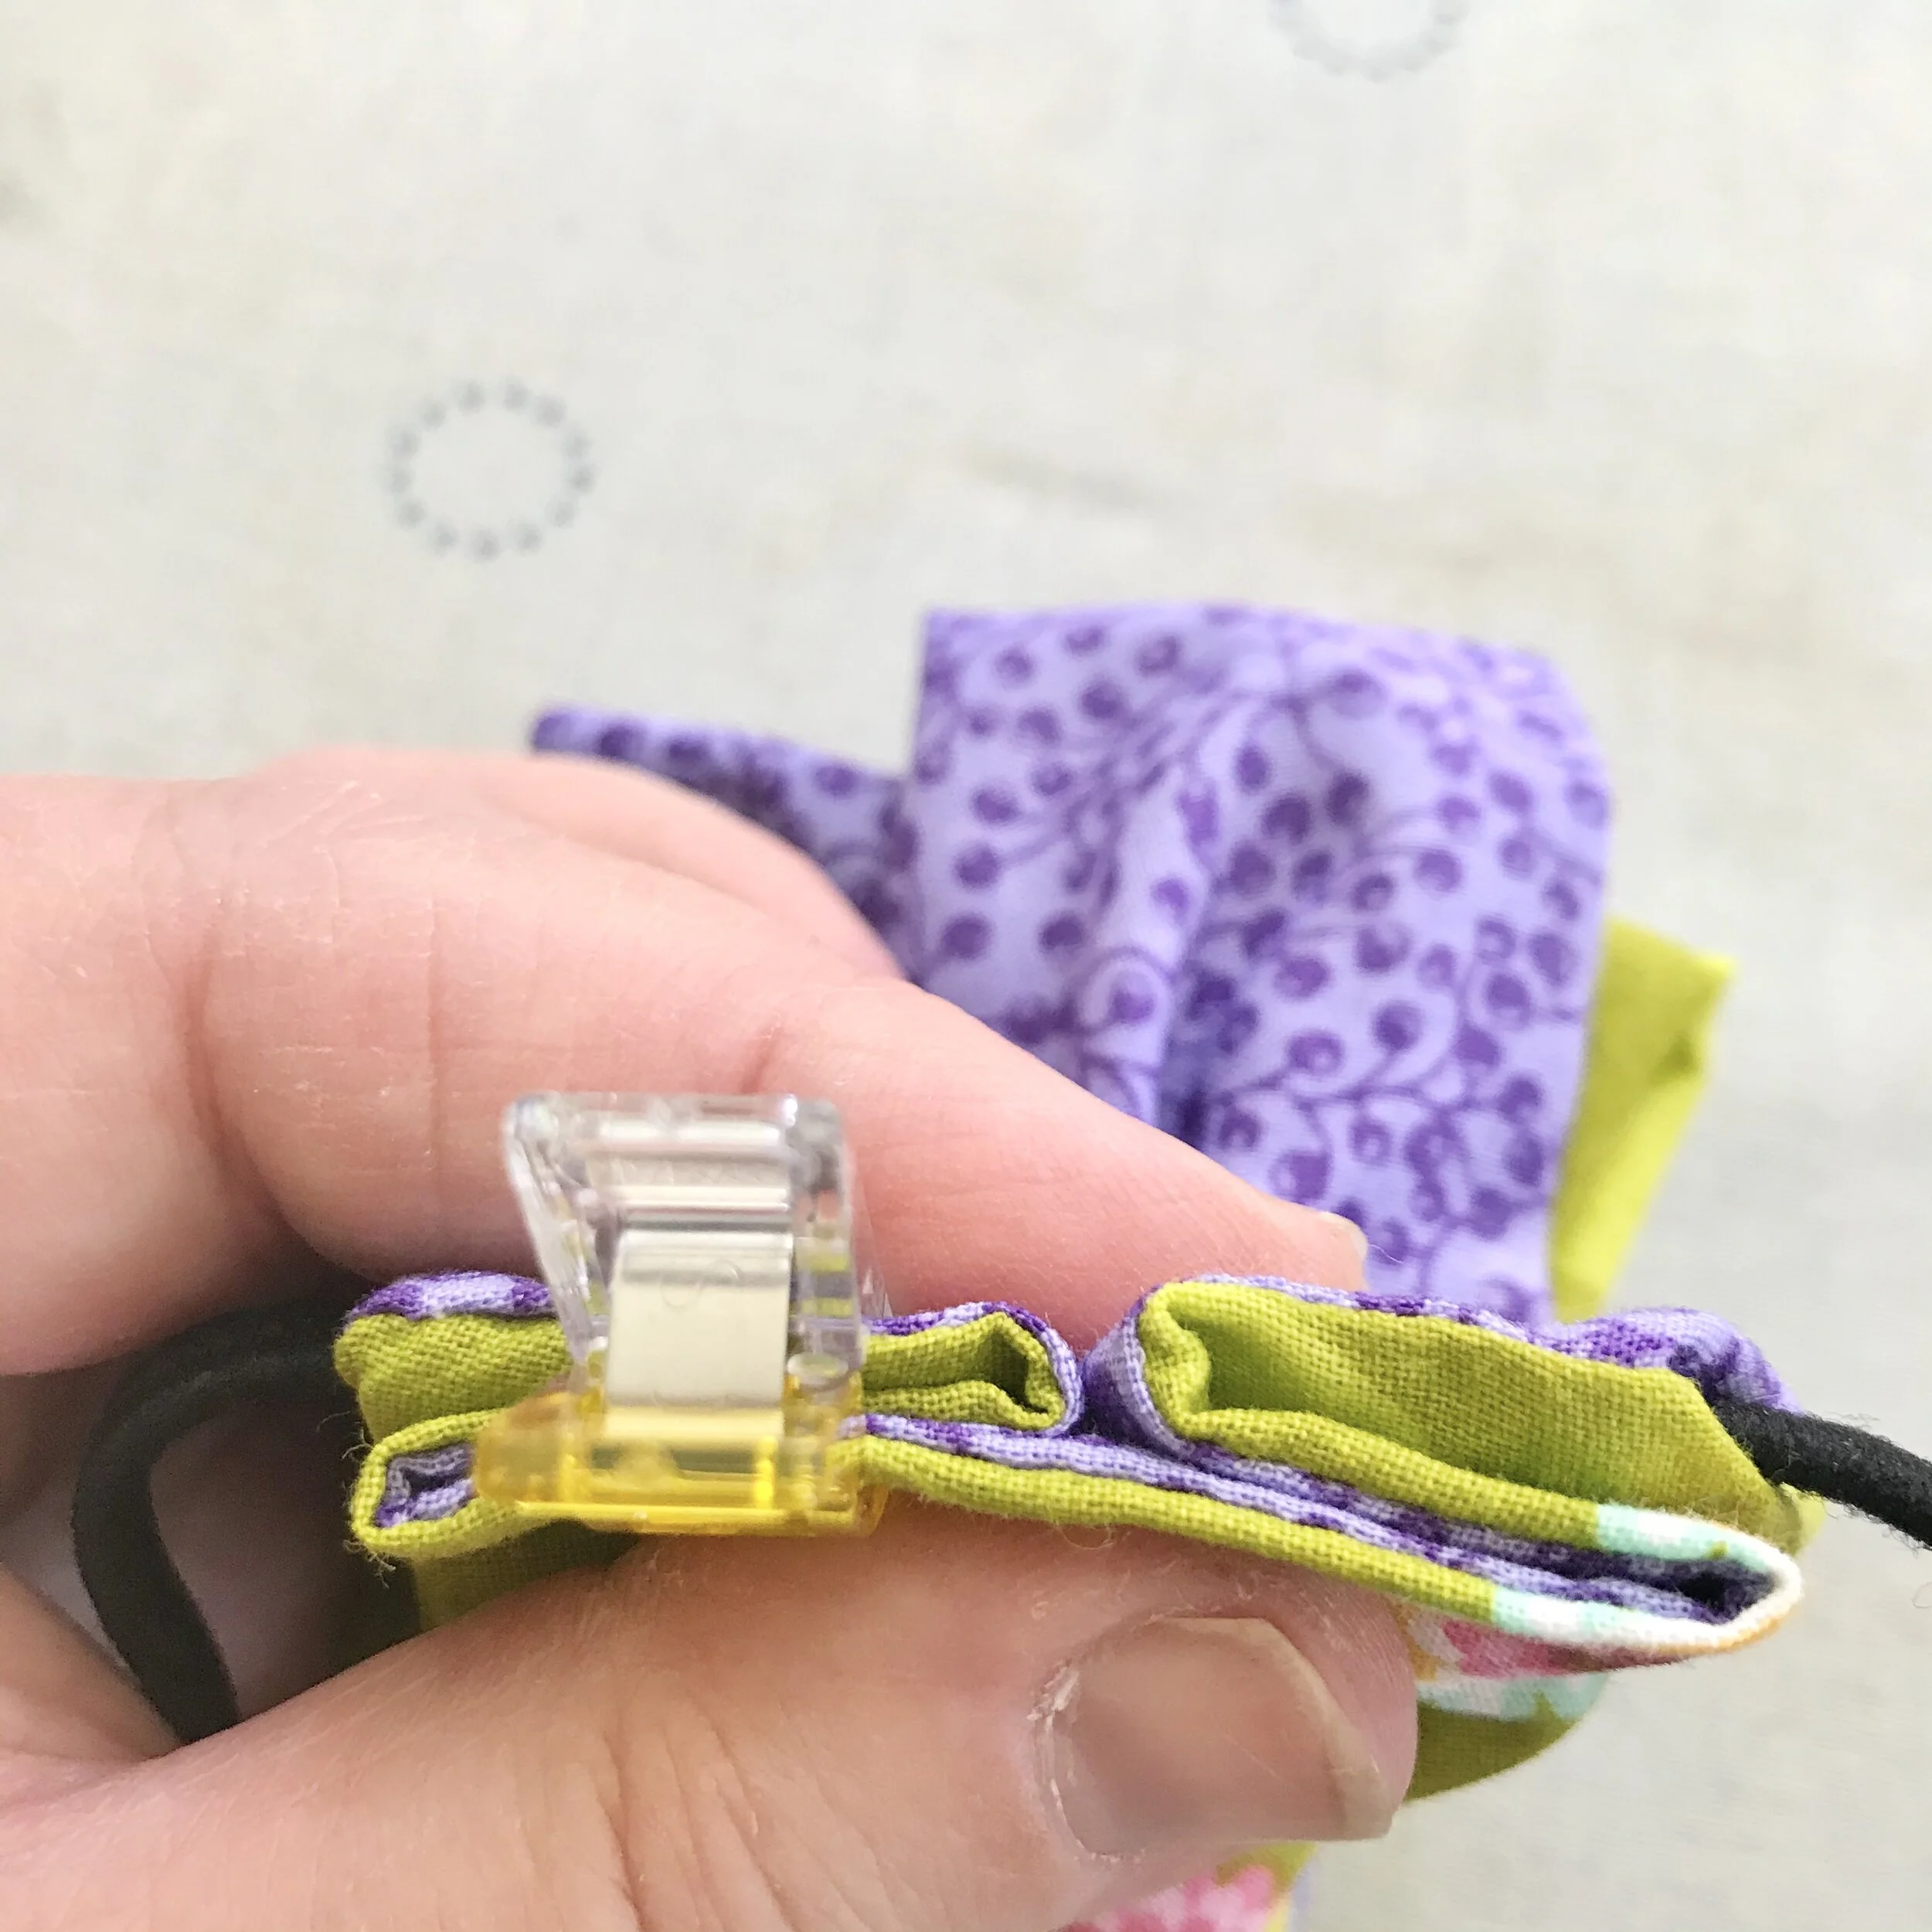
Tackle one side seam at a time. Insert the headband between the two pieces of fabric at one corner. Use a clip or a pin to secure the fabric around the elastic.
Repeat at the other corner. Then use clips or pins to close the side seam completely with the elastic headband running inside the fabric.
Important: you don’t want to sew through the elastic. The mask works better if the elastic is free to move and adjust.
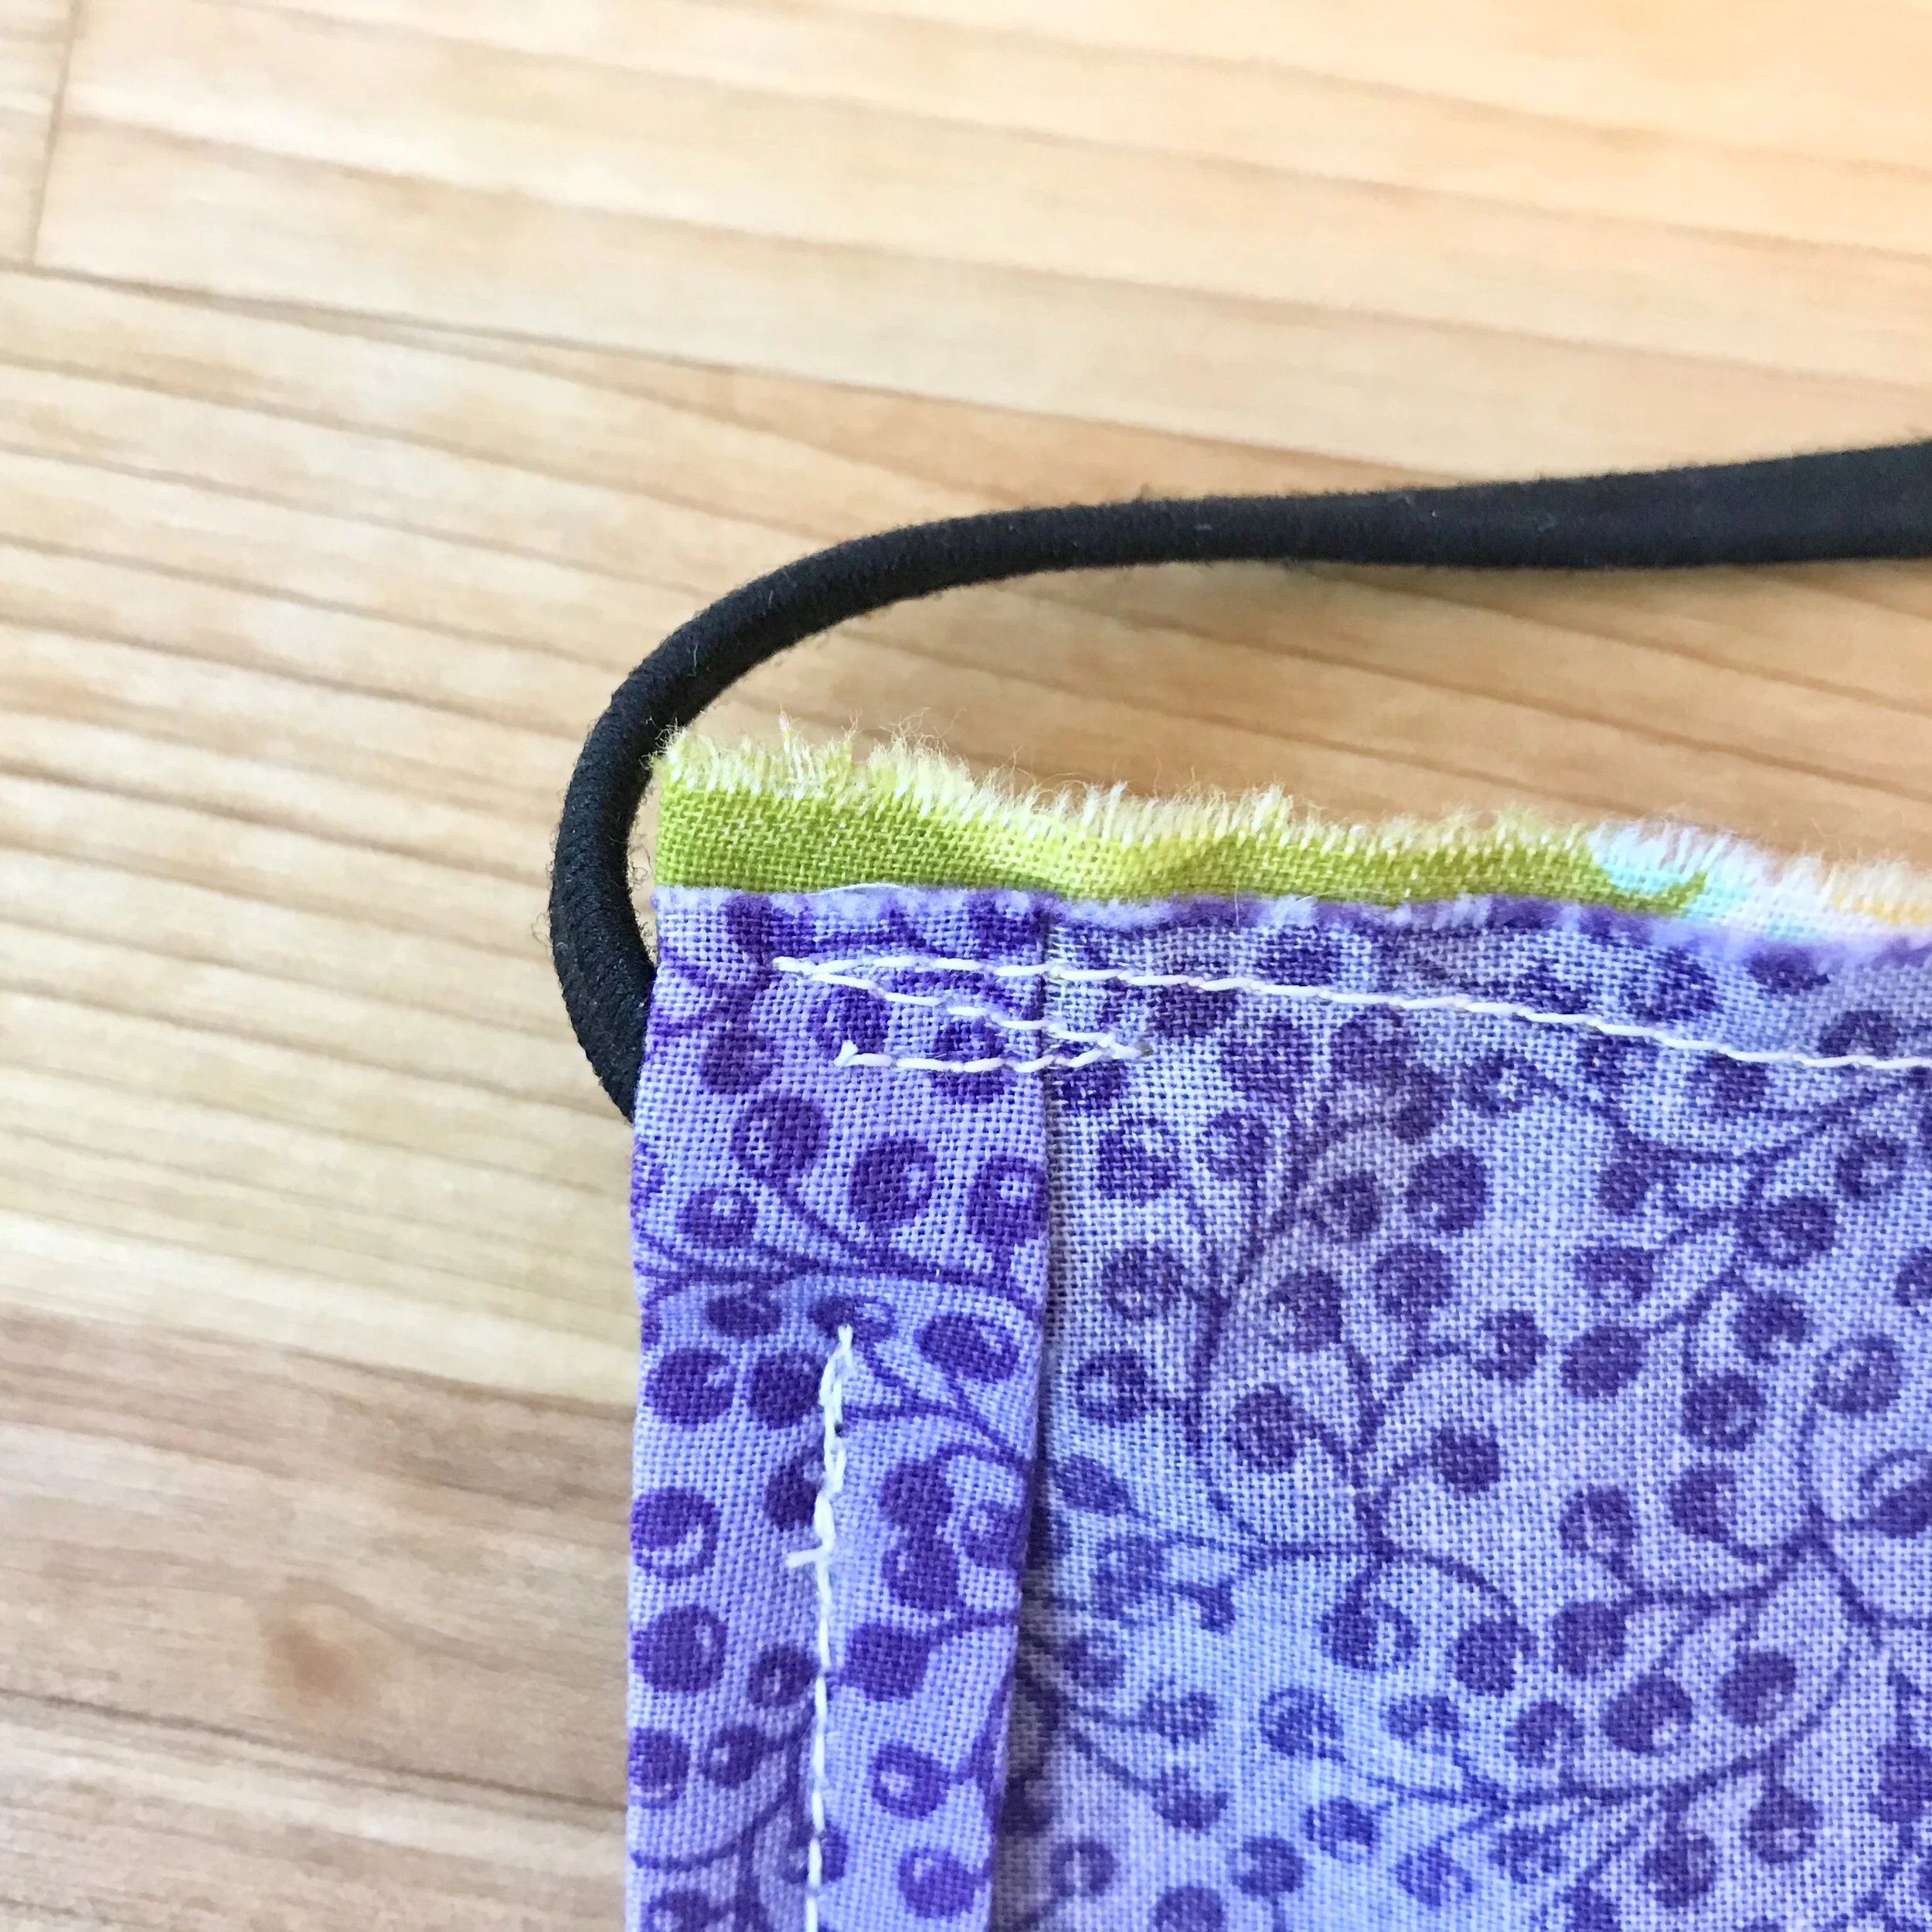
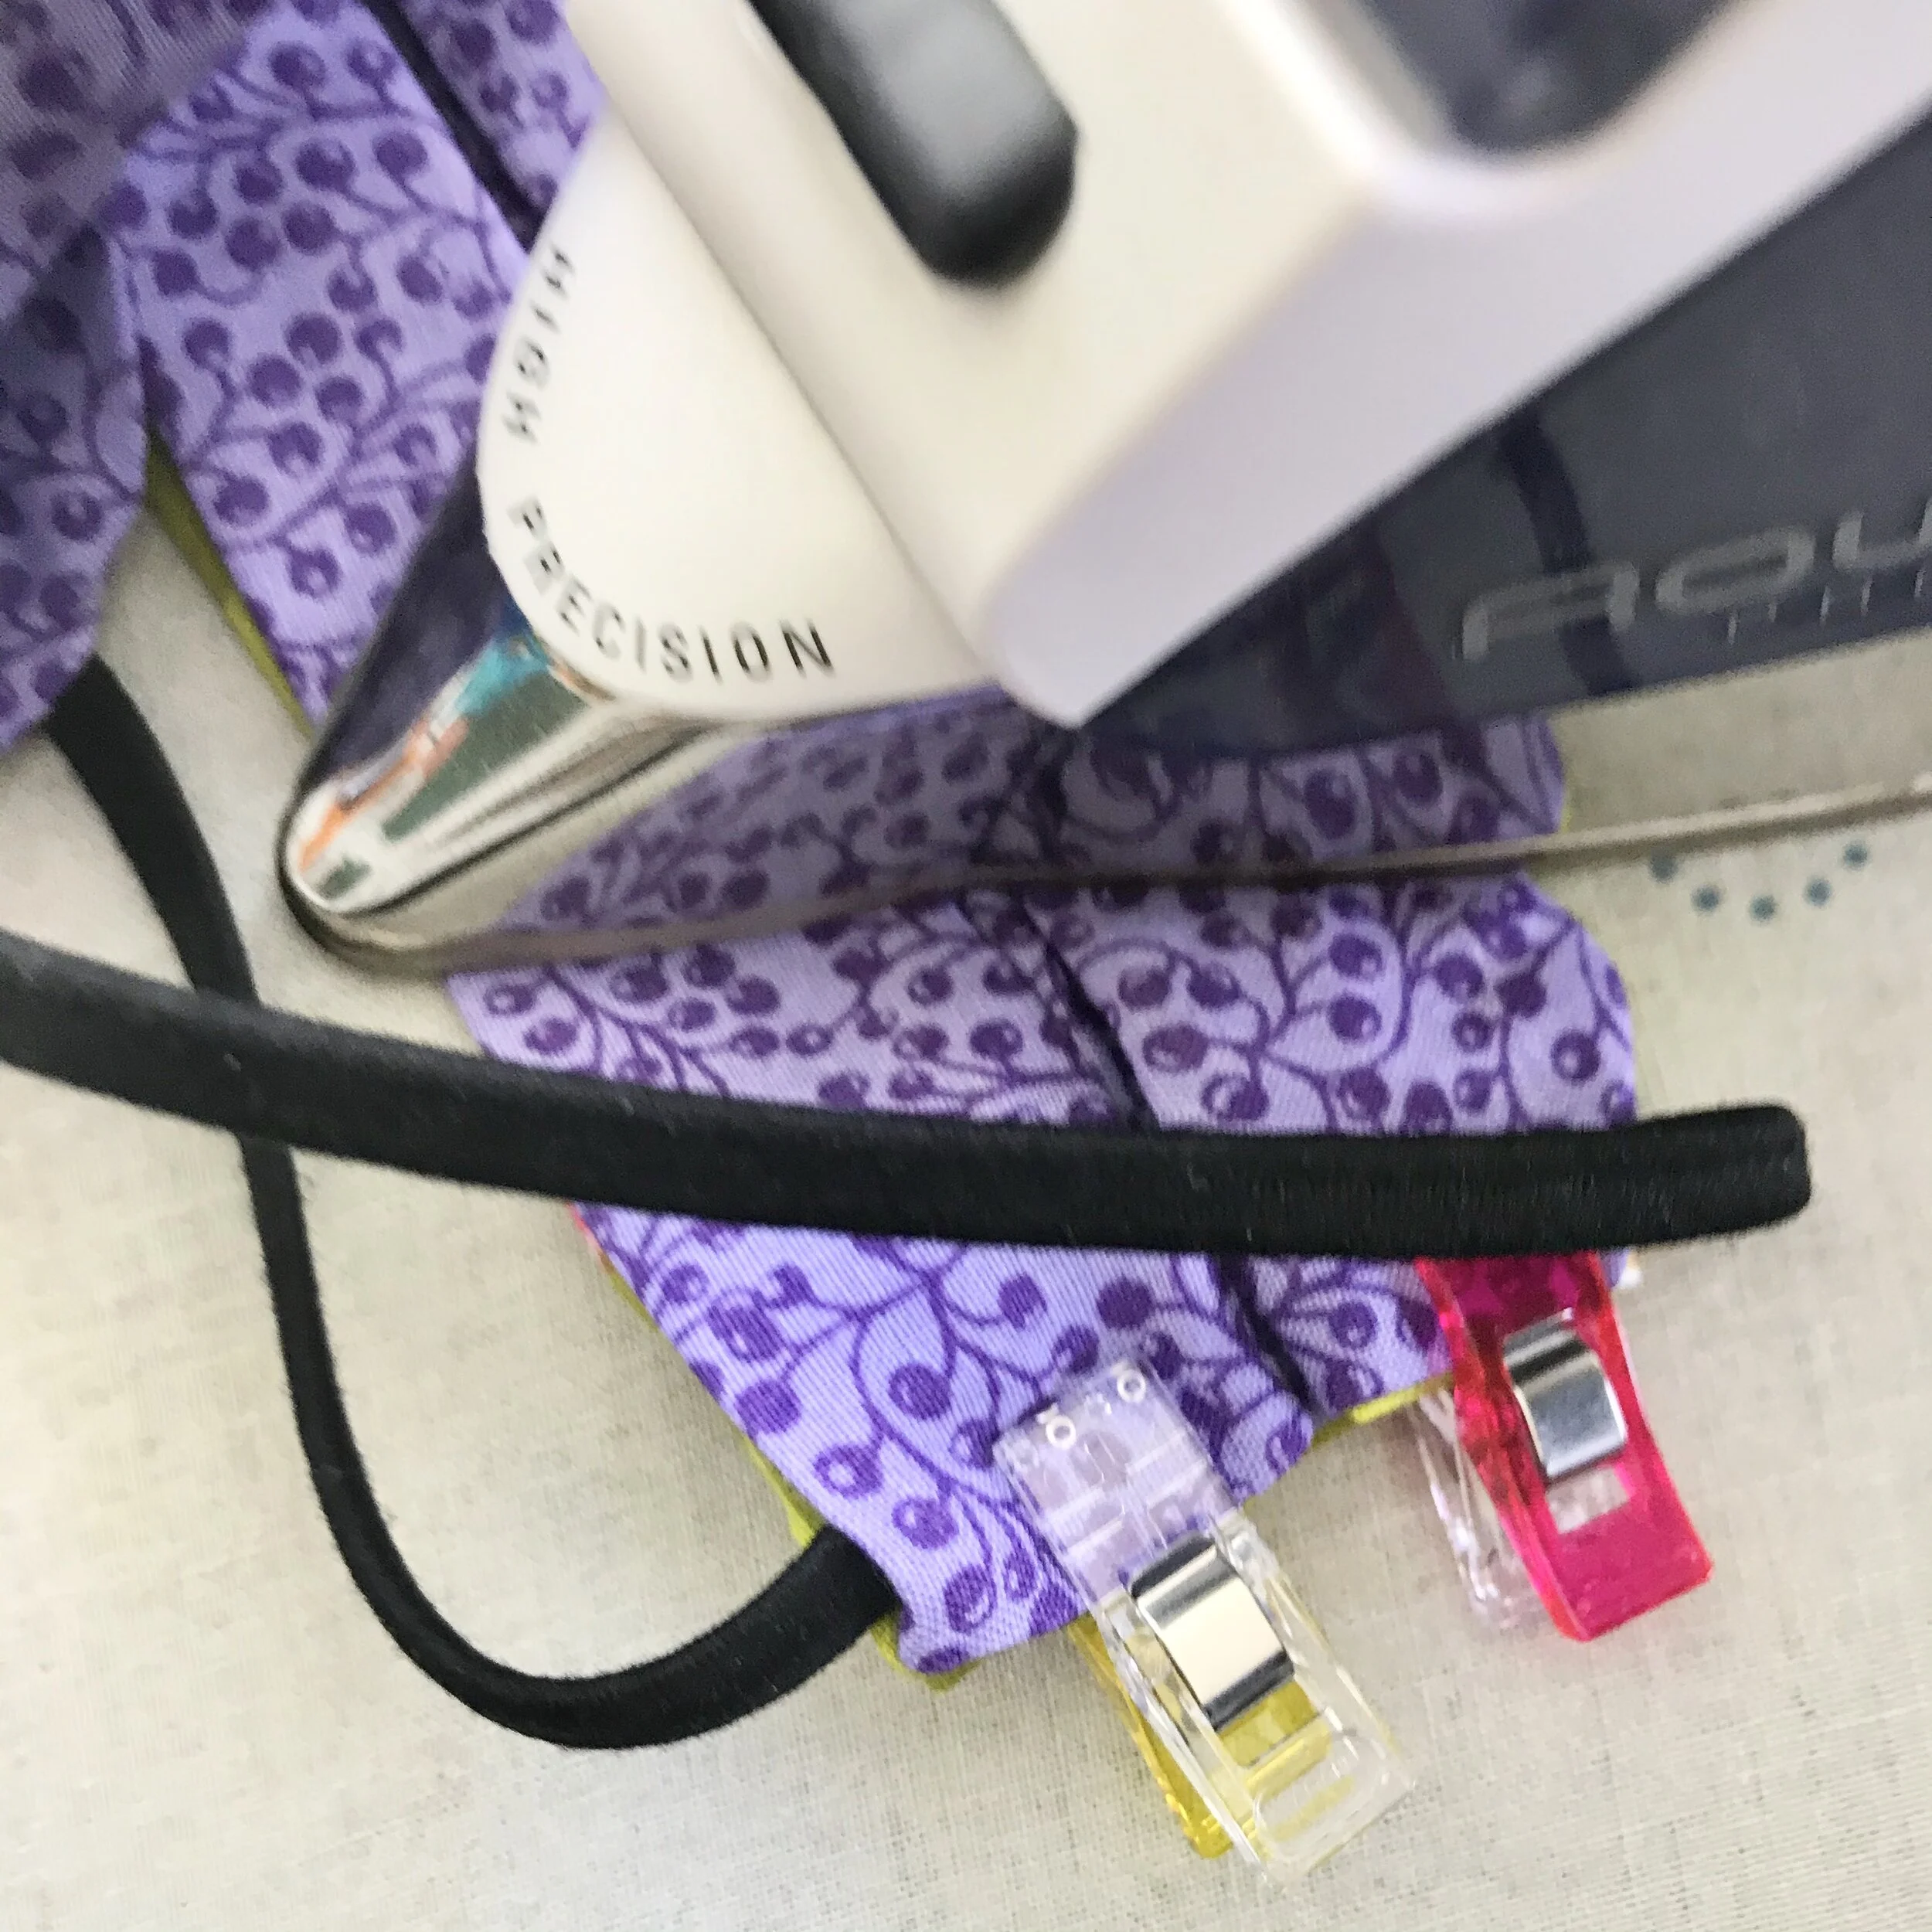
Step C: Sew the Side Seam
Sew the side seam taking care NOT to sew through the elastic. When finished with the seam, the headband should be half inside the mask emerging at each corner through the gaps created at each corner.
Repeat for the other side seam.
Continue with Step 7 below.
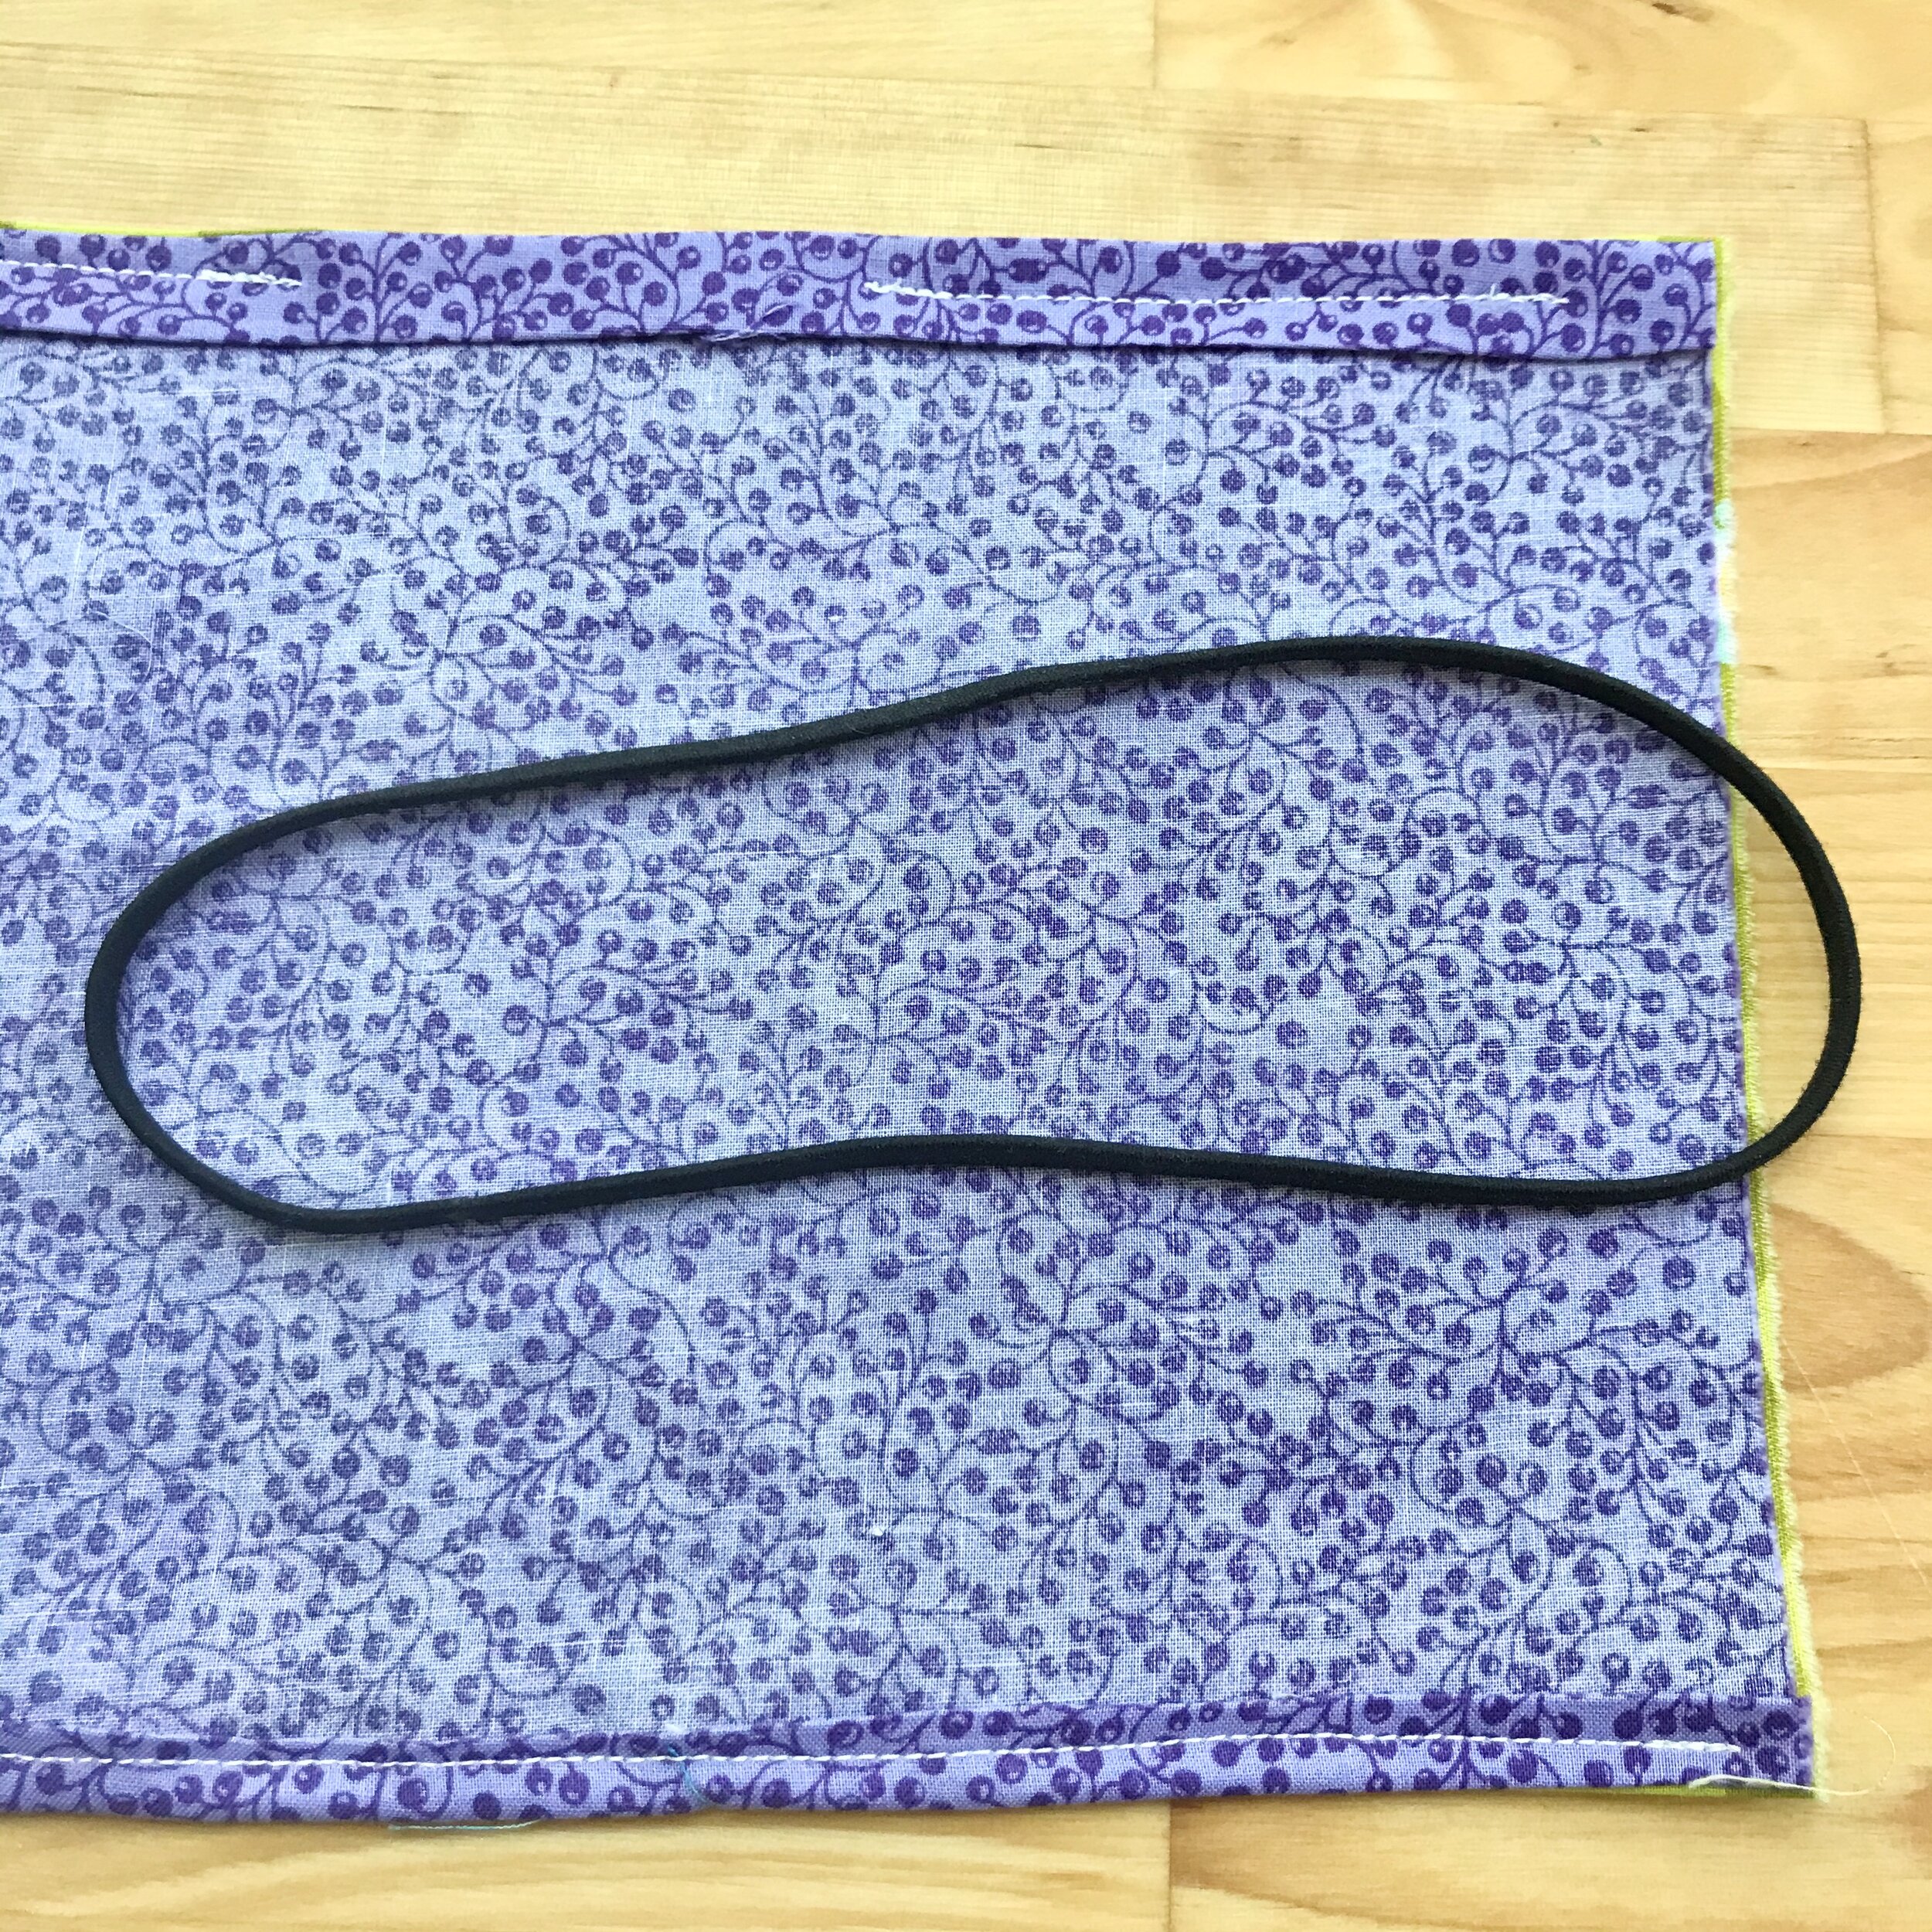
Using Elastic
When using elastic yardage, cut a piece of elastic approximately 20” long. I made masks using 1/4”, 1/2”, and 1” elastic — all using this method. The thicker elastic is more durable and will hold better for active children. If making a mask for running or other activities, I would recommend wider elastic, too.
Step A: Sew top & bottom Seams
Follow the basic mask instructions to sew the top and bottom seams.
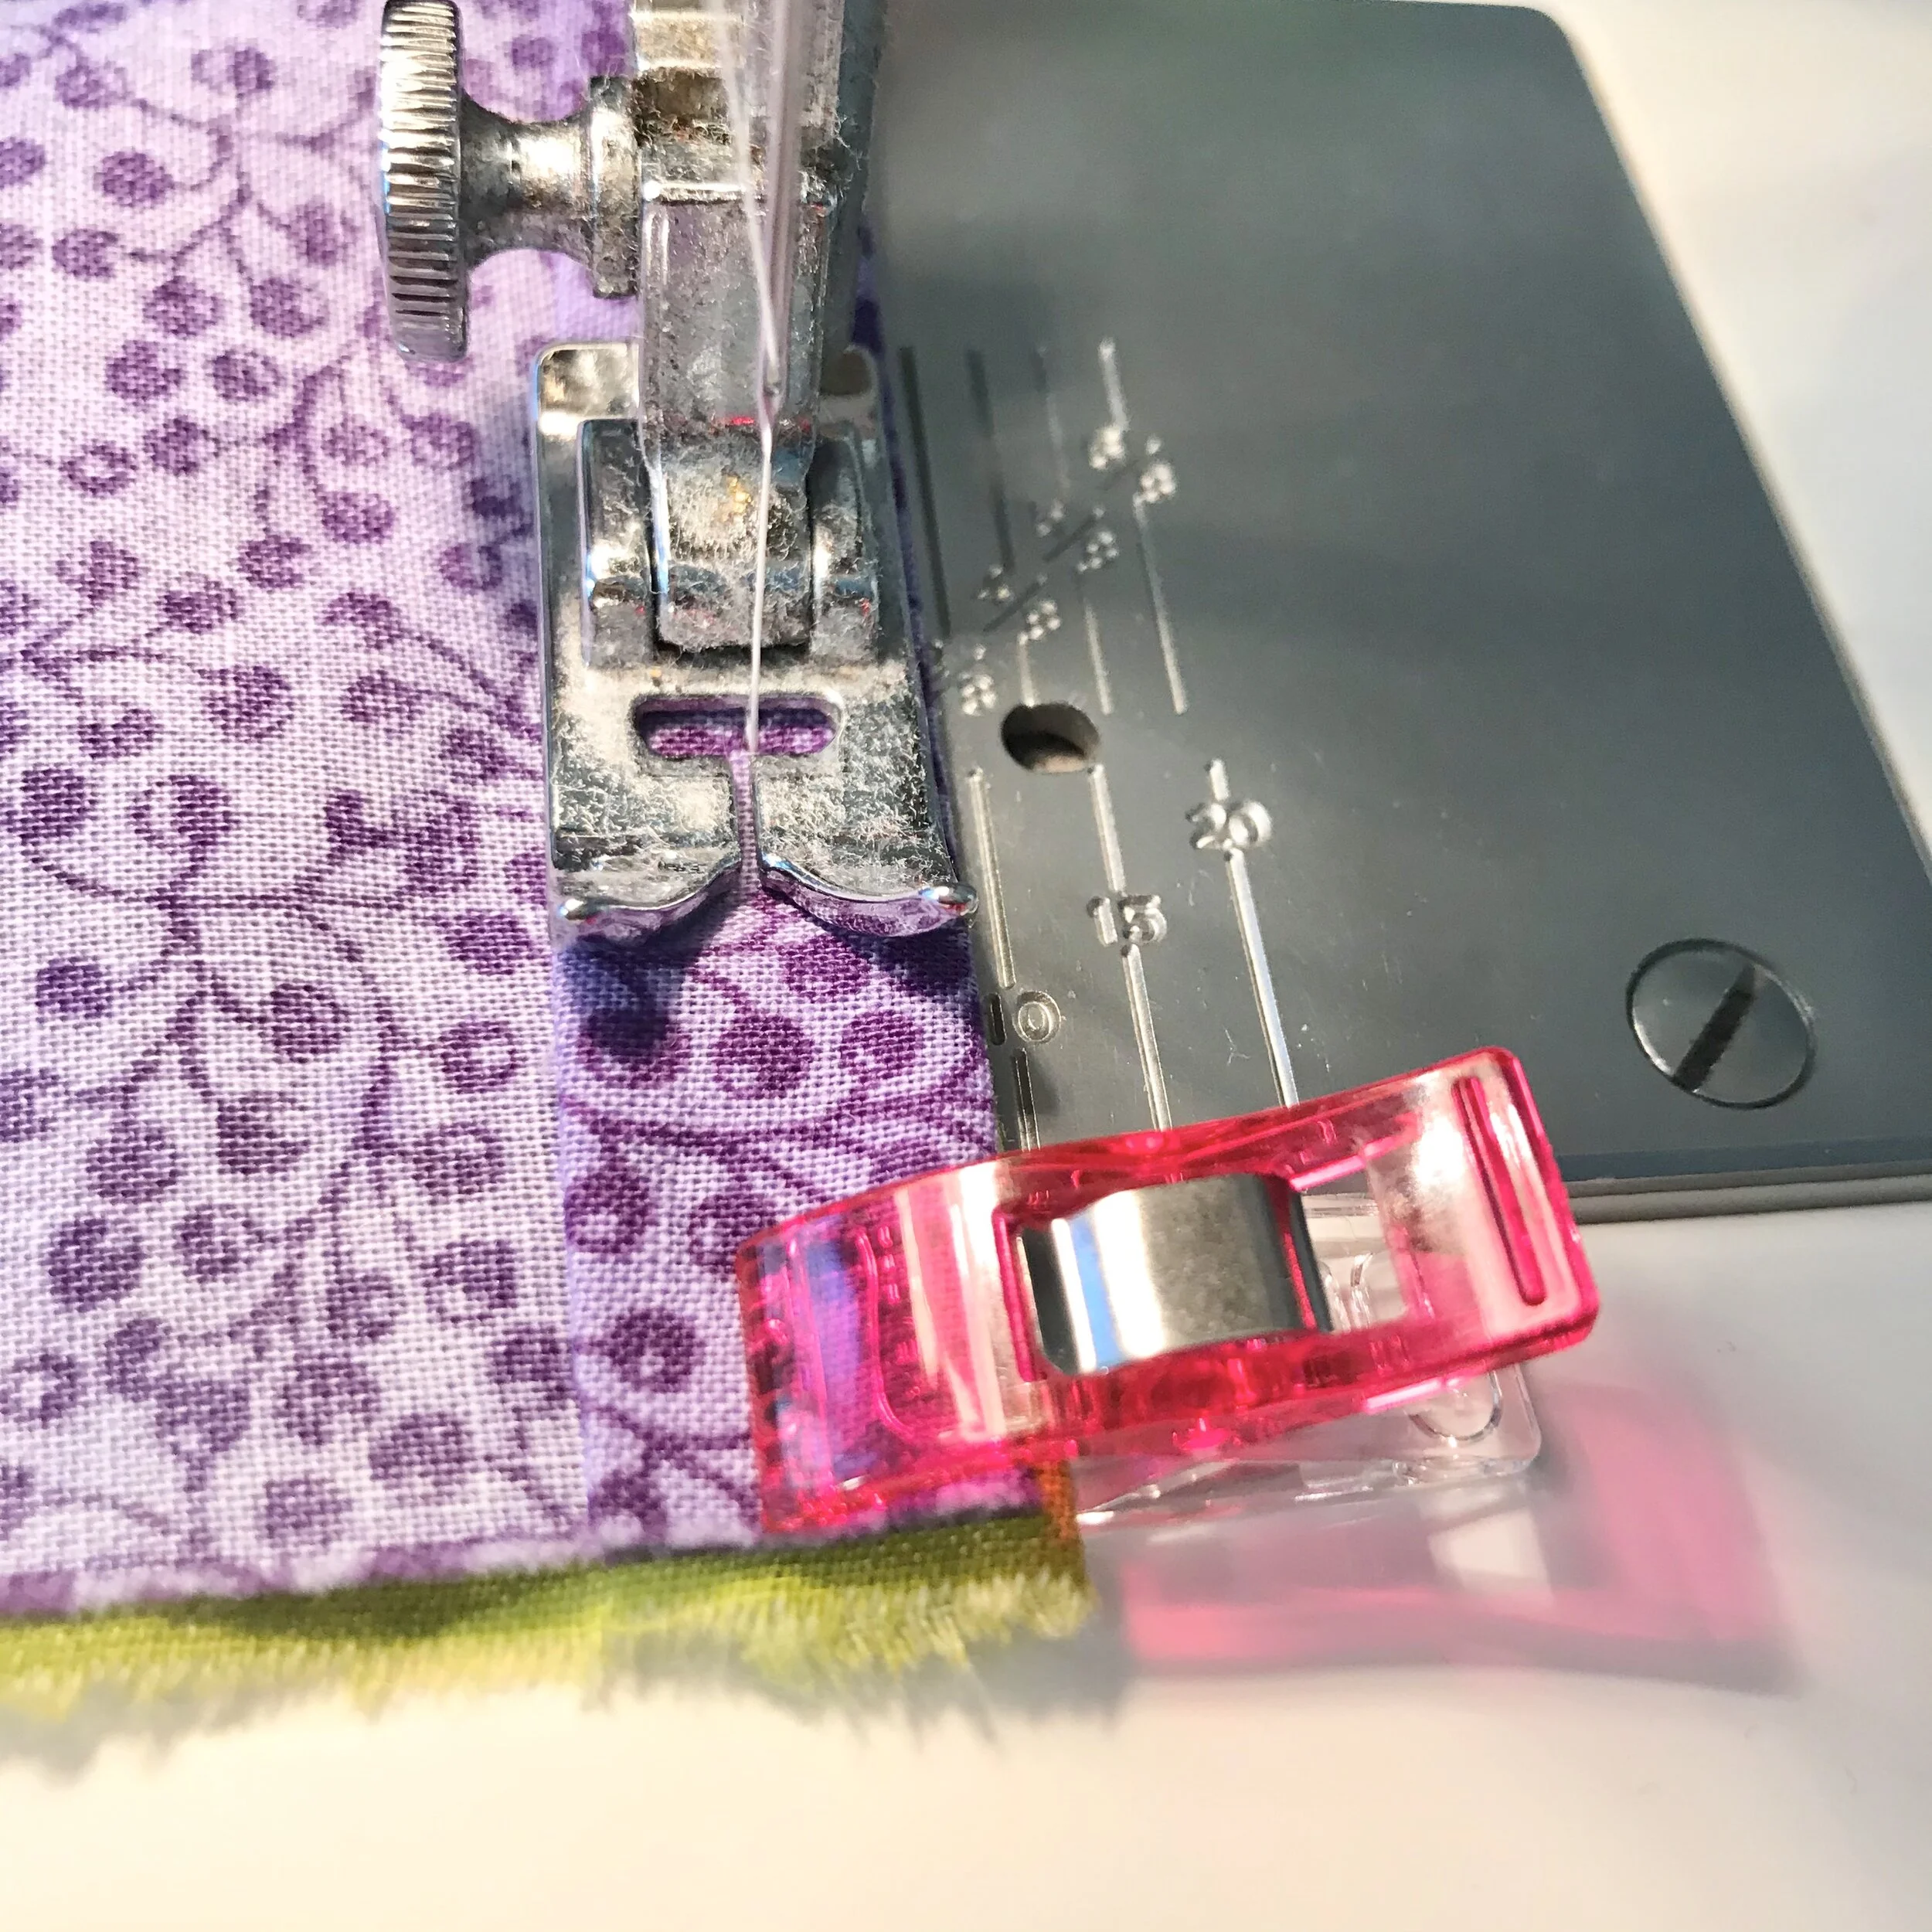
Step B: Sew the Side Seams
Sew the side seams making sure that at each corner a small gap remains between the side seams and the top and bottom seams. This is where you will feed the elastic.
StepC: Thread the Elastic
Using a safety pin, thread the elastic through each of the 4 corner openings.
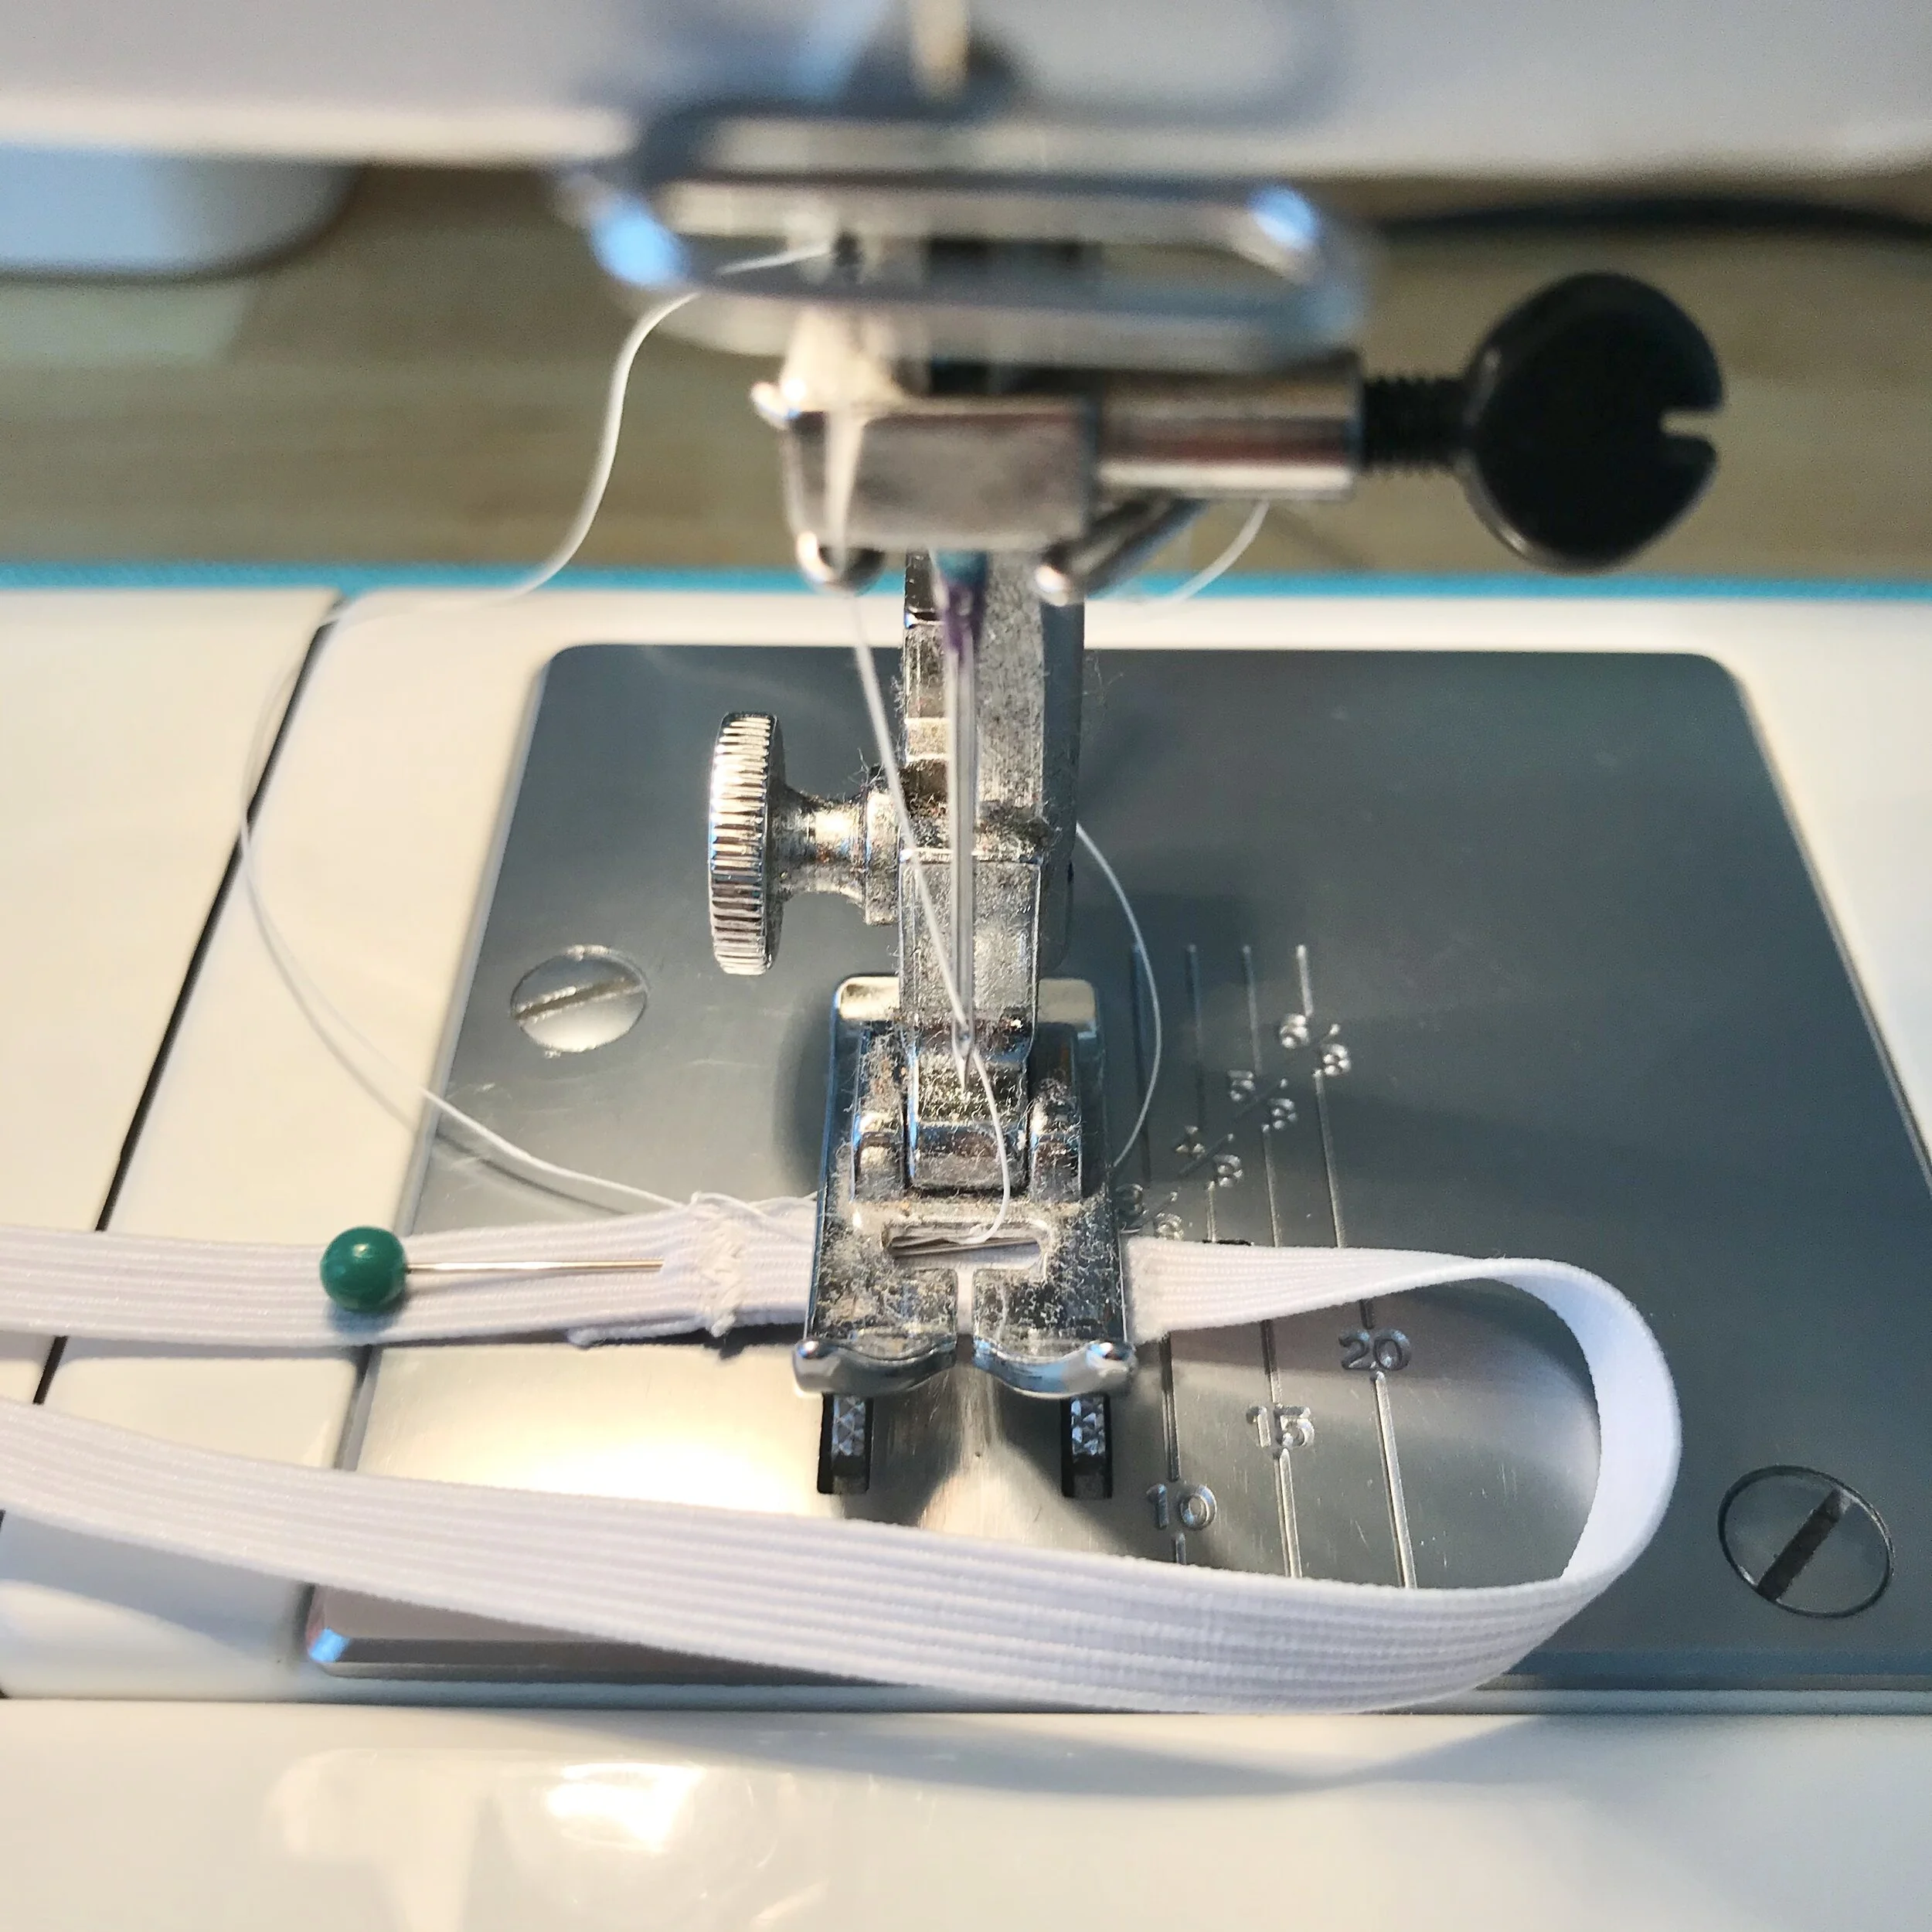
Step D: Stitch or Knot
Sew the ends of the elastic together or tie a secure knot.
Continue with Step 7 below.
Finishing Your Face Mask
Step 7: Turn the mask Right-Side Out
Use the filter gap in the top seam to turn the mask right-side out.
Step 8: Press
Press the mask seams and corners. The mask won’t lay flat.
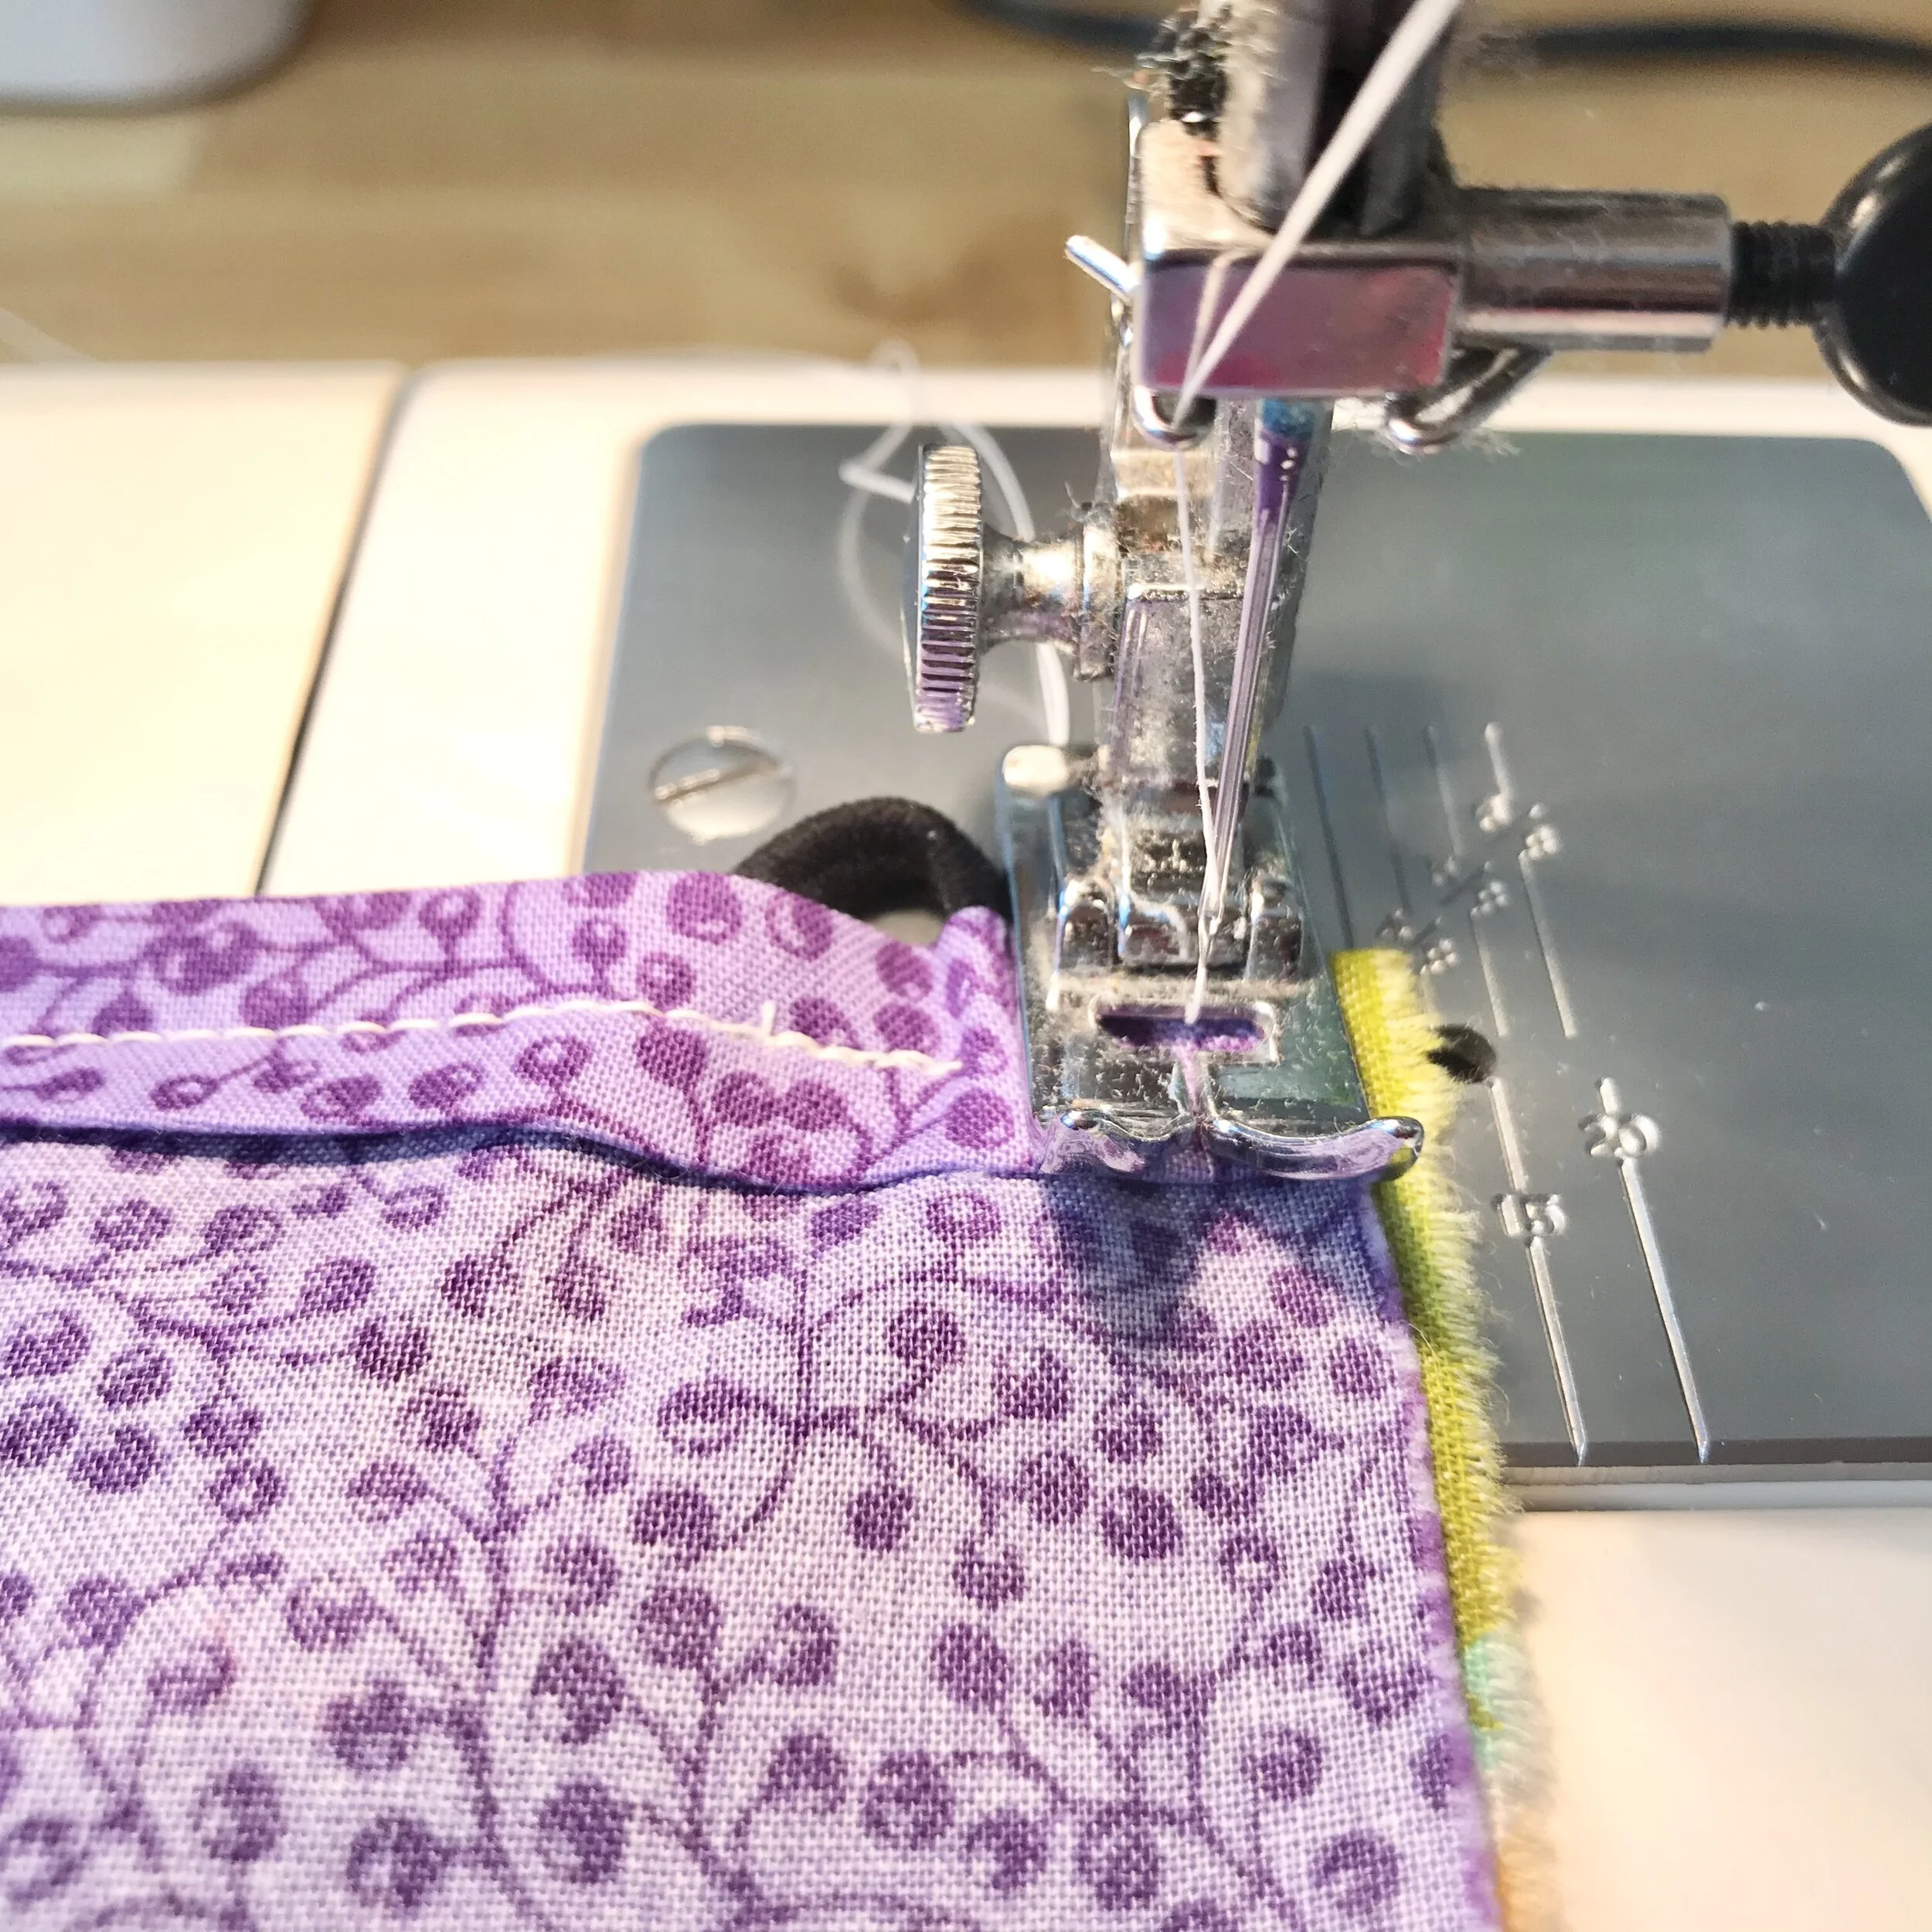
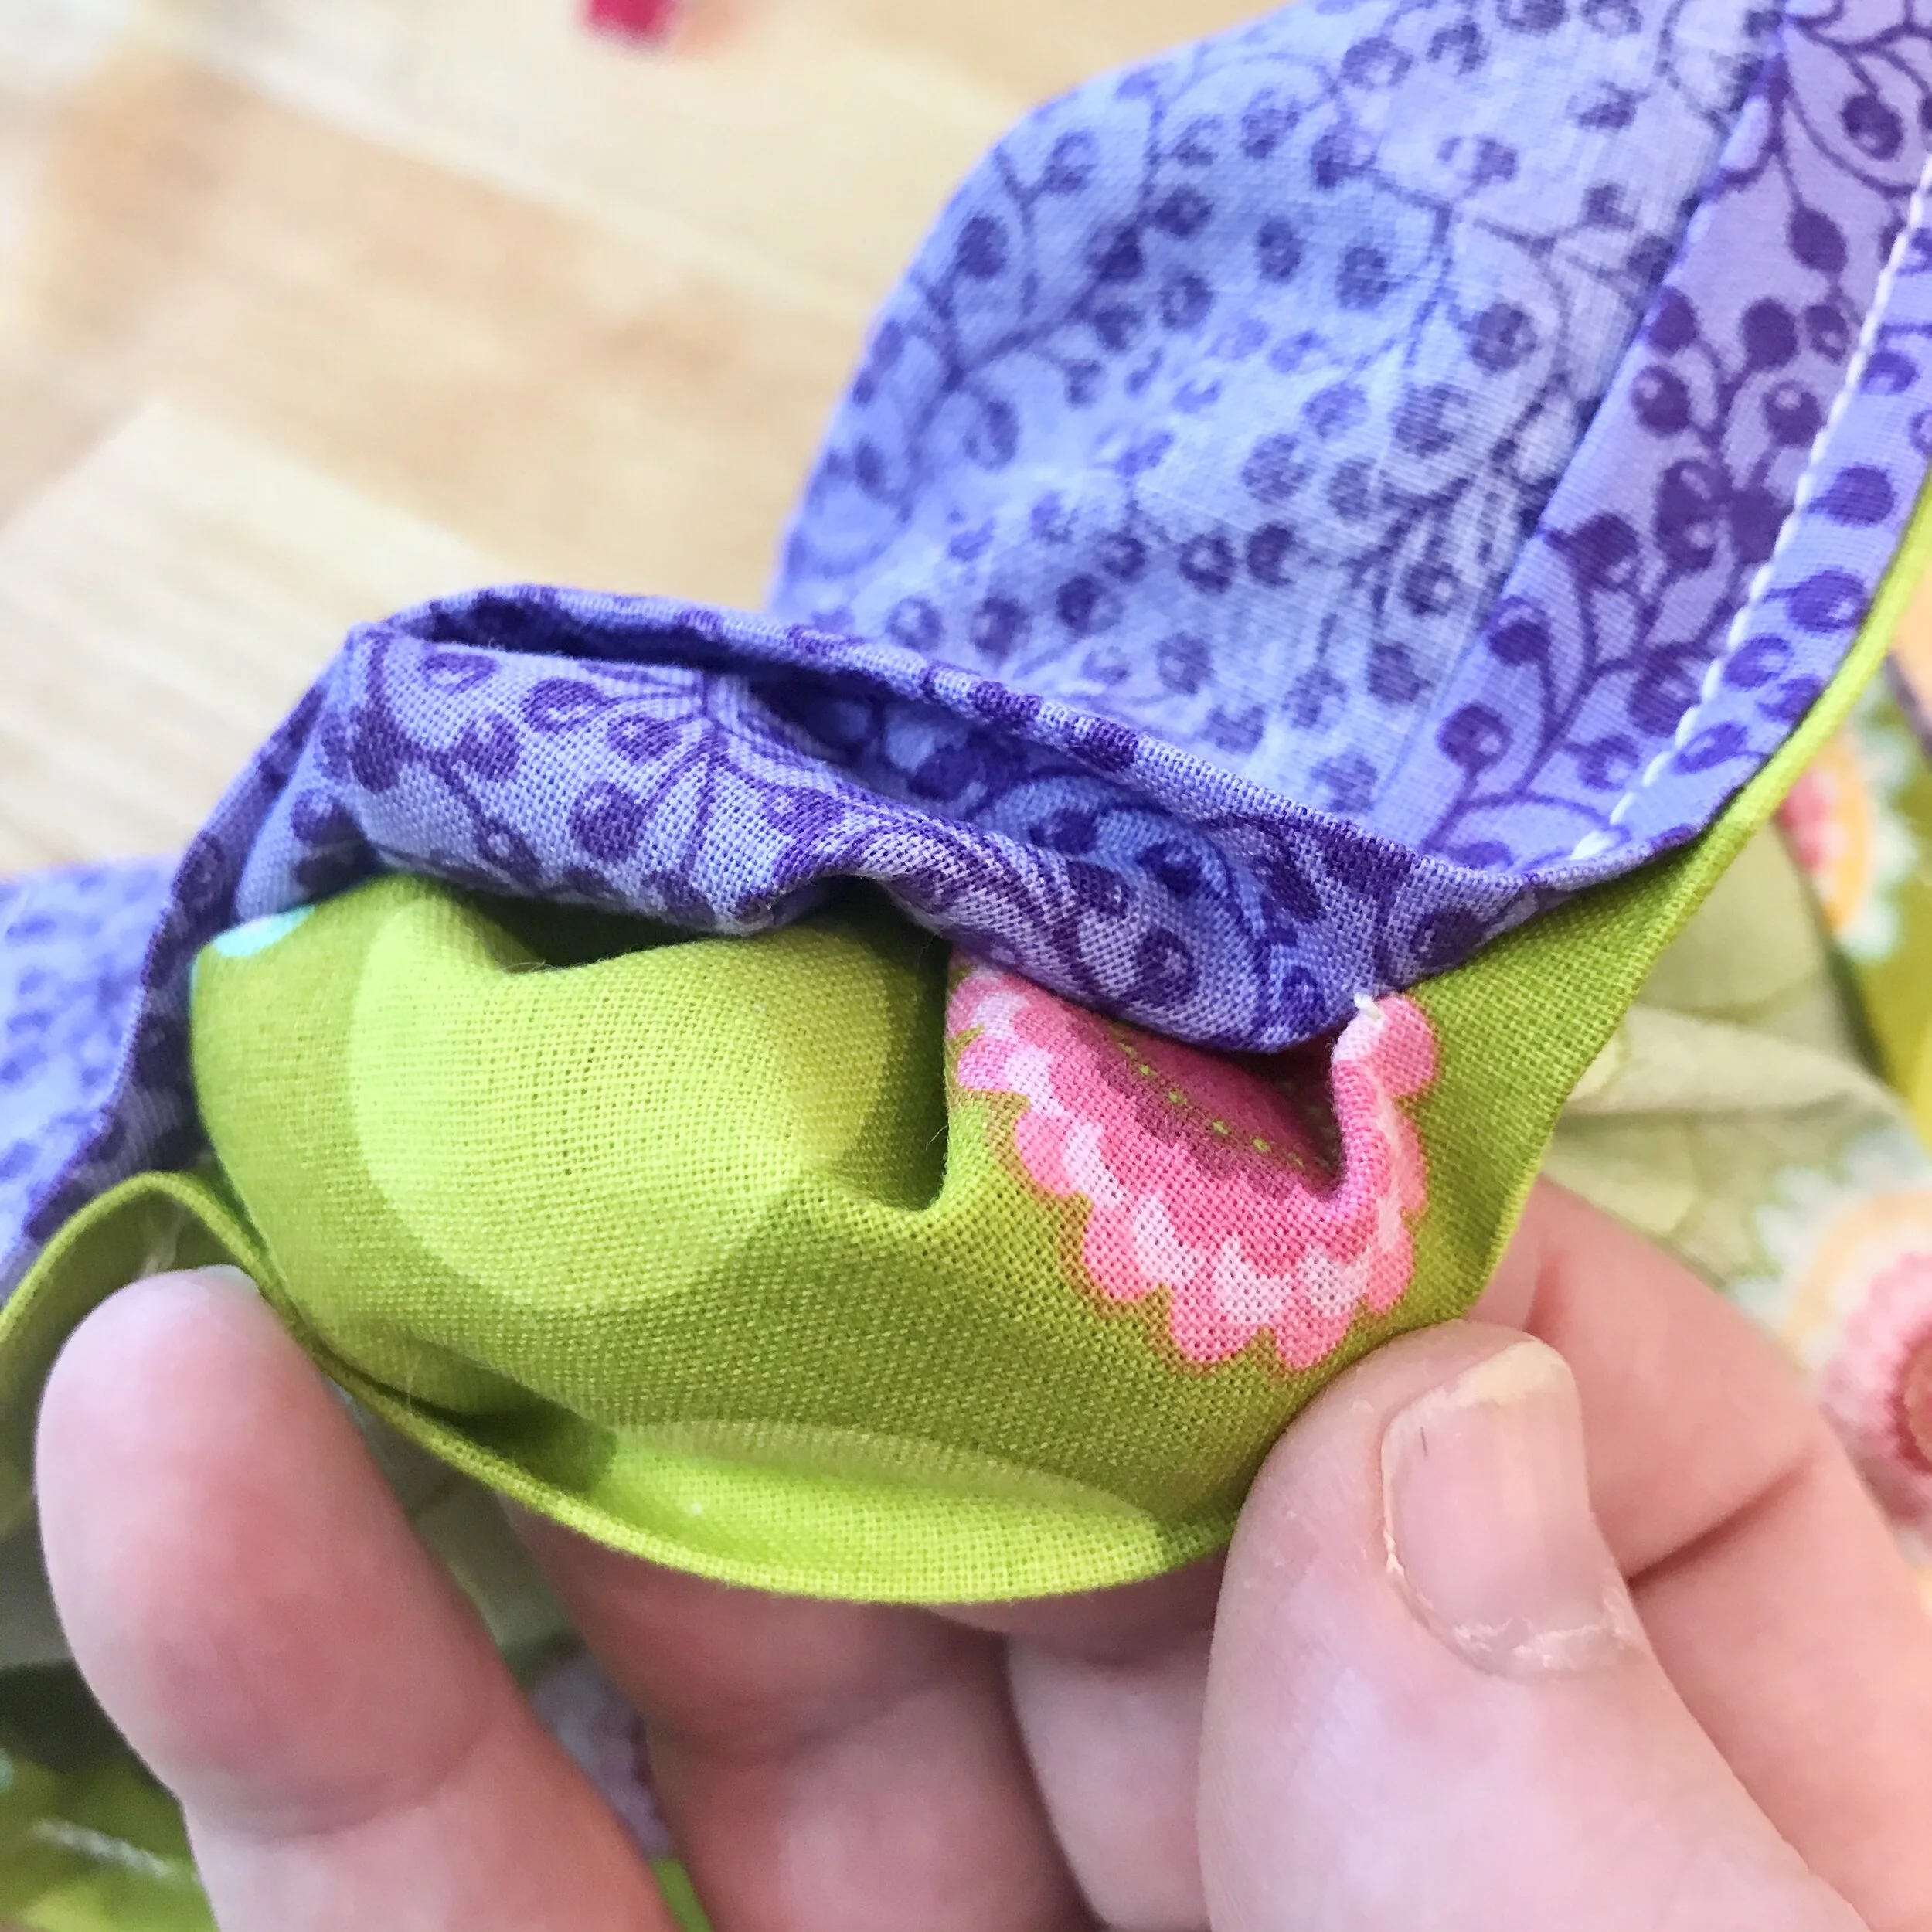
Step 9: Clip Pleats
Fold the side seams as shown creating one box pleat. Secure with pins or clips. Repeat on the other side seam.
Step 10: Press
Press the box pleats.
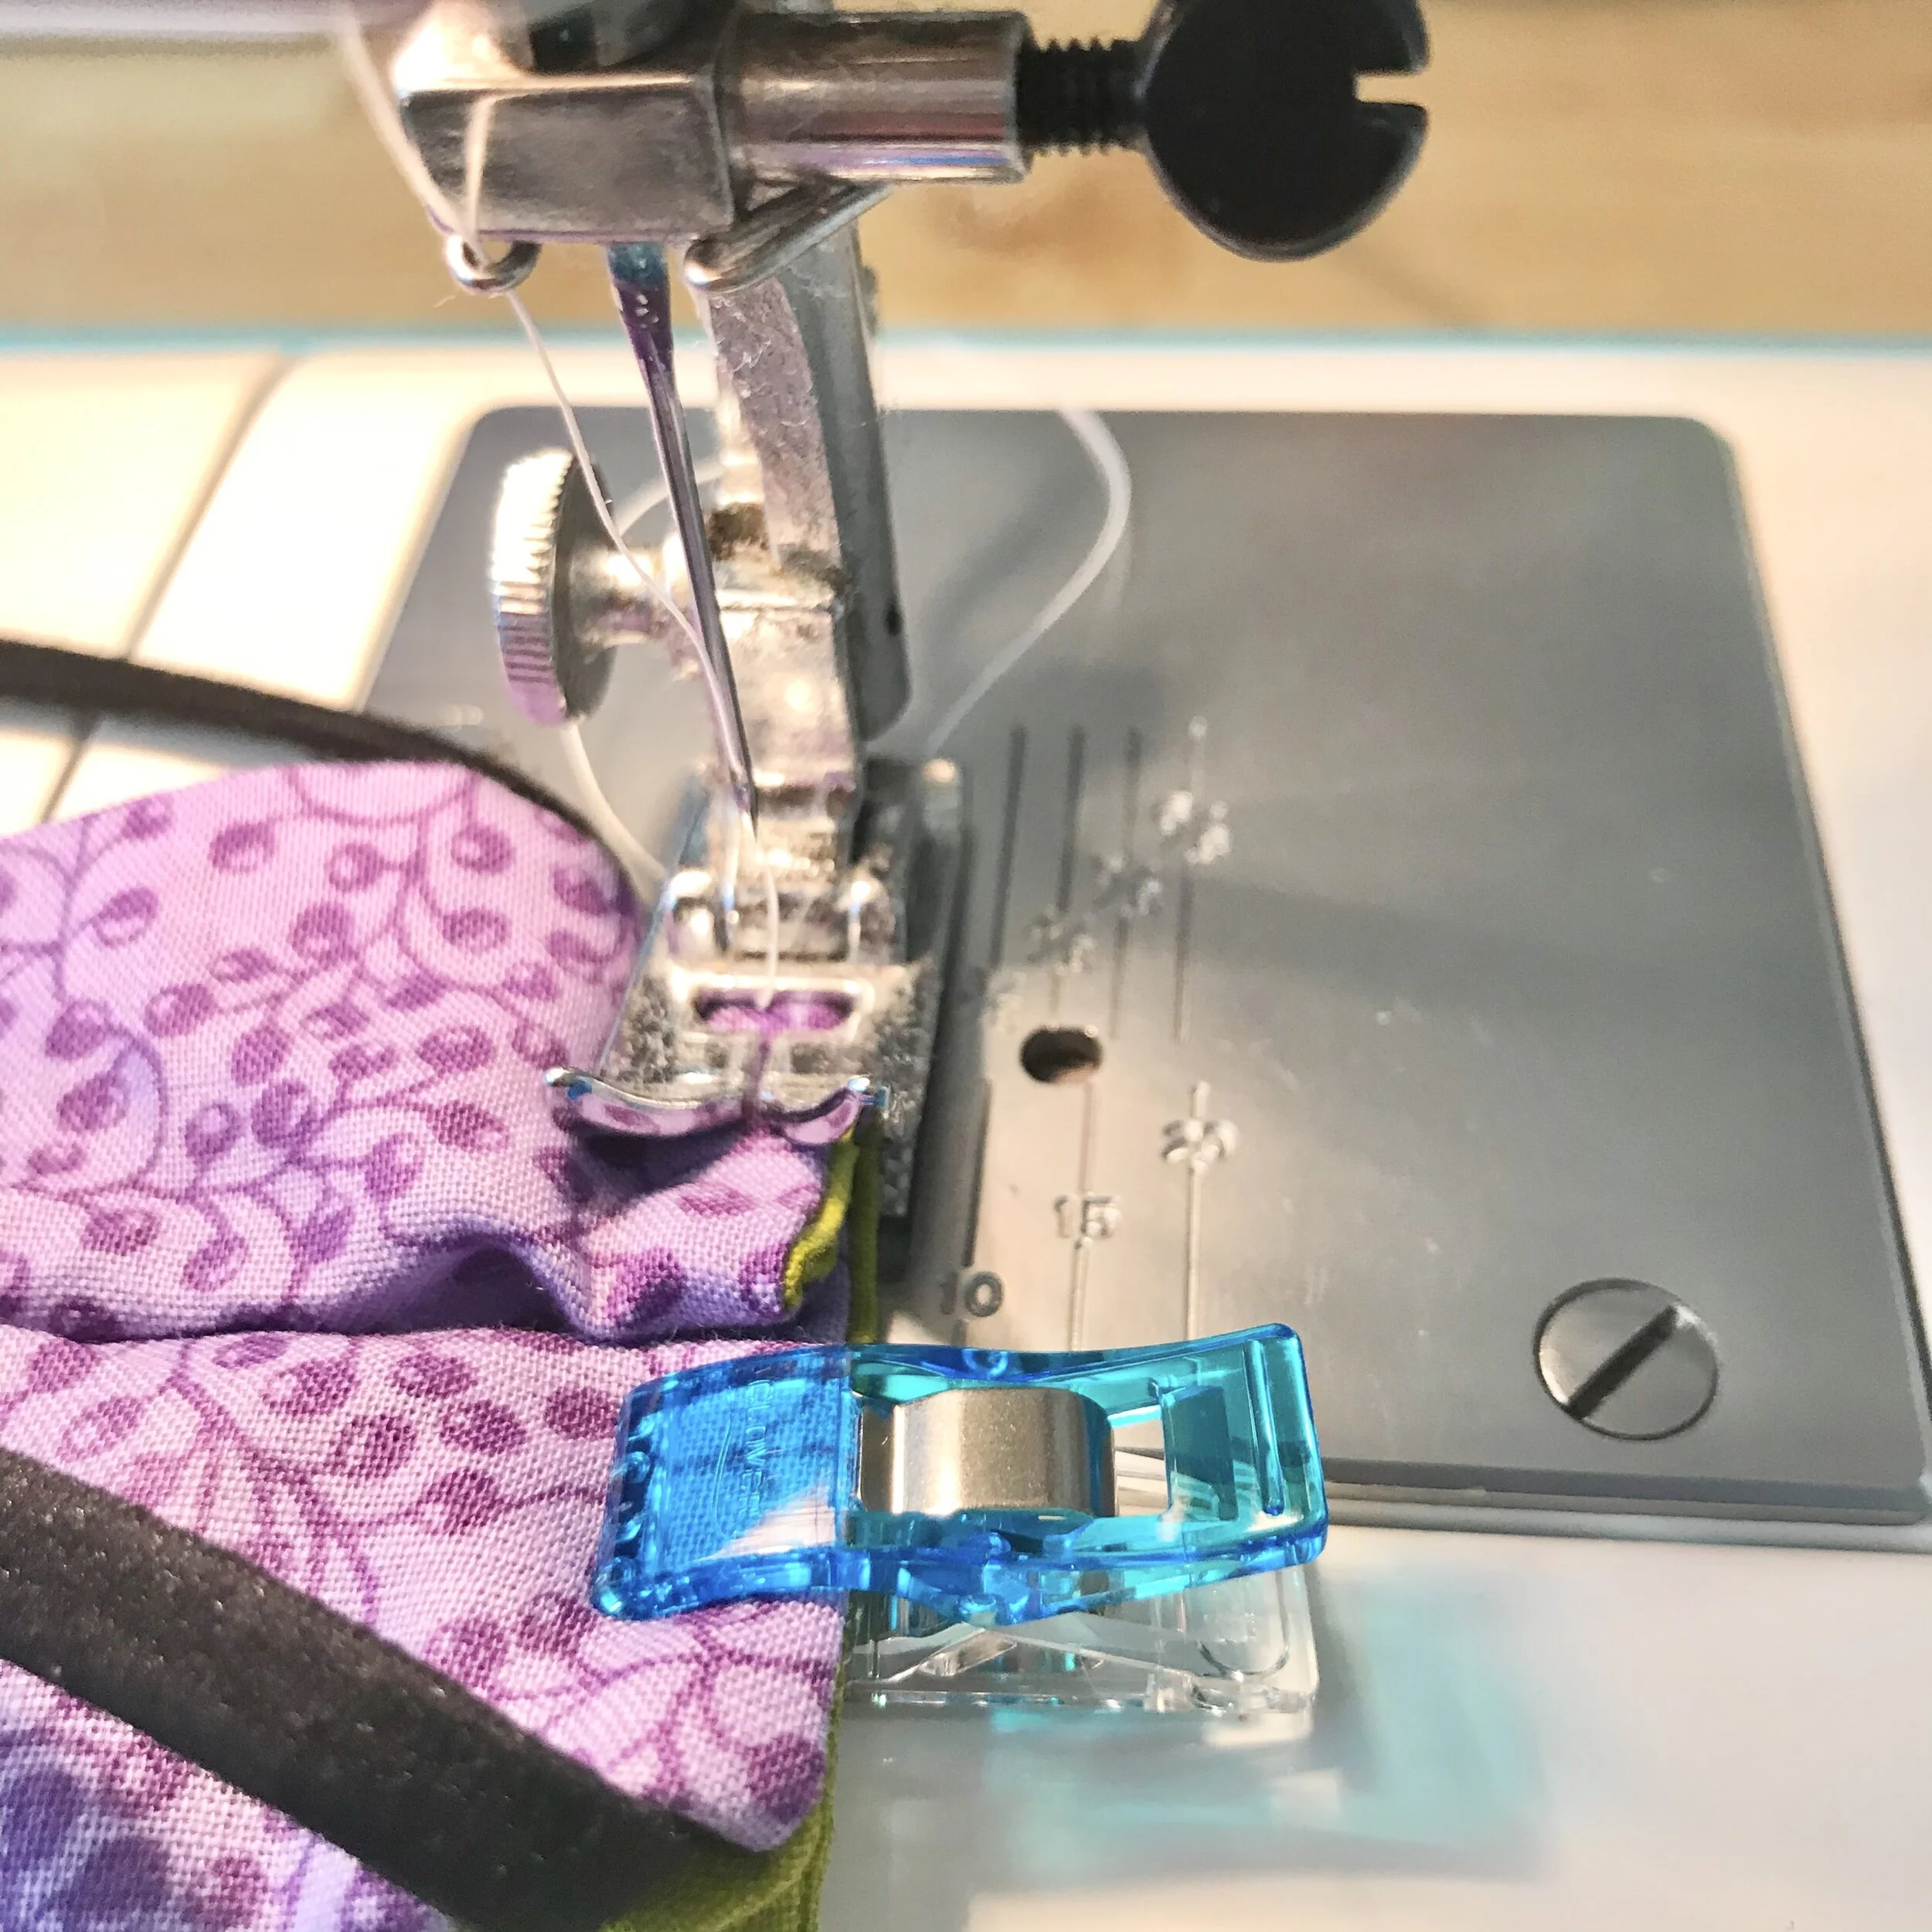
Step 11: Stitch the Pleats
Carefully stitch down the box pleats taking care NOT to sew the elastic into the seam.
Stitched-down Pleats
Sew as close to the edge of the fabric as possible.

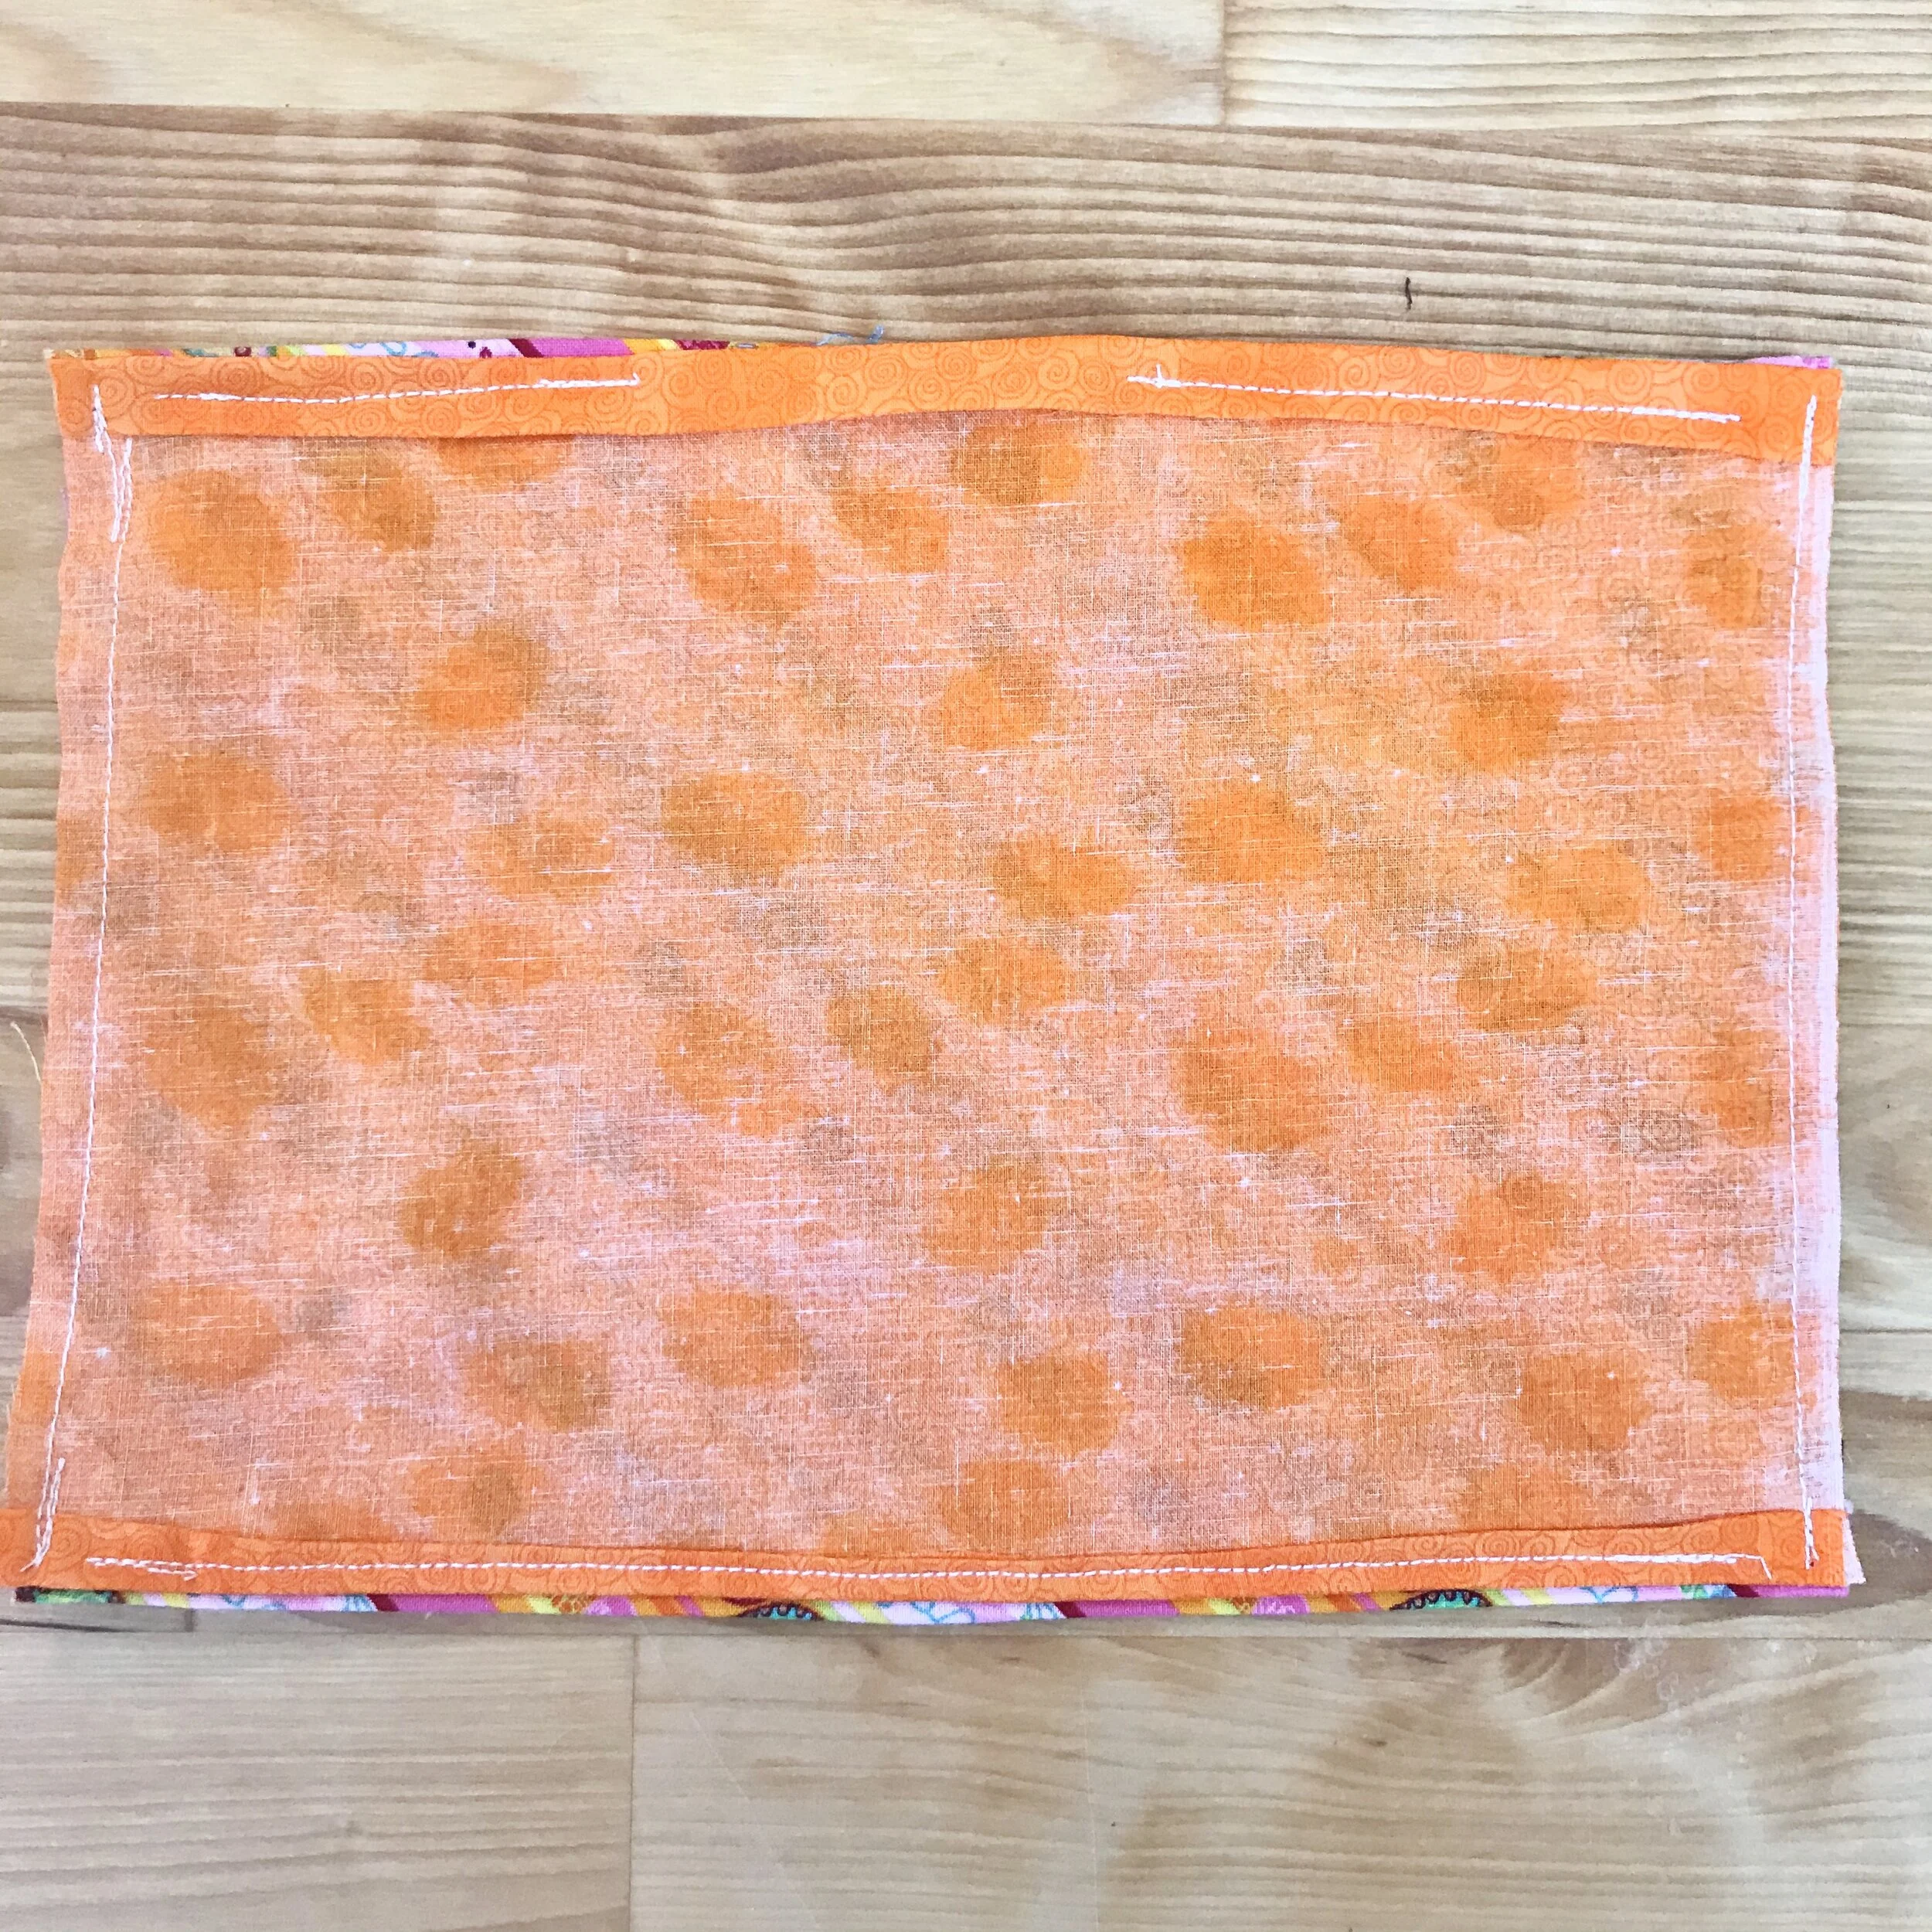
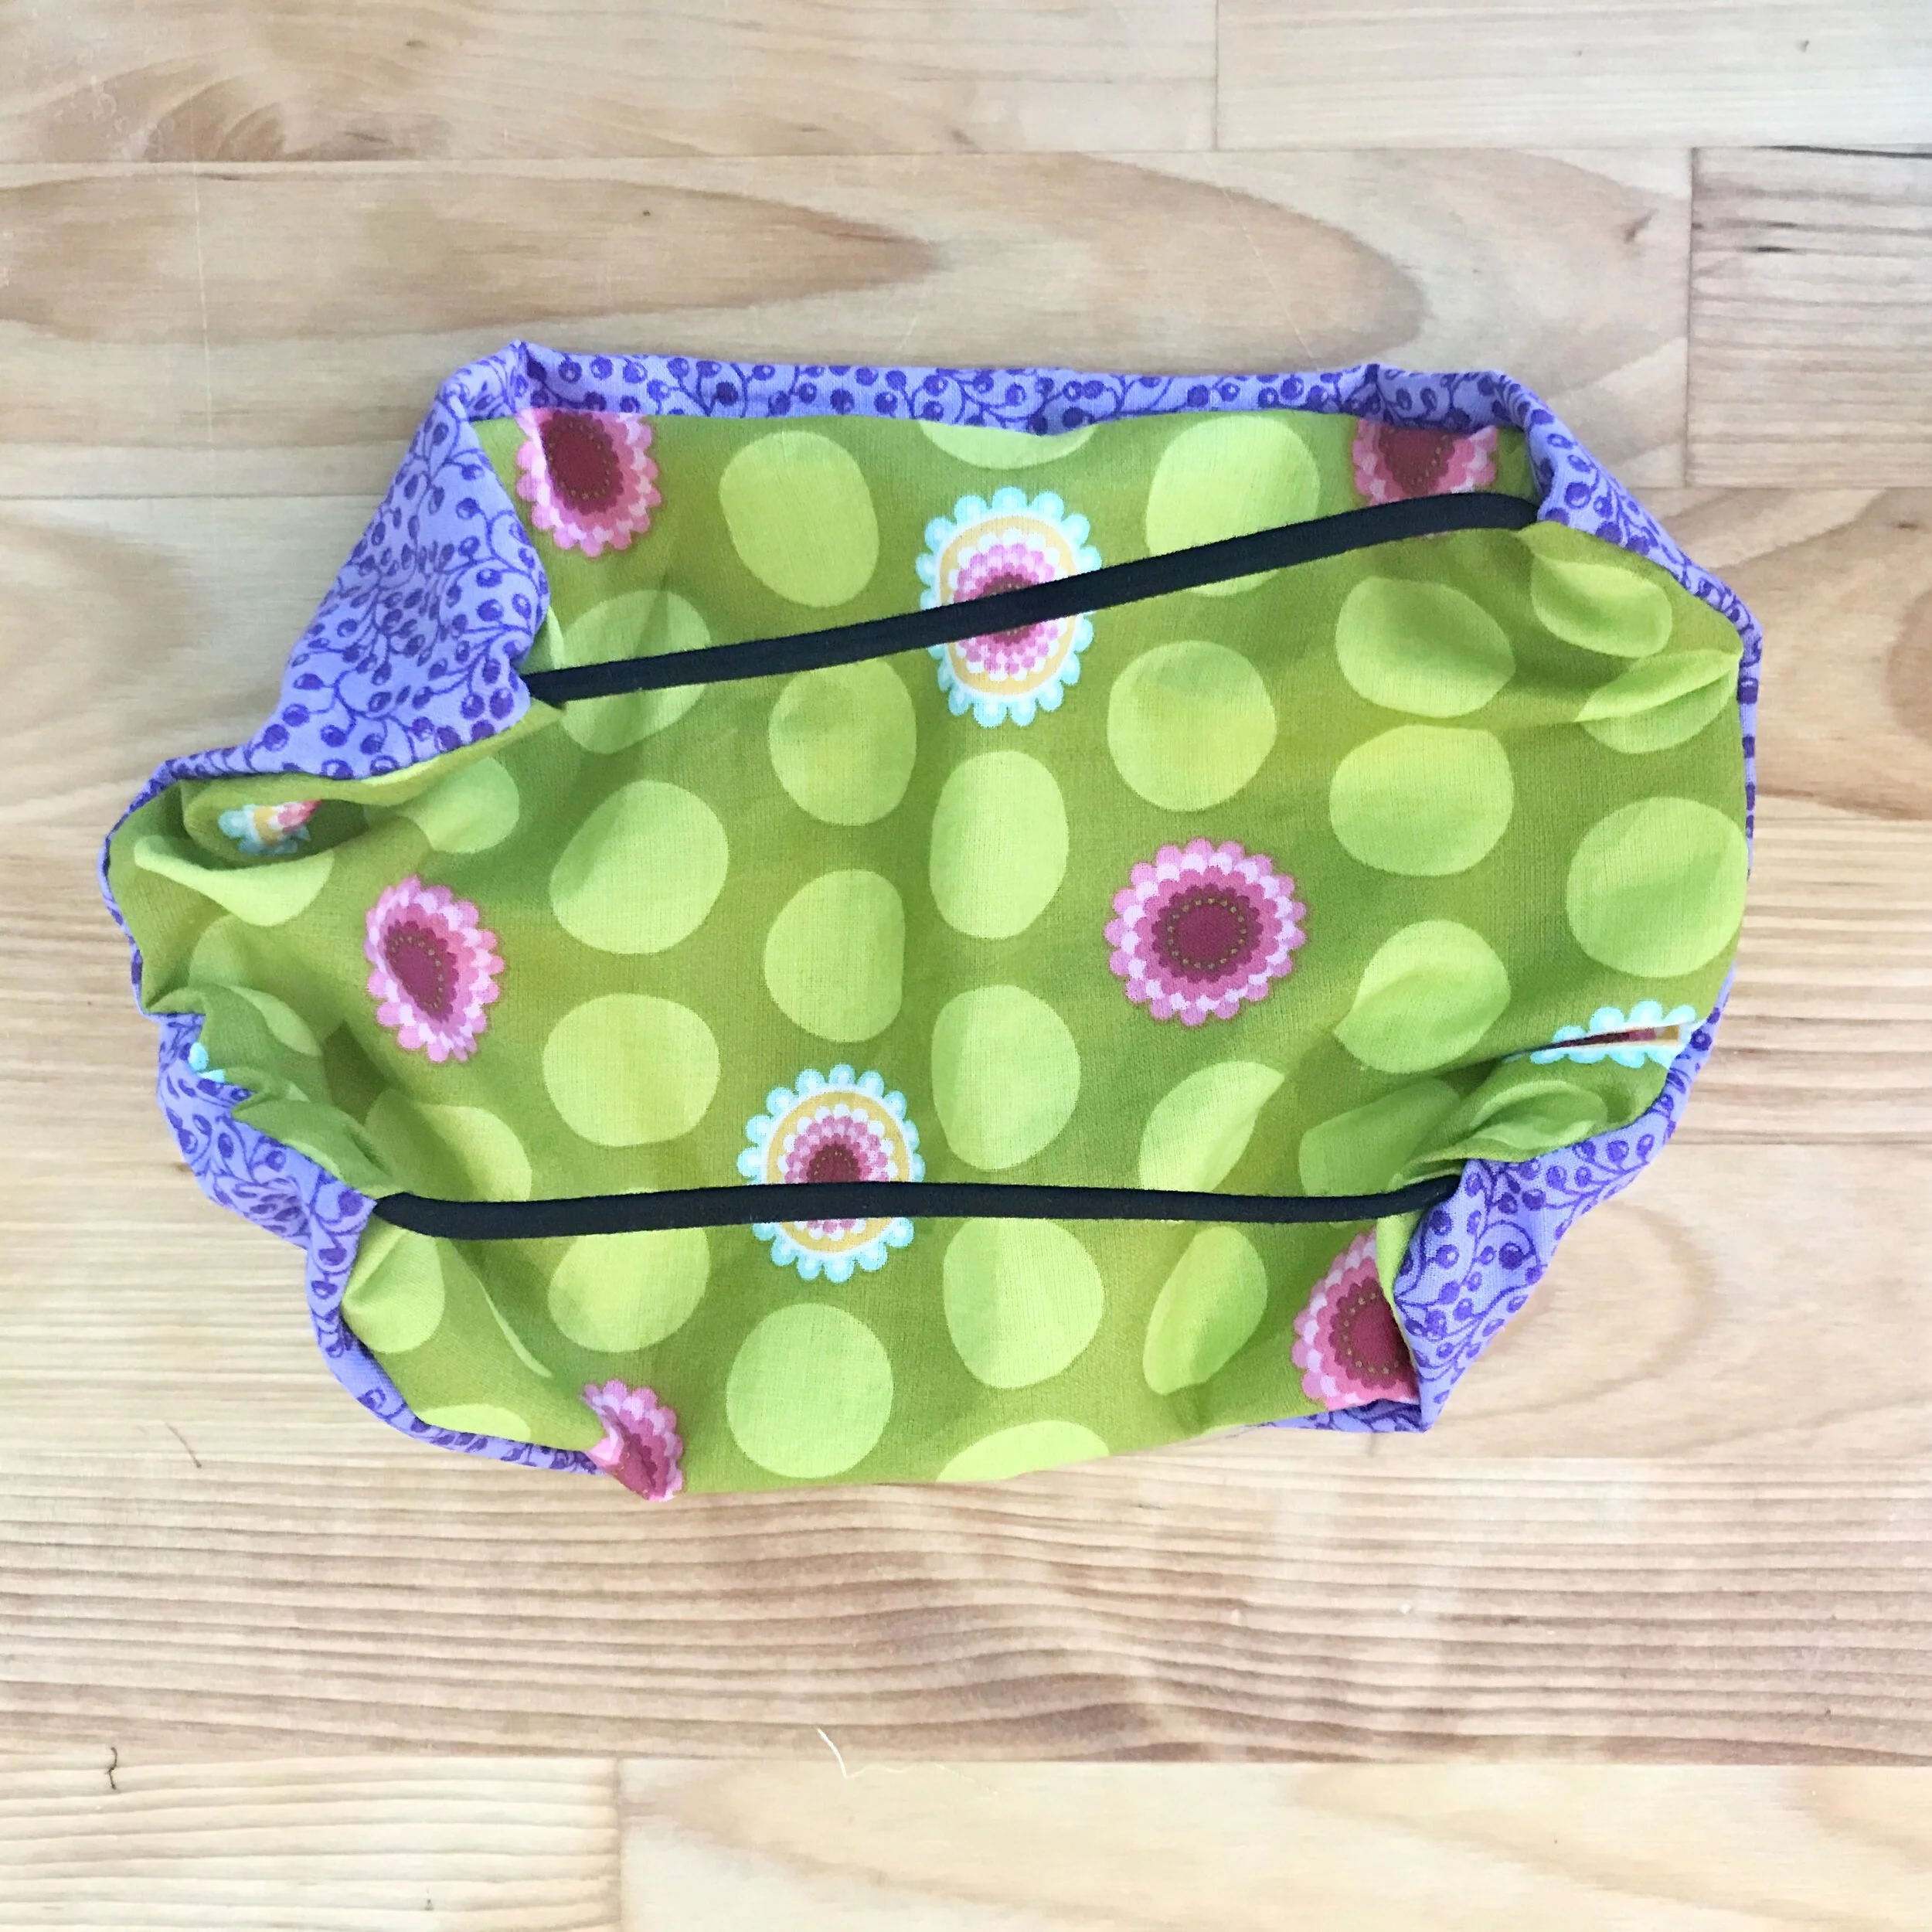
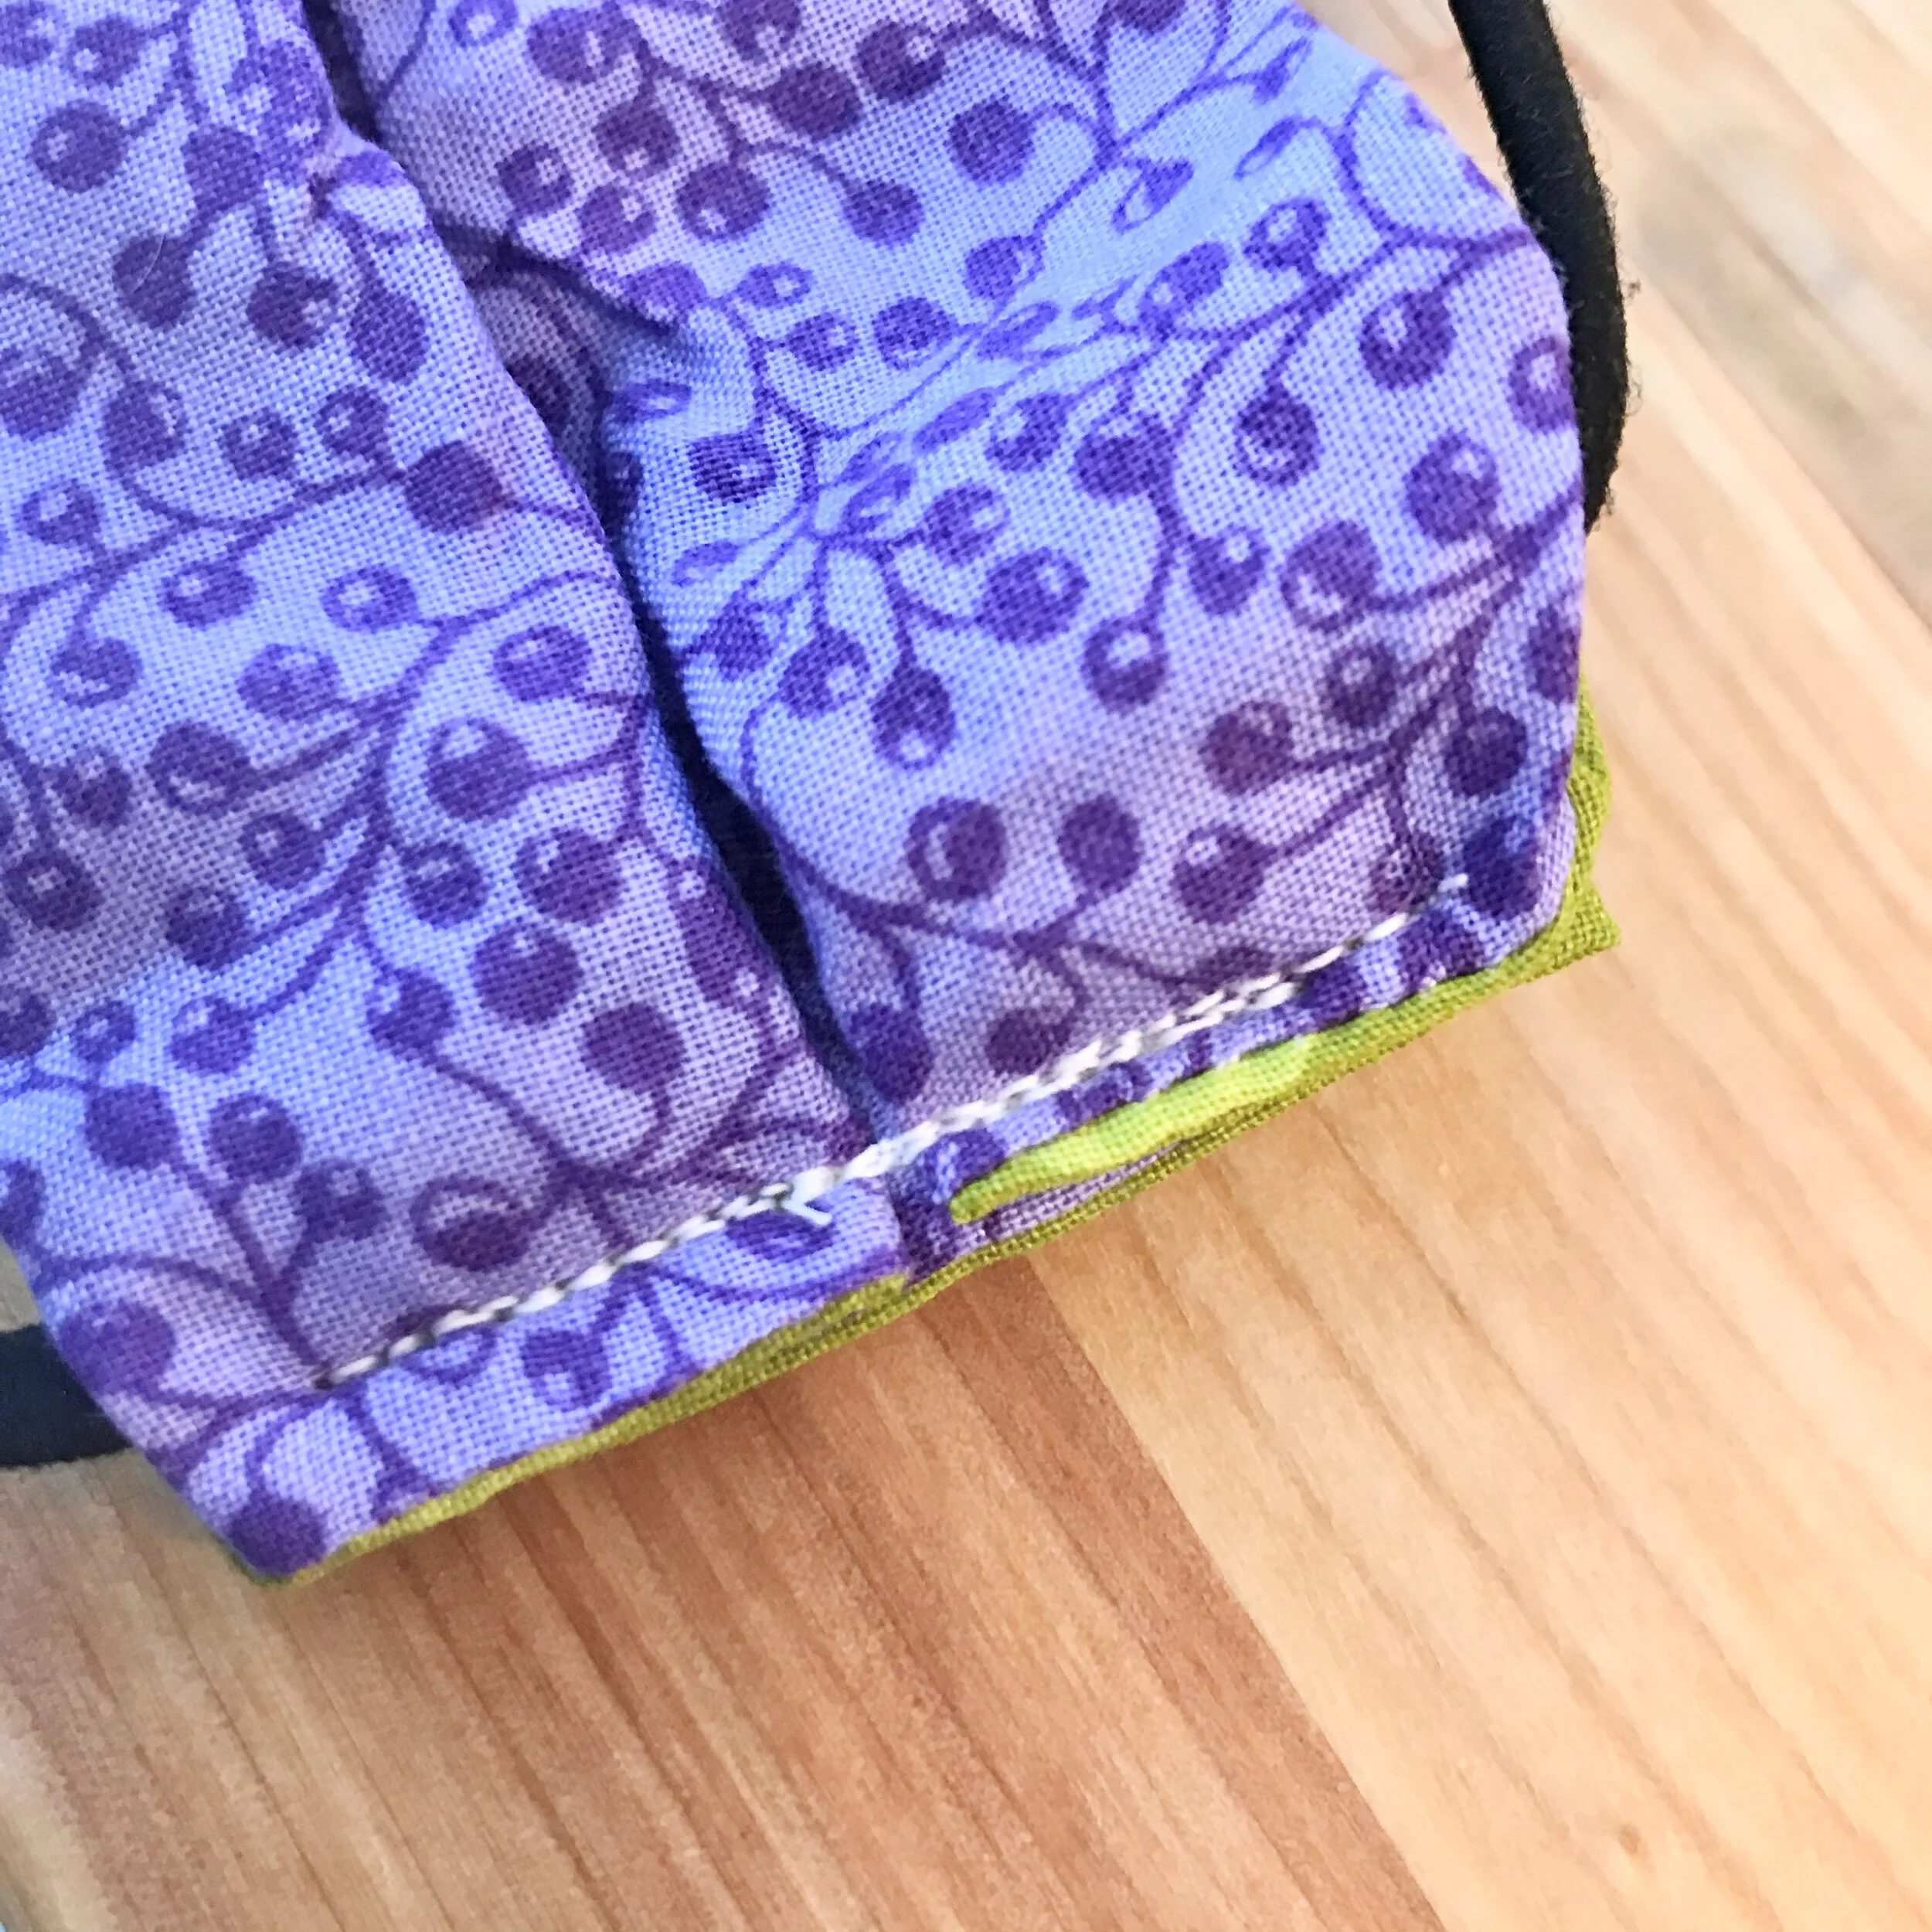
Completed Mask
Your mask is now done and is reversible! Wear it in good health!
No matter how you make your mask, be sure to wear it every time you leave the house. Wash it immediately when you return home, and practice good hygiene at home and beyond. And stay home! We are all in this together, and together we will flatten the curve. Be well!
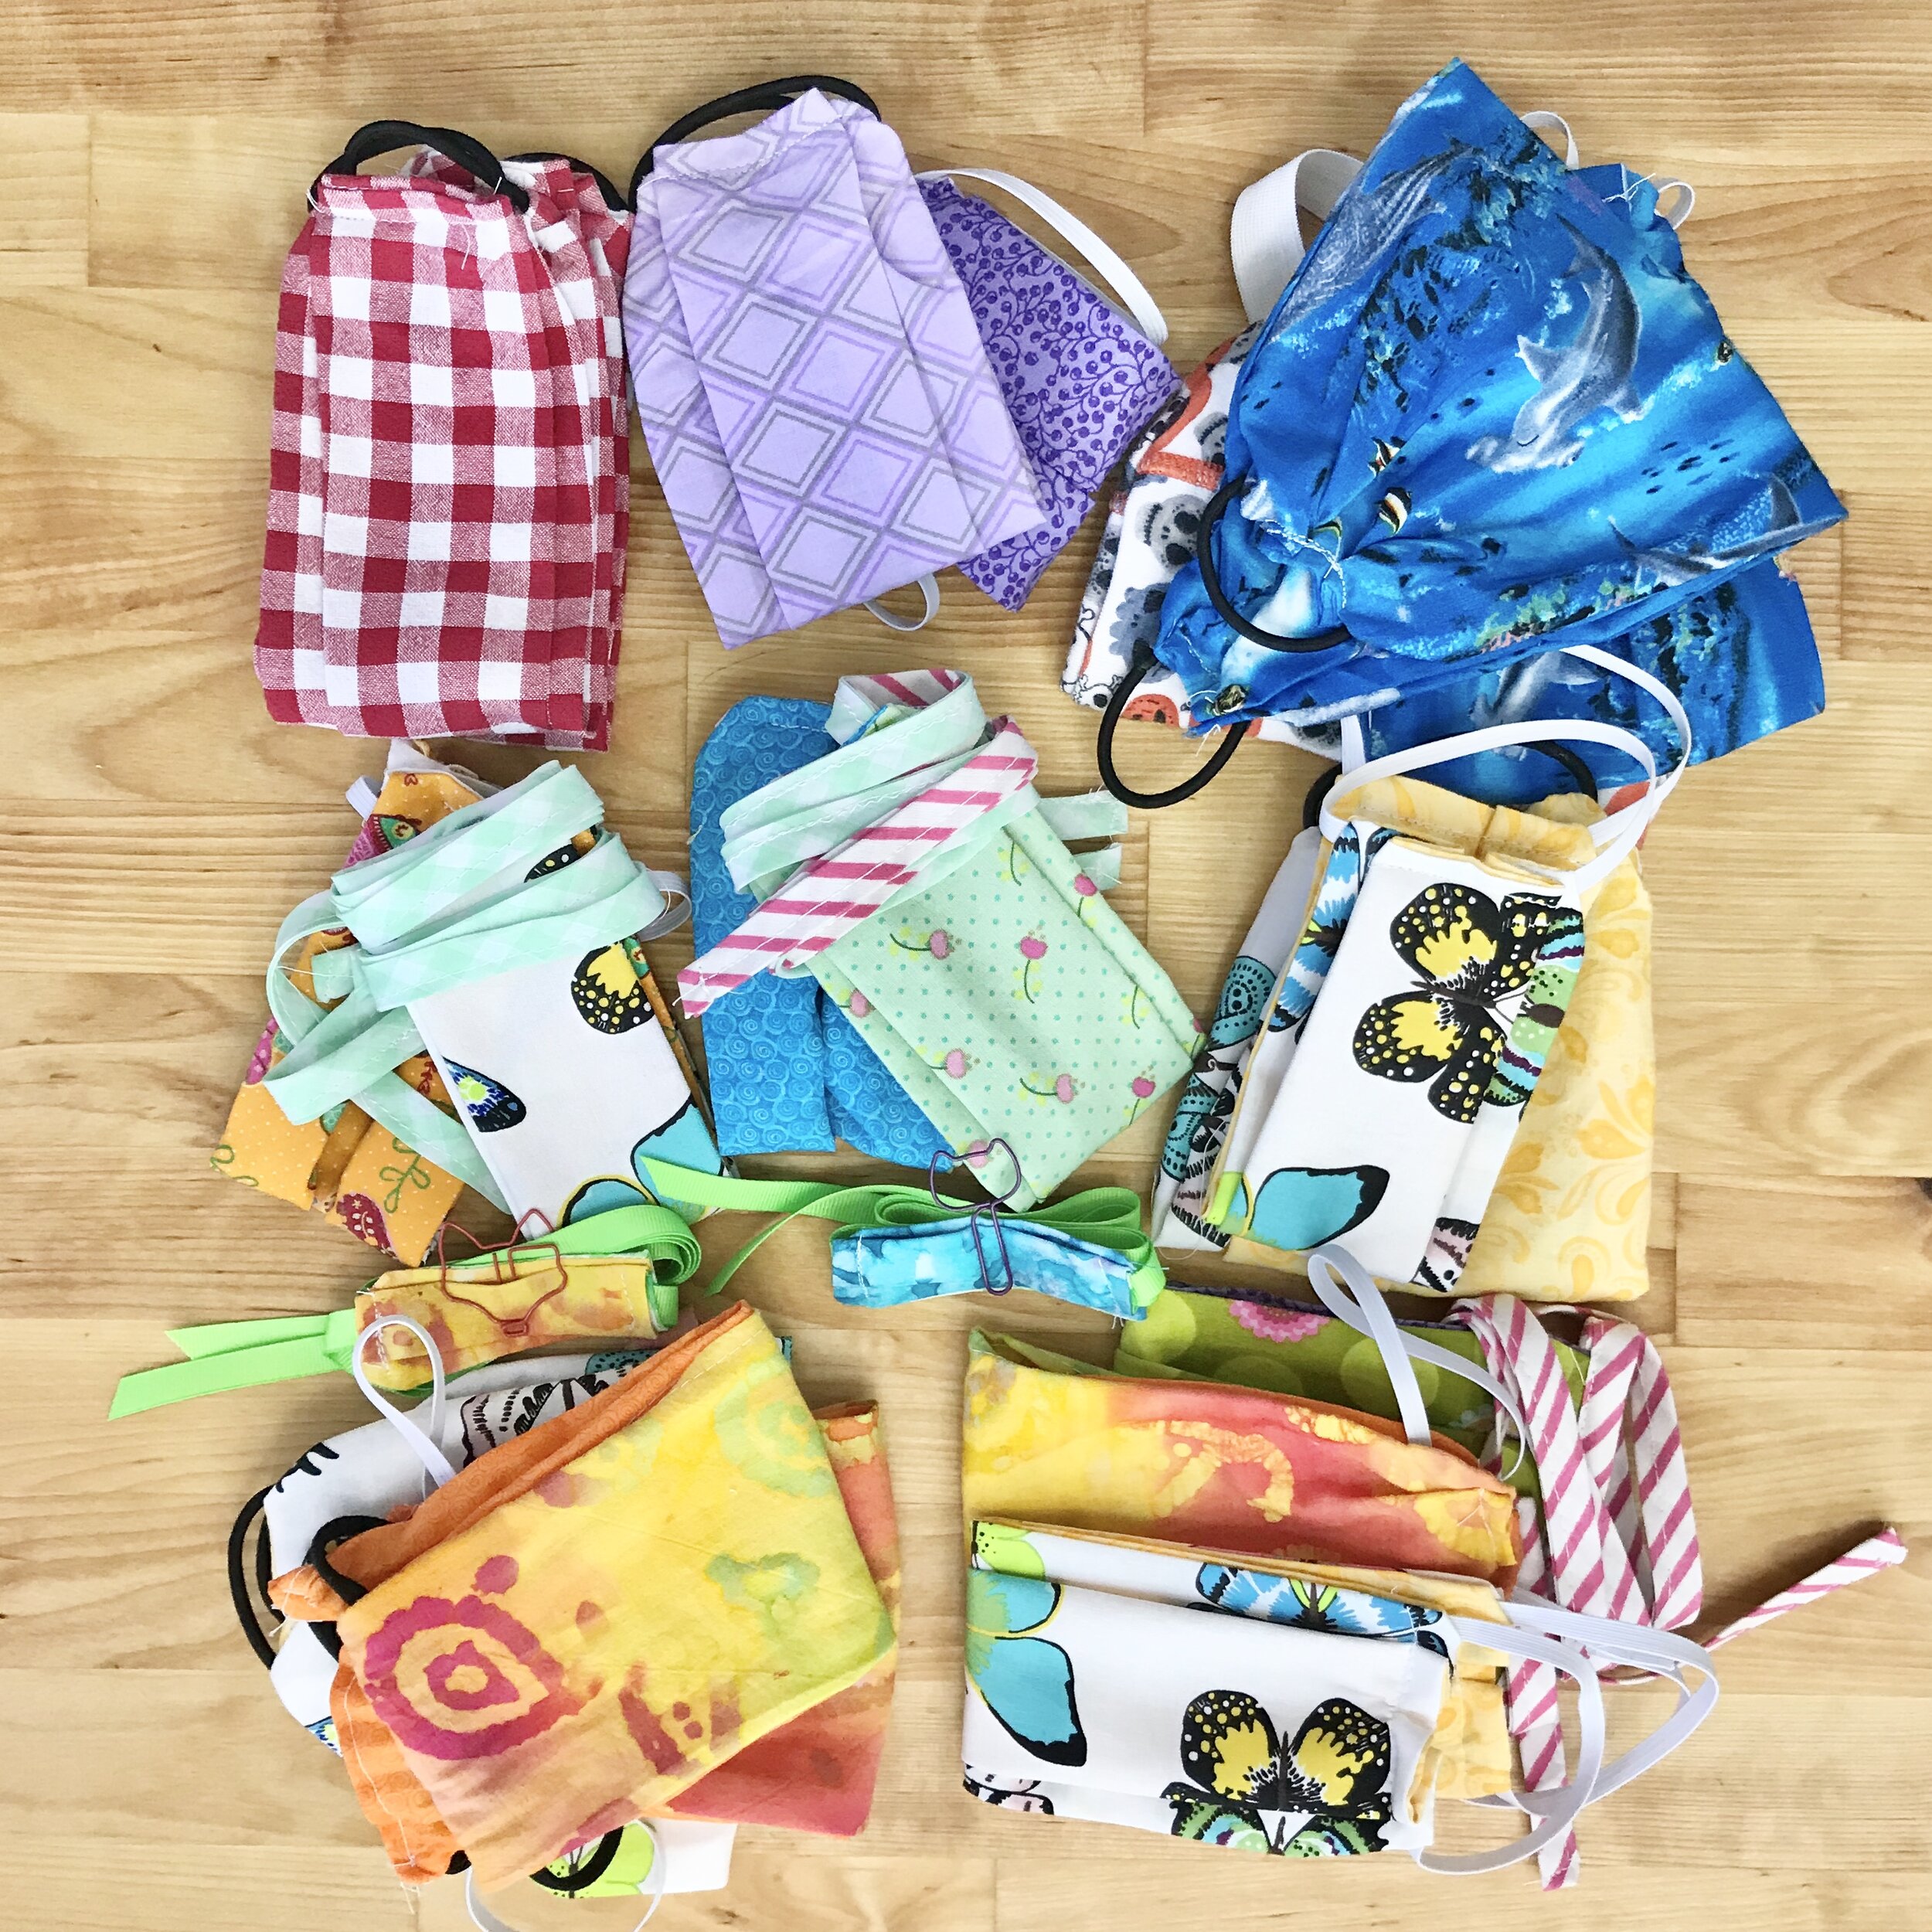
The work of the weekend: 22 masks to be mailed off to family far and near.
