
Using Your Child’s Artwork on Your Cricut
Creating Original & Unique Personalized Gifts

I taught this project on Amazon Live a few months ago.
Pablo Picasso famously wrote, “Every child is an artist. The problem is how to remain an artist once he grows up.” That is certainly true in my house where my child loses himself in art projects for hours at a time, and sometimes astonishes me with his original takes on animals, people, and life in general. I am a proud parent, of course, and I’ve looked for ways to use our child’s artwork to make gifts — sharing his unique work with the people who love him. This project — transferring a line drawing into the Cricut Design Space — can be used in a variety of ways once you have the basic artwork cleaned up and imported.
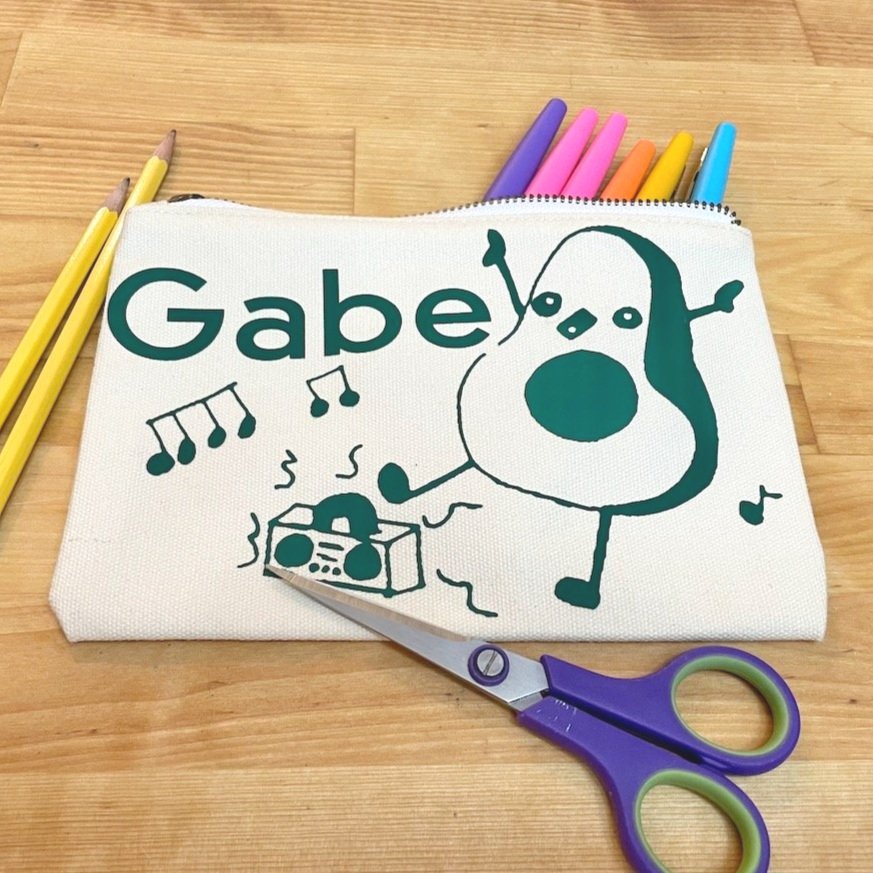
Before school started, I made some pencil bags for Bambino and his friends, so that’s the example I am using in this tutorial. But the same concept could be used to create mugs, shirts, or any number of other fun gifts. The basic process is the same: digitize and then clean up the artwork, import it into the Cricut Design Space, and then make!
A few months ago, I taught a class using this project on Amazon Live. That tutorial focuses on what to do after you have cut out the design. This post fills in the blanks — addressing how to prepare the artwork and then use it as well.
Disclosure: This post is sponsored by Cricut, but all ideas and opinions are my own. AKN


MATERIALS
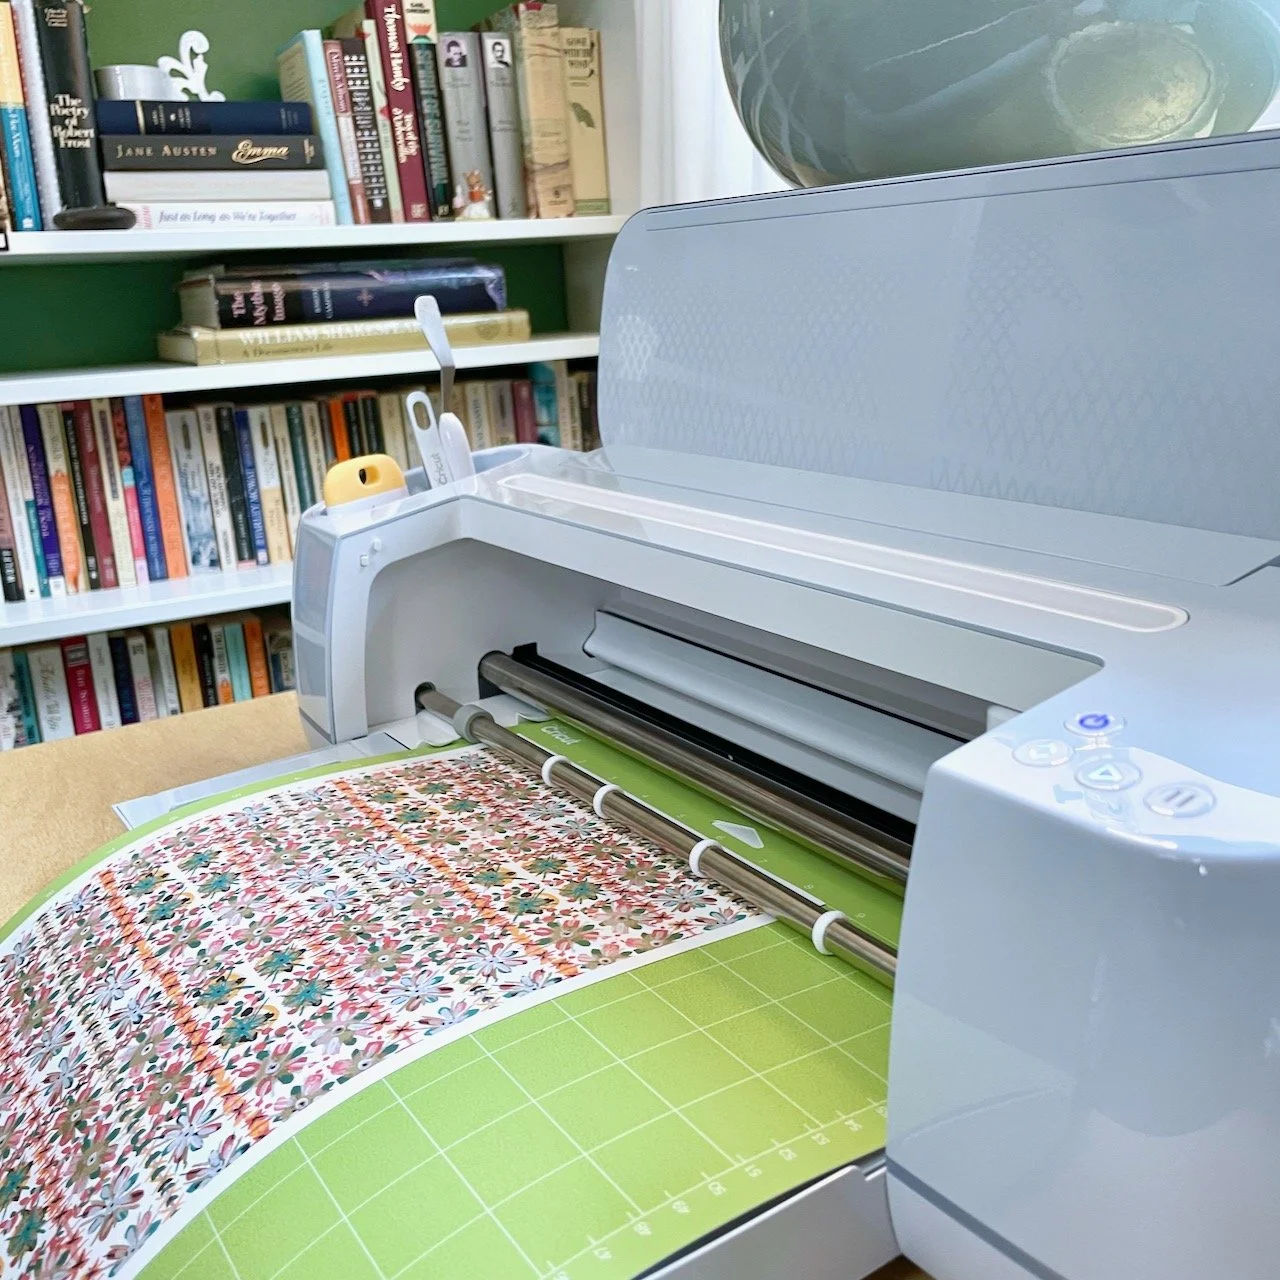
Cricut Maker or Cricut Maker 3 : I have both and love them! See my note below about machines.
Cricut BrightPad Go: this is a new tool for me. For this project, we will use it both for tracing and for weeding.
Cricut tools for weeding
a brayer
Canvas Pencil Bags: I use these from Amazon.
your child’s artwork
a pencil
a Sharpie
typing or tracing paper
a scanner or a scanning app
a Cricut EasyPress or a hot iron
A Note about Cricut Machines: these projects could absolutely be done on other Cricut machines. I happen to have the Maker and the Maker 3, but I know many of you out there have hardworking Joy and Explore machines, too. Use what you have! The principles are the same.
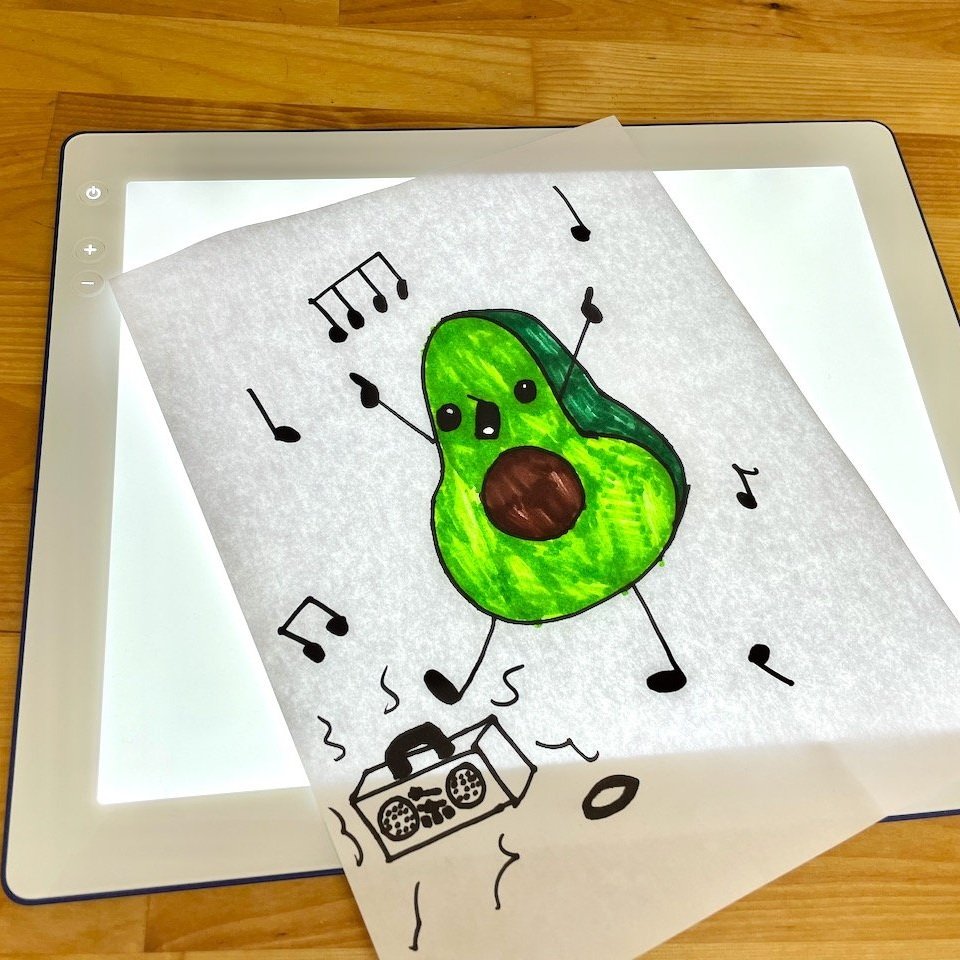
A Note about Artwork: choose your child’s artwork carefully. You want a design in which shape is important — not color. The finished product will be a line drawing, so you want something that is relatively simple, but still tells a story.

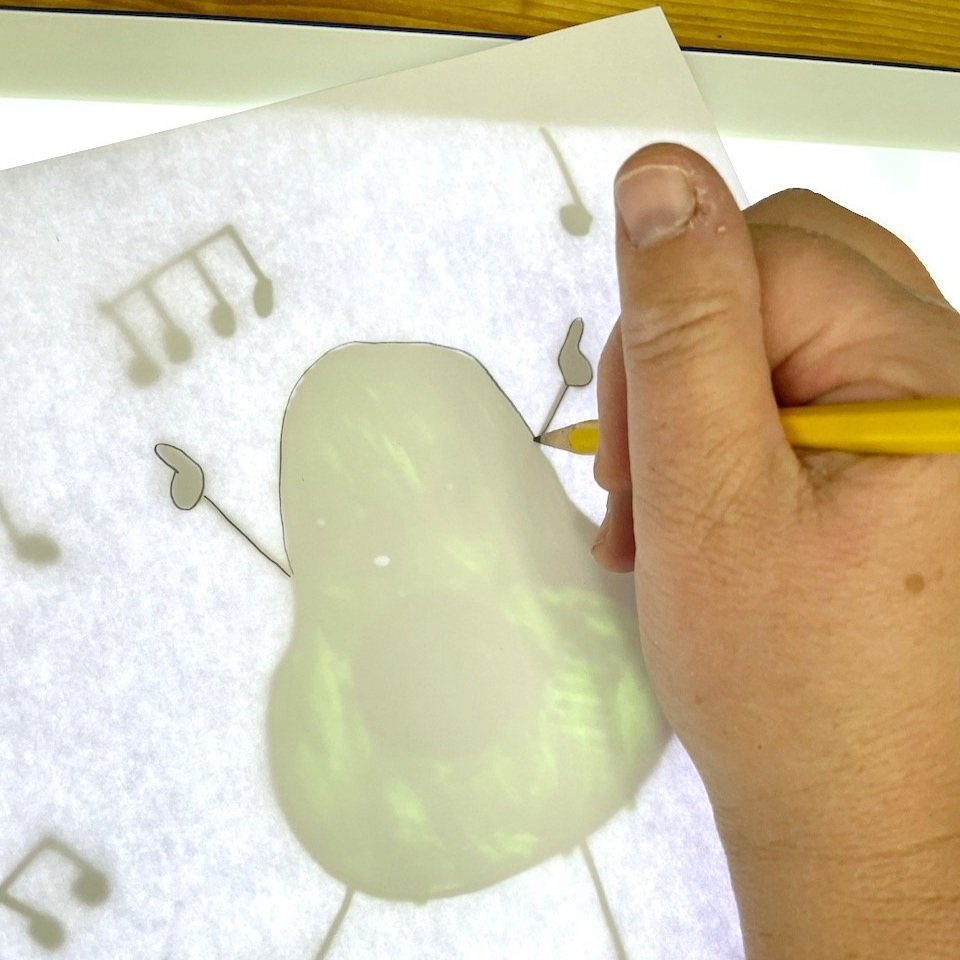
1. Trace Artwork
Place the original piece of art — or a photocopy if you are worried about damaging the original — on the BrightPad Go or a lightbox. Place a sheet of white typing paper or tracing paper on top of the original image. Using a pencil, trace the major lines and details of the artwork being as faithful as you can to the original piece.
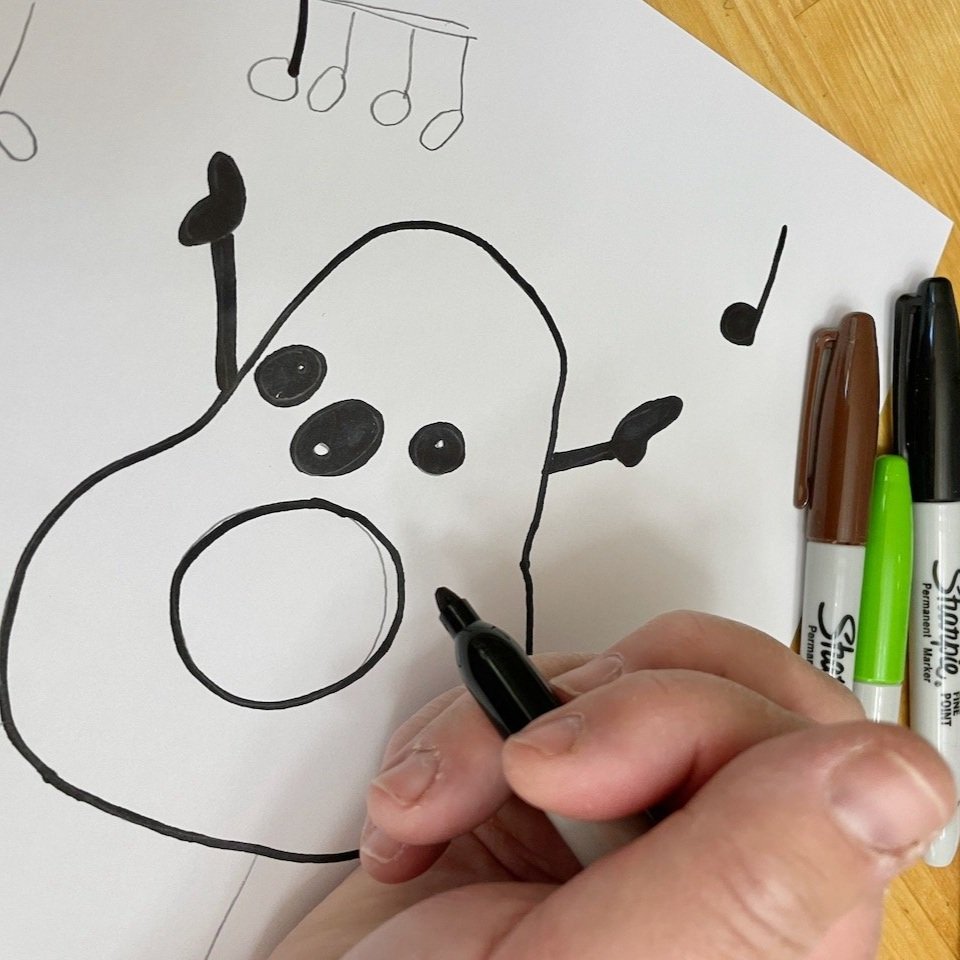

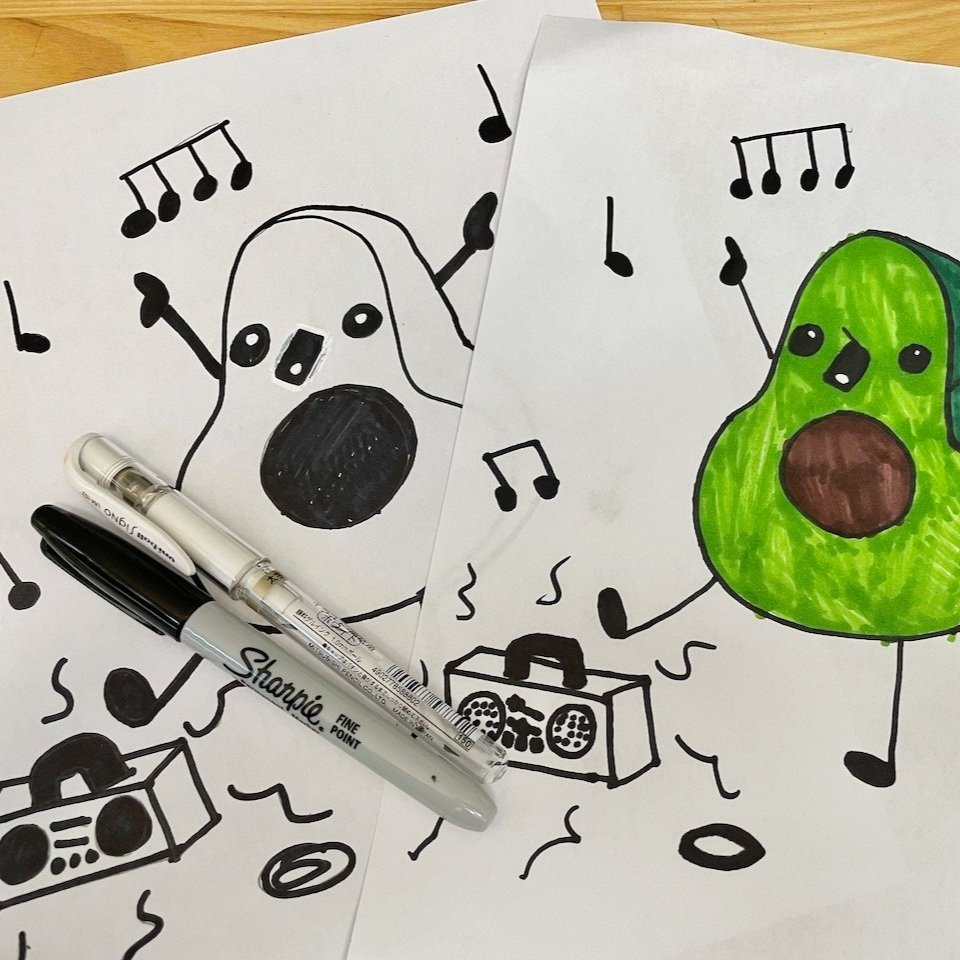
2. reTrace with Sharpie
Remove the original piece and examine your tracing. Fill in any missed areas. Then trace over your pencil lines with Sharpie. Use a heavier, thick line — remember, the lines will become pieces of vinyl, so they can’t be too fine. You can use a white pen to make corrections as needed.

3. Scan & Save Image
Once you are happy with the line drawing you have created, scan the image into your phone or into the computer. A flatbed scanner will always produce the best scan, but if you are working with a phone, be sure the image is completely flat and well-lit.
Tip: If it is an option, save the image as a PNG with transparency. This will make the next steps much easier. If not, save the image as a JPG.
4. Remove the Background
Removing the background means removing the white of the paper which the Cricut would read as a solid color. If you were able to save the image as a PNG with transparency, you may find you have little or nothing to remove.
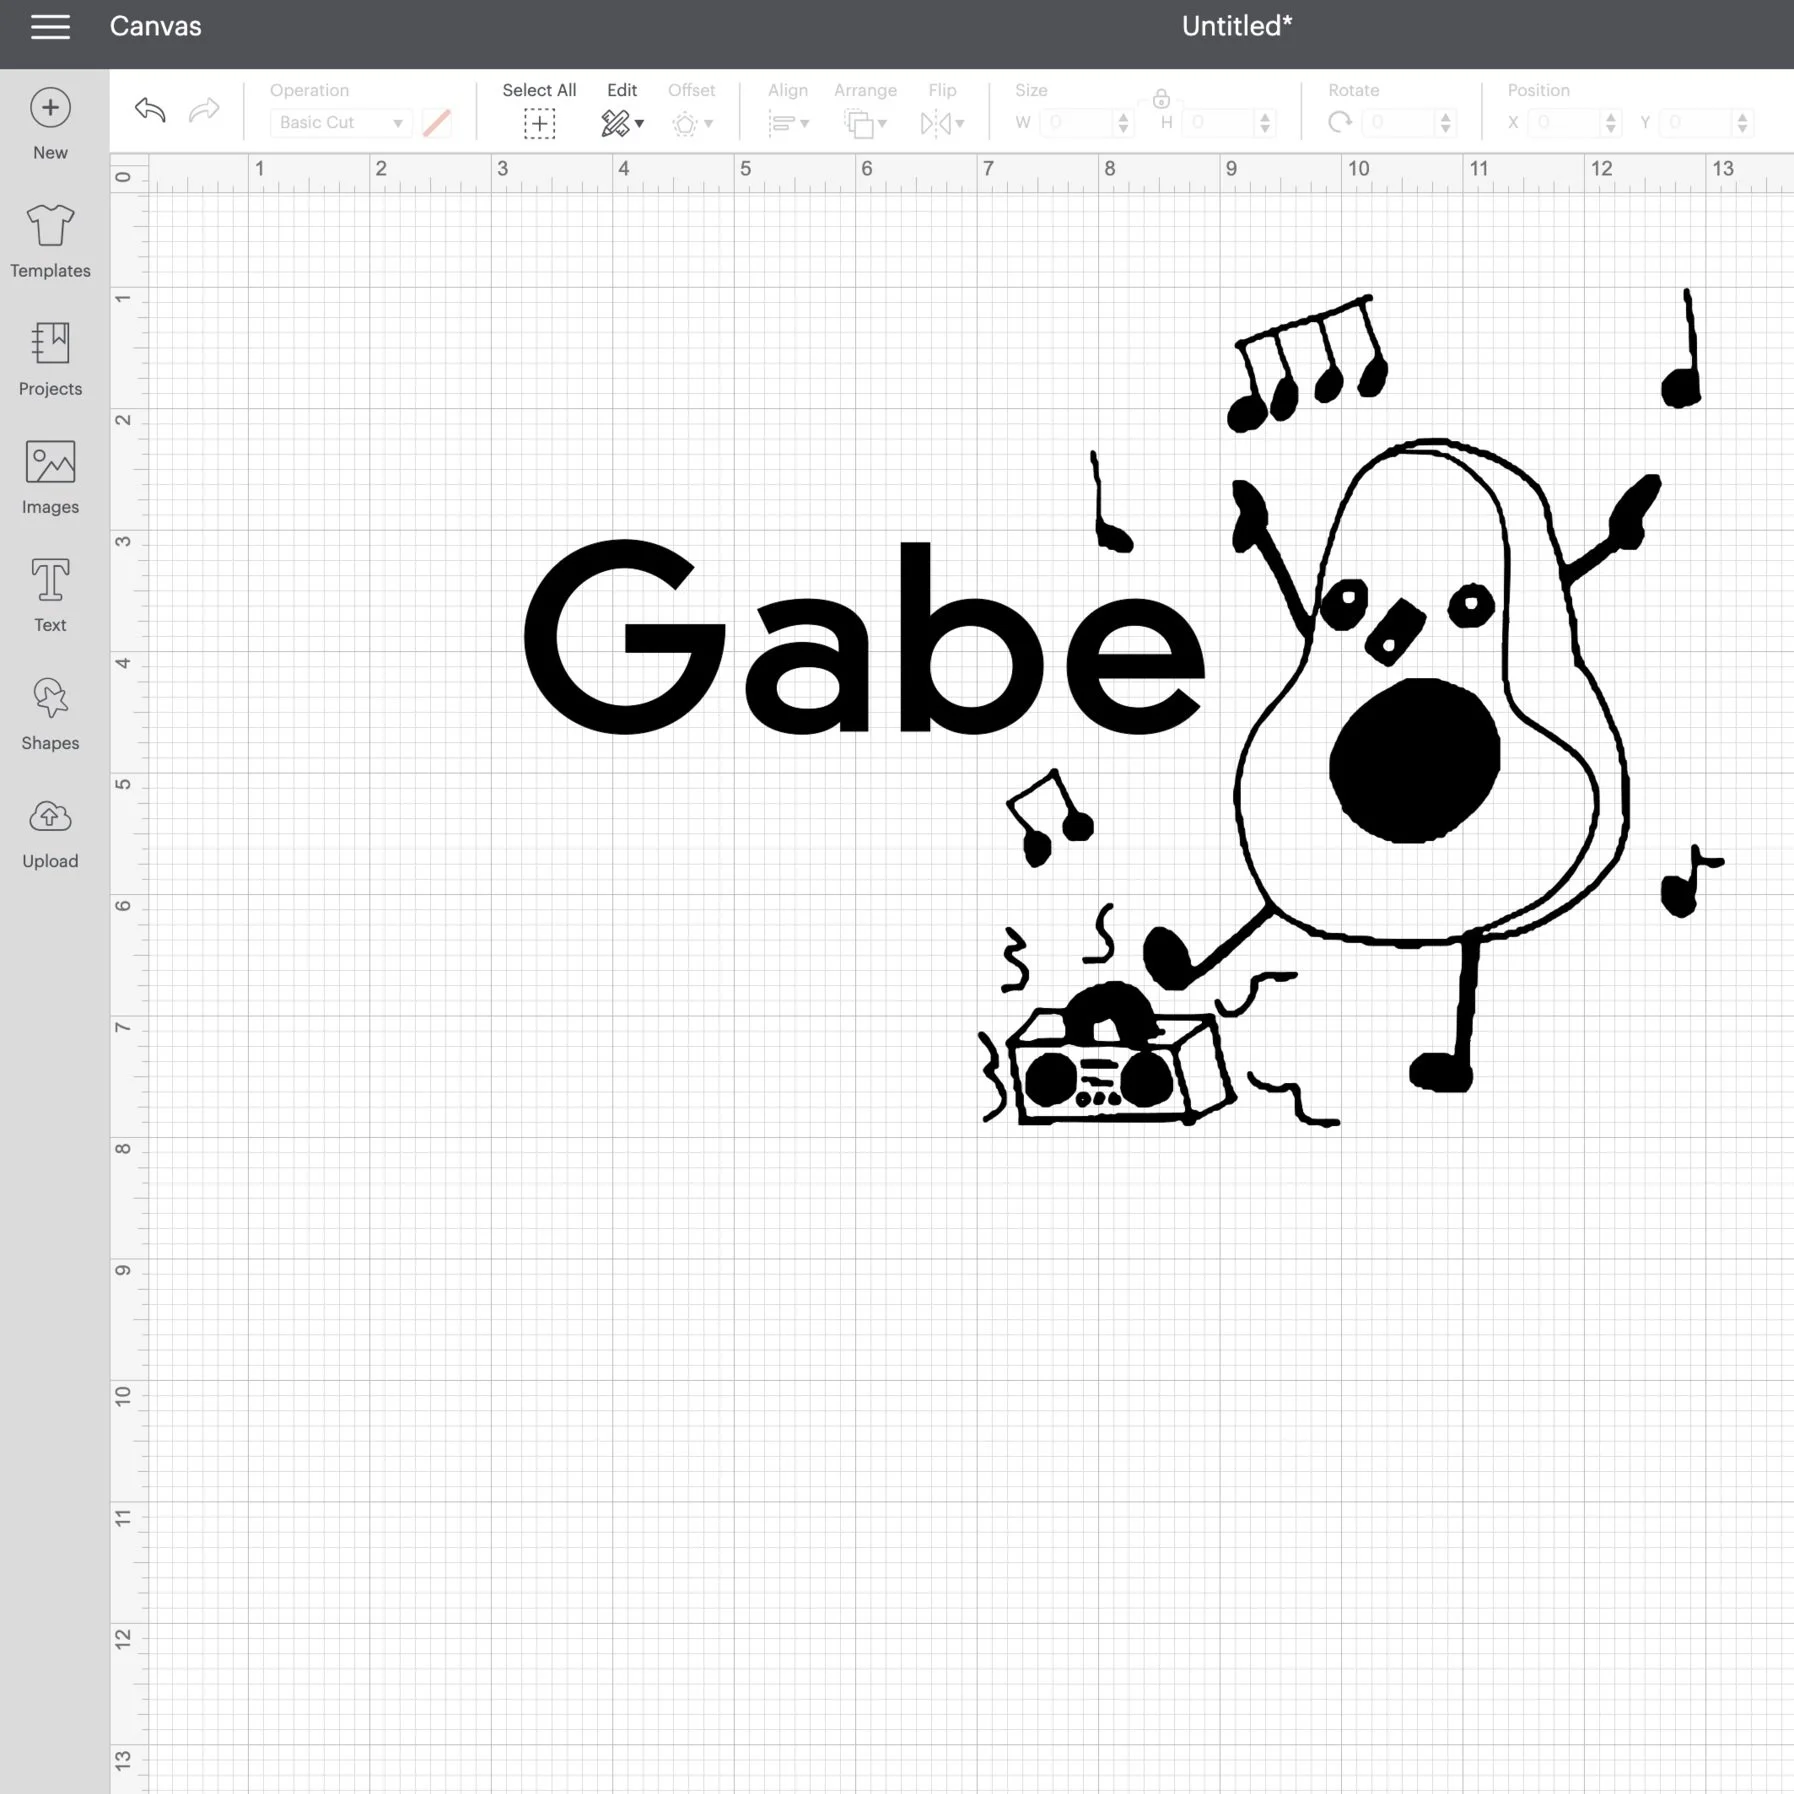
Regardless, with most simple images, this can be done in the Cricut Design Space. When you upload the artwork into the Design Space, you’ll be asked about removing the background. Carefully make sure that only the white of the image is removed and the lines you want to keep are preserved.
Tip: sometimes it takes a few tries to get the image uploaded and edited. For most images, choosing “Simple Image” when uploading results in the best success for this kind of project.
Tip: If you are struggling to remove the background in the Cricut Design Space, there are other apps and programs specifically designed to convert an image to a PNG with transparency. Adobe Spark is my go-to program both on my phone and on my desktop. They have a free version which includes background removal. However, I rarely need to use it with the improved Design Space.
5. Create Your Design
Once it’s uploaded, your child’s artwork will function just like any other graphic element in the Cricut Design Space. Resize it. Add text. Add other shapes or graphics as desired.
For these pencil cases, I added the child’s name. Then I grouped the drawing and the name together, and sized them at 6.5” x 8.2” — a good size for the front of the pencil bag.

6. Mirror, Cut, & Weed
After you click “Make It” be sure to select MIRROR when using iron-on vinyl. Otherwise your lettering and design will be backwards!
Queue up your vinyl and cut the design. I used a single color for both the name and the artwork, but you can use multiple colors as desired. Personally, I think the strength in the drawing comes through best in a single color.
Place the cut vinyl on your Cricut BrightPad Go and, using your Cricut tools, begin weeding. Take your time! Weeding can be a little stressful, but just go slowly.
When weeding, you may have some choices to make. For example, in the avocado, I had to decide which parts to keep green and which to weed in order to have the best shape and detail. Keep your child’s drawing close at hand as you make those weeding decisions.

7. Position on Pouch
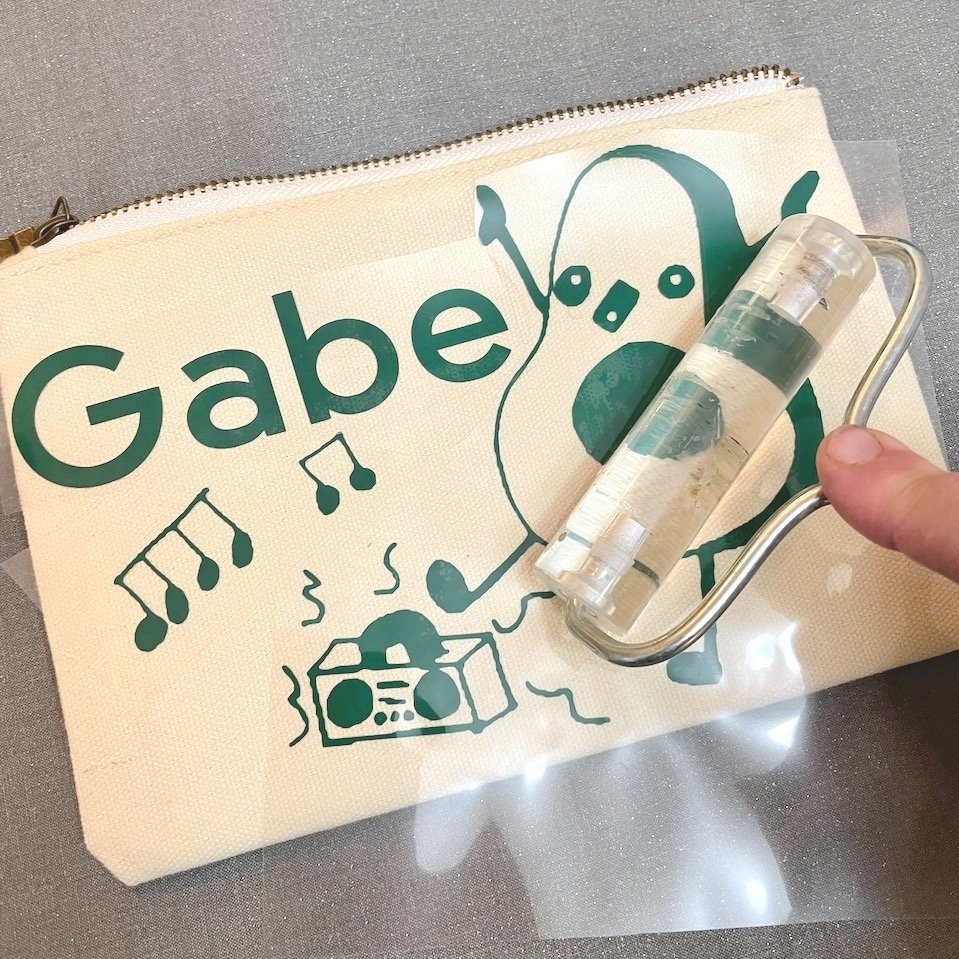
Carefully align the vinyl on the pouch, measuring to center it as needed. I ended up cutting a few elements apart and repositioning them for this sample to make a better composition.
For these pencil bags, I inserted a piece of cardboard into the bag before aligning the design. Because the bags have a plastic lining, the cardboard keeps that lining from melting together when the iron or press is applied.
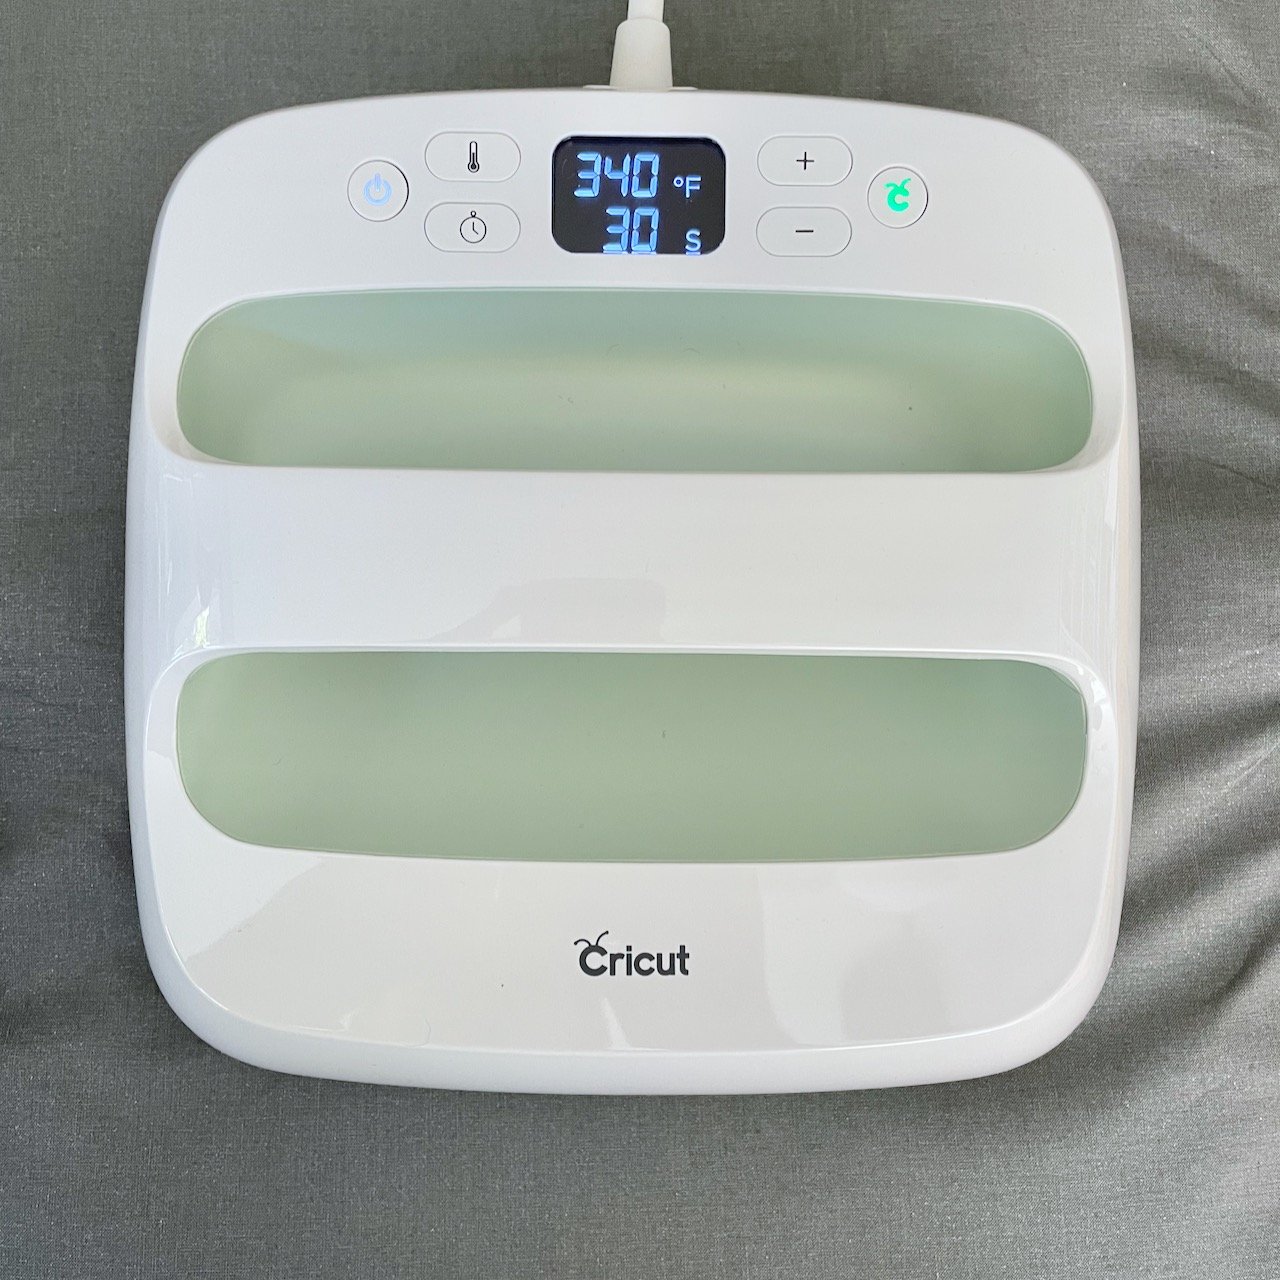
8. Press Per Directions
Follow the heating directions for the vinyl you are using. Set your iron or press appropriately, and apply heat for the correct amount of time.
Cricut’s Heat Guide is incredibly helpful when doing iron-on projects. That way you don’t have to remember all of the settings yourself!
Tip: After applying heat, I use a brayer to smoosh the vinyl into the fibers of the fabric while it is still hot. This isn’t in the directions, but I have found it makes the vinyl better adhere to the fabric’s texture.
9. Cool & Enjoy
Remember that your piece will be hot! Cool per the vinyl instructions. And then enjoy!
Your child’s artwork makes a wonderful motif for all kinds of gifts and will be appreciated by the people who love them. And perhaps you should make yourself a little something precious, too!
Pin it!

Learn how to use your child's drawings on your Cricut to make fantastic personlize gifts. Tutorial shows how to trace a drawing, remove the background in the Cricut Design Space, and then use it to make customized pencil bags, and the process works for all kinds of cricut project ideas. Use vinyll, iron-on vinyl, to monogram and customize a great gift. Perfect for grandma, grandpa, or teachers!