Valentine’s Hearts Garland & Love Bunting

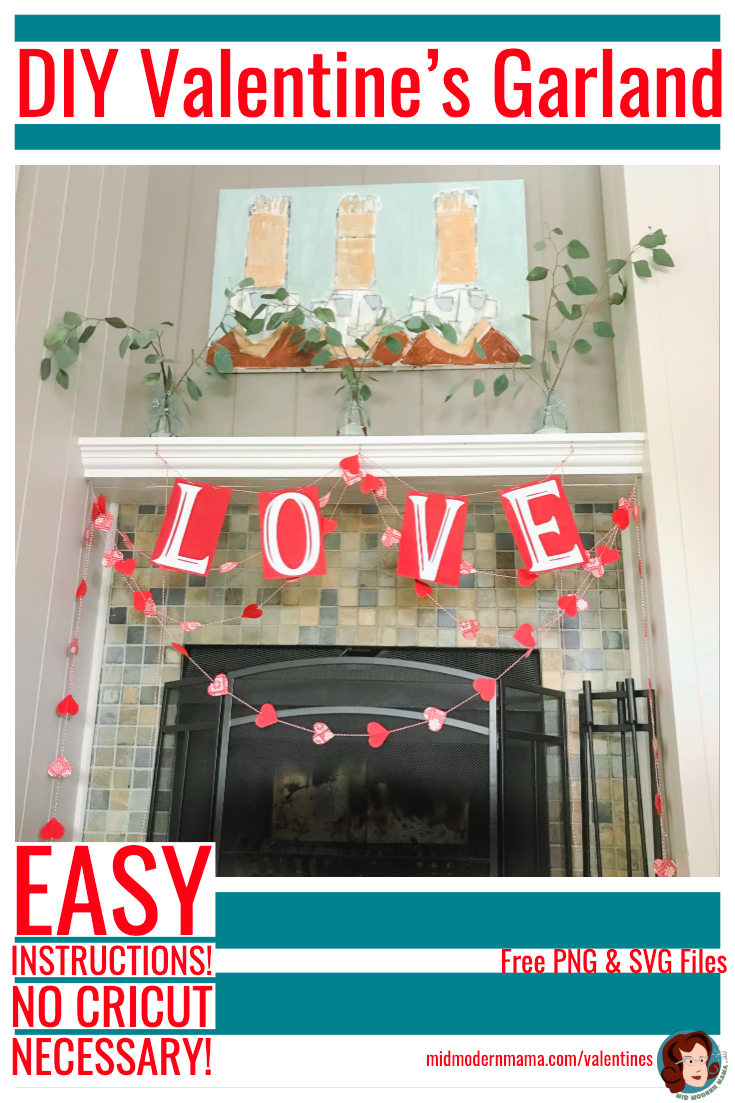
Our fireplace is in an awkward spot — it isn’t a focal point at all, squished between a bathroom and a doorway. In fact, when my best friend came to visit us at this house for the first time, she had been there three days, and I said something about the fireplace to which she replied, “What fireplace?” So I try to dress it up any time I can! For Valentine’s Day I made this cute red and white heart garland with a LOVE Bunting — simple, easy, and made with things I had around the house!
My family gave me a Cricut Maker for Christmas, and this was a good chance to put it to work. The files I created for this project are available for free as a download, too. However, you can totally do this without a Cricut. It just means more cutting work for you! The files are in both PNG and SVG formats. If you don’t have a Cricut, just print the PNG files.
This is actually two separate projects: the Hearts Garland and the Love Bunting. Make them both! Make one or the other! They work together, but they can certainly be made individually as well. Enjoy!
Materials:
File downloads (free in my Library)
Cardstock (two colors — I used red and white)
Wrapping or Scrapbooking Paper (optional)
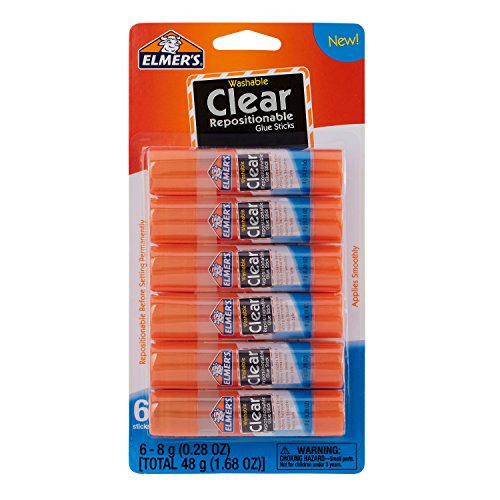
Gluestick
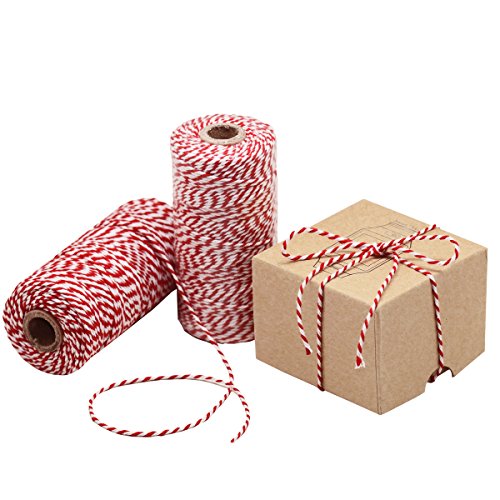
Twine: I used red and white bakers twine.
Cricut or Printer
Scissors
Exacto Knife
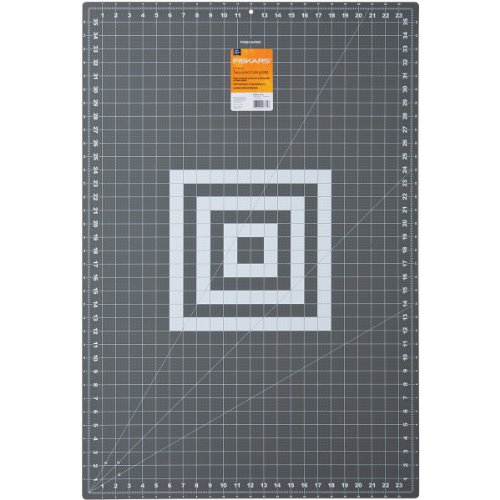
Self-healing mat
Hole punch
A note about paper: to make this garland, I used some beautiful, heavy wrapping paper that I just happened to have at home. I wanted something red and white with a little pattern to it. However, use what you have on hand. Red, pink, white… there are lots of Christmas wrapping papers that would work for this project as well as scrapbooking papers, card stock, old Valentine’s… I can imagine doing this with many different materials!
You will need something on the heavier end, though. It needs to have a bit of heft so that the hearts don’t curl. If you have a thinner paper that you want to use, pair it with some card stock to give it a little more presence. When you are cutting our your hearts just cut half of them in the thinner paper and half in the heavier paper. Then pair them and glue them together.

The Hearts Garland

Cut the Hearts
Since I was using gift wrap for my hearts, first I cut four 12” x 12” pieces of wrapping paper. Then I loaded those onto my Cricut mat and cut four sheets of hearts. Each sheet has 30 hearts, so I cut a total of 120 hearts for my garland.
If you are cutting them out by hand, you could easily print the hearts on the back side of your paper and then cut them out. Or cut one out of card stock and use it as a template. Then put in a good movie to watch while you do the cutting.


Glue the hearts to the Twine
Once you have all of your hearts cut out, the gluing begins! I used a basic glue stick. I laid my twine out on top of my self-healing mat. This is a fabulous tool for all kinds of projects. It is safe to cut on. It can be washed off — so glue away. And it has a grid, so it is easy to measure right on the mat. They last forever, too. Mine is more than 20 years old and still in great shape!
In this case I used the mat so that it was easy to space the hearts out evenly. I ended up putting the hearts about 4 inches apart along the twine.
To glue the hearts:
Cover one heart with glue. Position it along the twine. Then glue another heart on top of it, sandwiching the twine between the two hearts.
Your hearts don’t have to match! One side of the paper I used was printed; the other side was red. So I alternated — solid red, red & white, solid red… and so on.
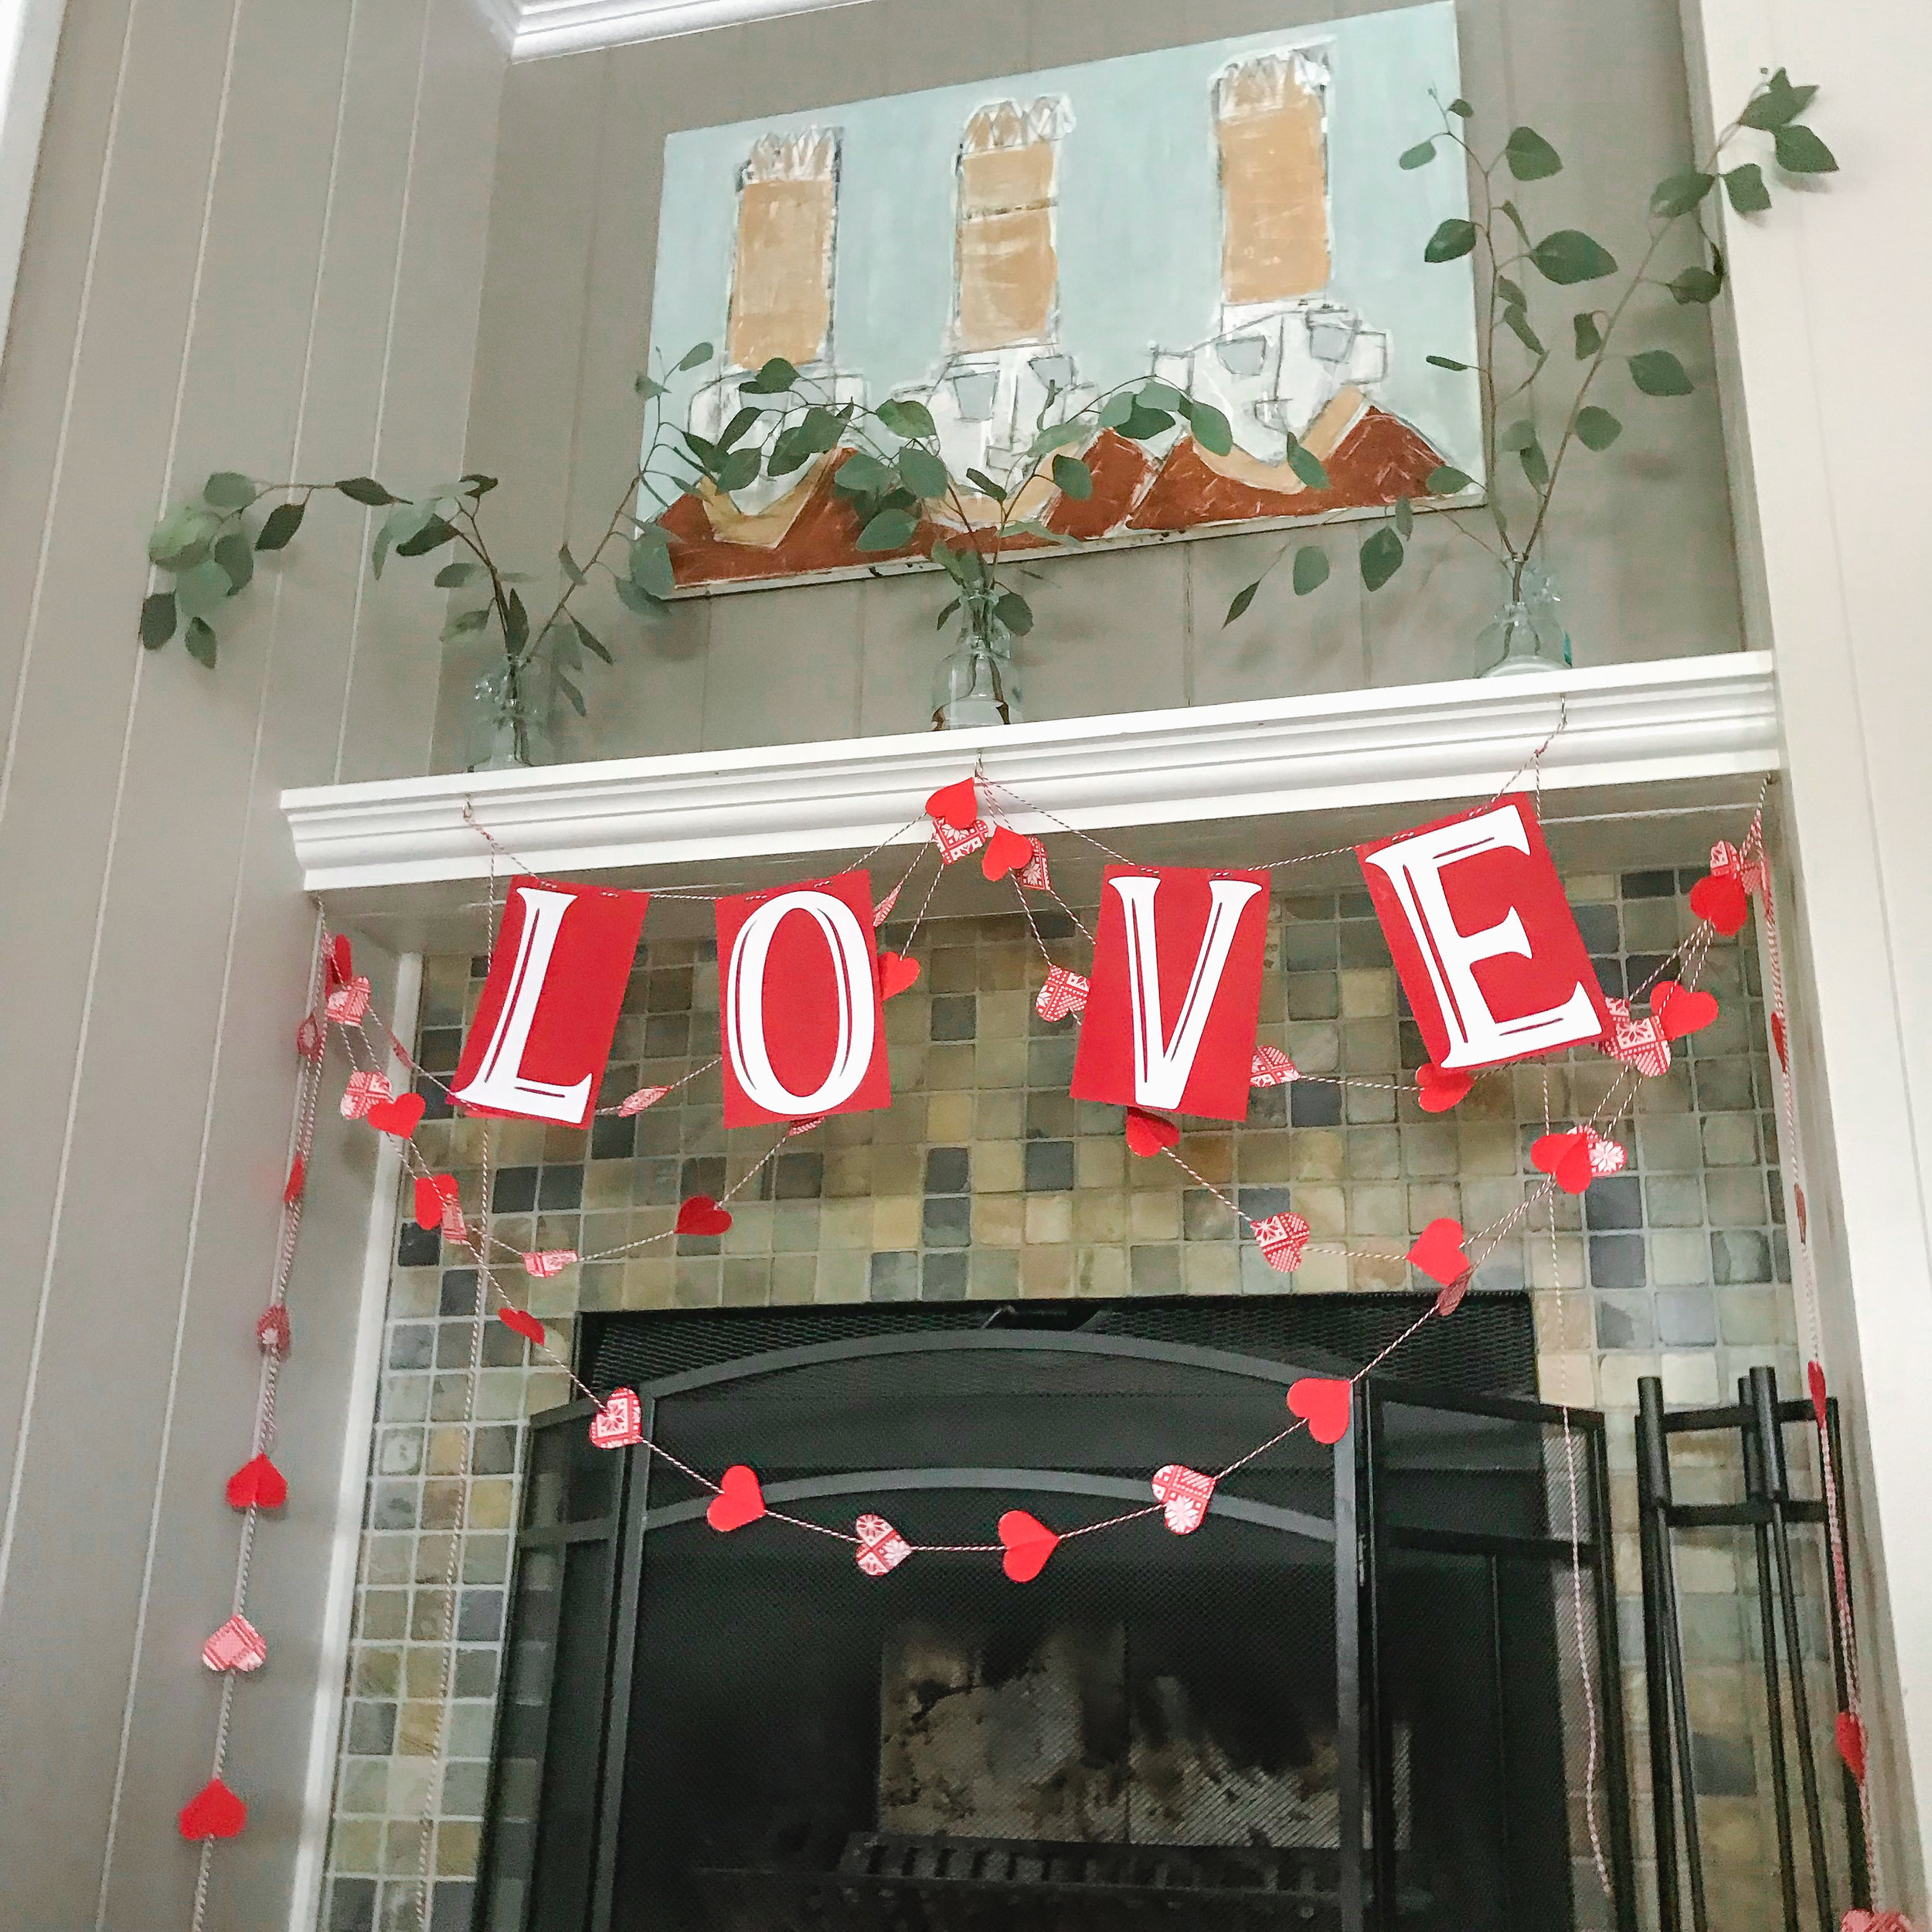
Hang your Garland
Our mantle is really small and narrow — only 54” wide. I made about 240” of garland, so I had plenty to loop across several times and to drape down each end, too.
On our mantle we have several holes drilled into the bottom and a series of cup hooks which I rearrange depending on what I am hanging on the mantle. For this arrangement I used a cup hook in the center and hooks at the far corners as well. The Love Bunting was hung on two other hooks.
The LOVE Bunting

Love Bunting
For the LOVE Bunting (which is completely separate), you’ll need to either print and cut out the letters or cut them with your Cricut. I cut them from white card stock. If you cut them by hand, print them and use your xacto knife and self-healing mat for more precision.
Mount each letter on a piece of red card stock that is 5.5” x 8.5” (half of an 8.5” x 11” sheet of card stock). Use a glue stick or spray mount to glue them together.
Using your hole punch, punch a series of four holes at the top of each red card — evenly spaced.
Thread the cards onto another piece of twine and drape. I used different cup hooks for this garland than for the hearts — but do what works for your mantle and decor!

Here’s the finished garland hung on our mantle.
This garland would be darling hung around windows, across a ceiling, in a classroom, or an office — wherever you need a punch of color and Valentine’s decorations that are both easy to make and inexpensive.